
How to Create a Searchable Database with WordPress
Create a searchable database with WordPress for free.
A quick guide on adding Google & Facebook login buttons to HivePress-built websites.

Forward-looking businesses are always searching for ways to increase conversion rates, so they care about the user experience on their website. That’s why many companies use social login, also known as social sign-on, on their websites.
For website visitors, social login means that they can skip the registration procedures required to create a new account and can simply sign in with one click. It’s a truly convenient alternative to the traditional registration forms that improve UX.
At the same time, for website owners, social login is a useful feature that simplifies user verification and provides more reliable access to user data for personalization.
In this short tutorial, we’ll show you how to set up the HivePress Social Login extension so you can allow your website visitors to sign in via Facebook and Google. We’ll explain step-by-step how to get a Facebook App ID and a Google Client ID and correctly integrate them with your website.
Before we begin, it’s important to note that the Social Login extension is based on HivePress, a free WordPress directory plugin, and can be used only on HivePress-powered websites. So in this walkthrough, we’re going to use the HivePress plugin along with its default multipurpose WordPress theme, ListingHive.
Let’s get started!
First of all, you need to install the Social Login extension by going to the WP Dashboard > Plugins > Add New > Upload Plugin section. Then select the extension ZIP file, install it, and proceed by activating the extension.
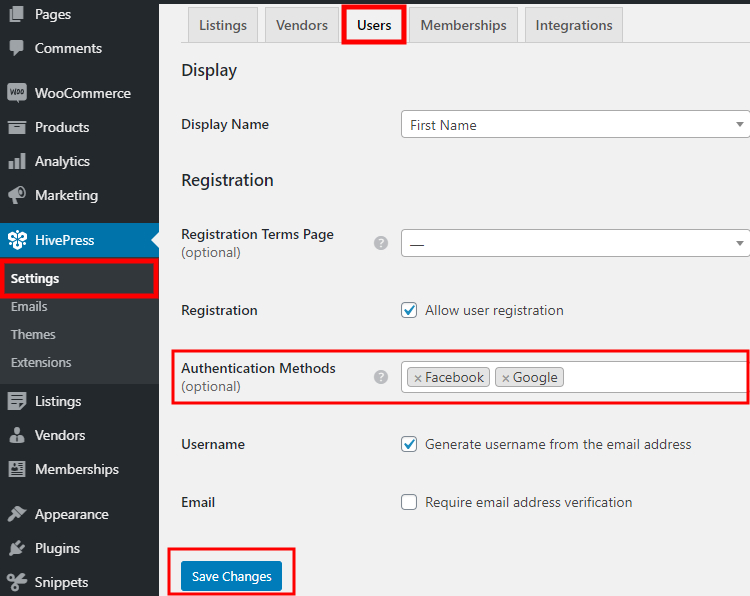
Once you install the add-on, you need to select the authentication methods for your website. To do that, go to the WP Dashboard > HivePress > Settings > Users section and select one of the available methods. If you want to allow users to sign in via Facebook and Google, it’s necessary to select both methods and save changes, as shown in the screenshot below.
After you select the authentication methods for your website, you can proceed to the next step.
In order to add the “Log in with Facebook” button to your website, you need to get a unique App ID from Facebook first. This ID links your website with Facebook and allows you to request the Facebook profile details (e.g., the email address) required for logging users in.
So, let’s move to the first step.
Before creating a Facebook App, you have to register a Facebook Developer account. To do that, navigate to the Facebook for Developers page and click on the Log In or Get Started buttons. Then, you need to sign in with your FB account to proceed. Once you verify your account, you can move to the next step.
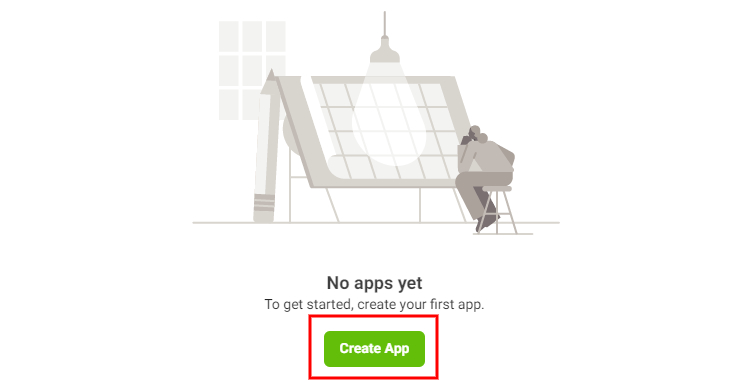
Once you finish the registration, you can go to the App Dashboard to create your first app. Simply click on the Create App button.
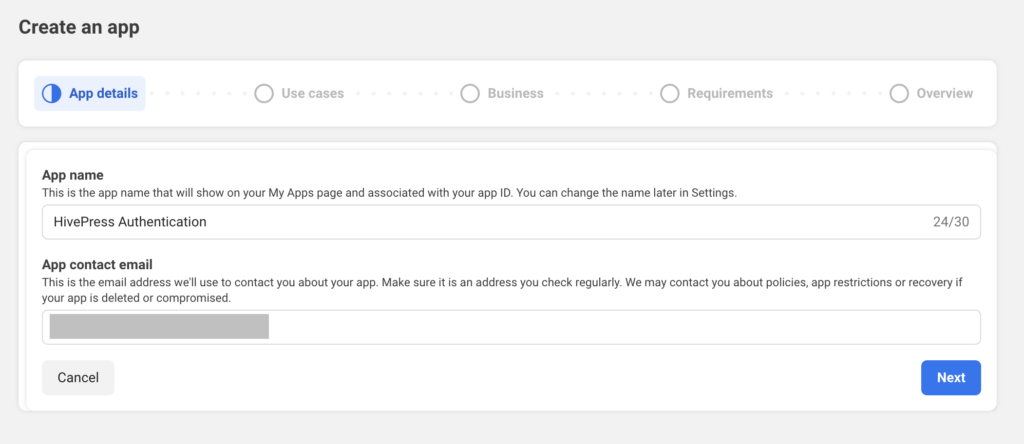
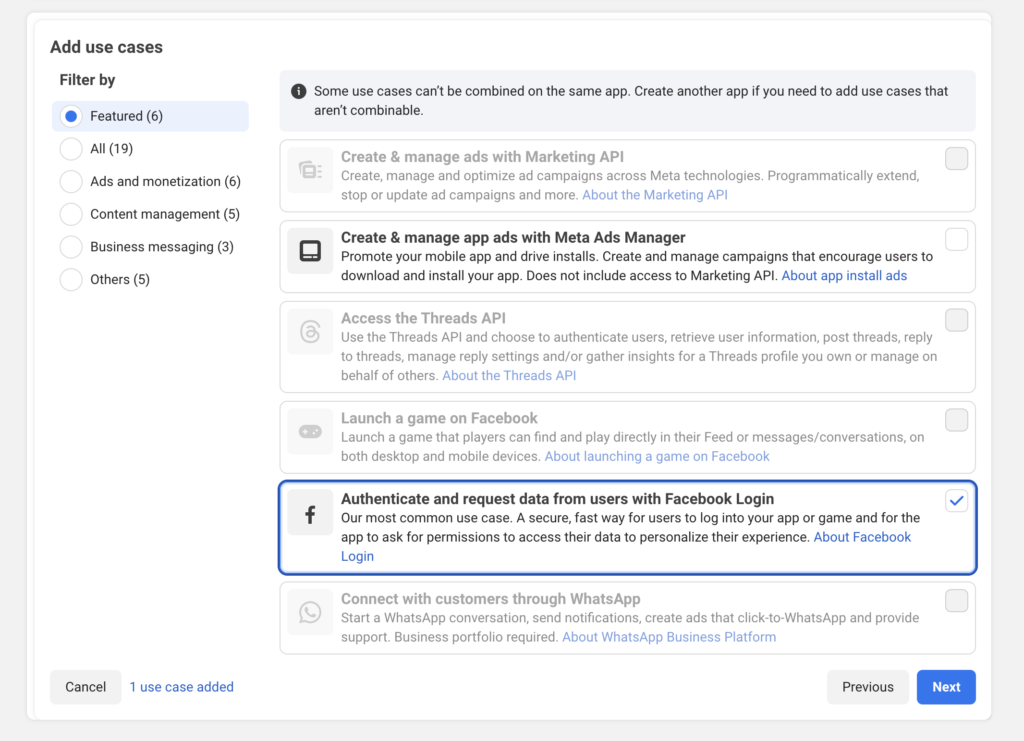
During the app creation process, you’ll go through several steps:
Once completed, you’ll be taken to your app dashboard, where you can configure the Facebook Login settings.
Once you are in your Dashboard, go to the App Settings > Basic section.
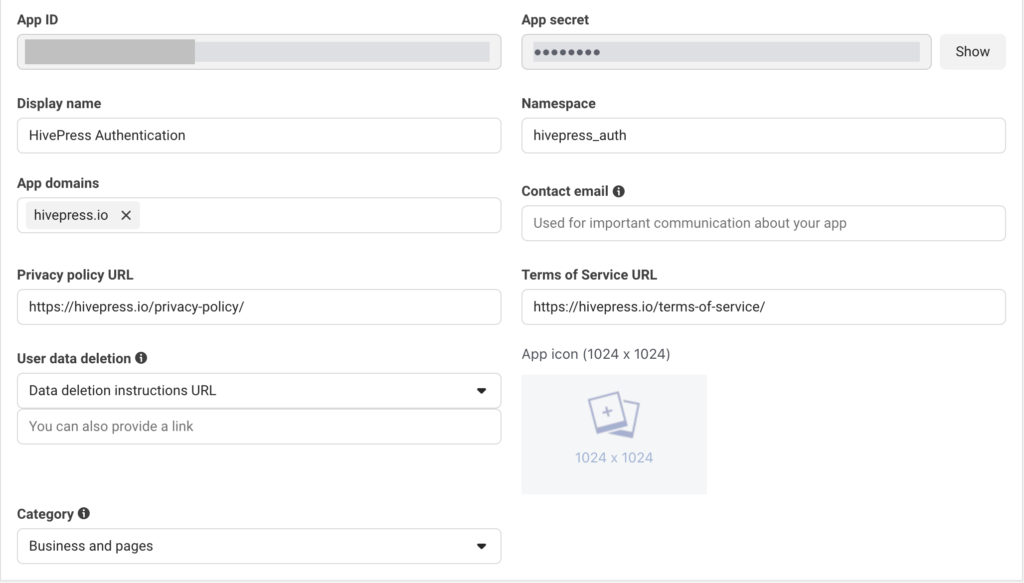
On the settings page, you have to:
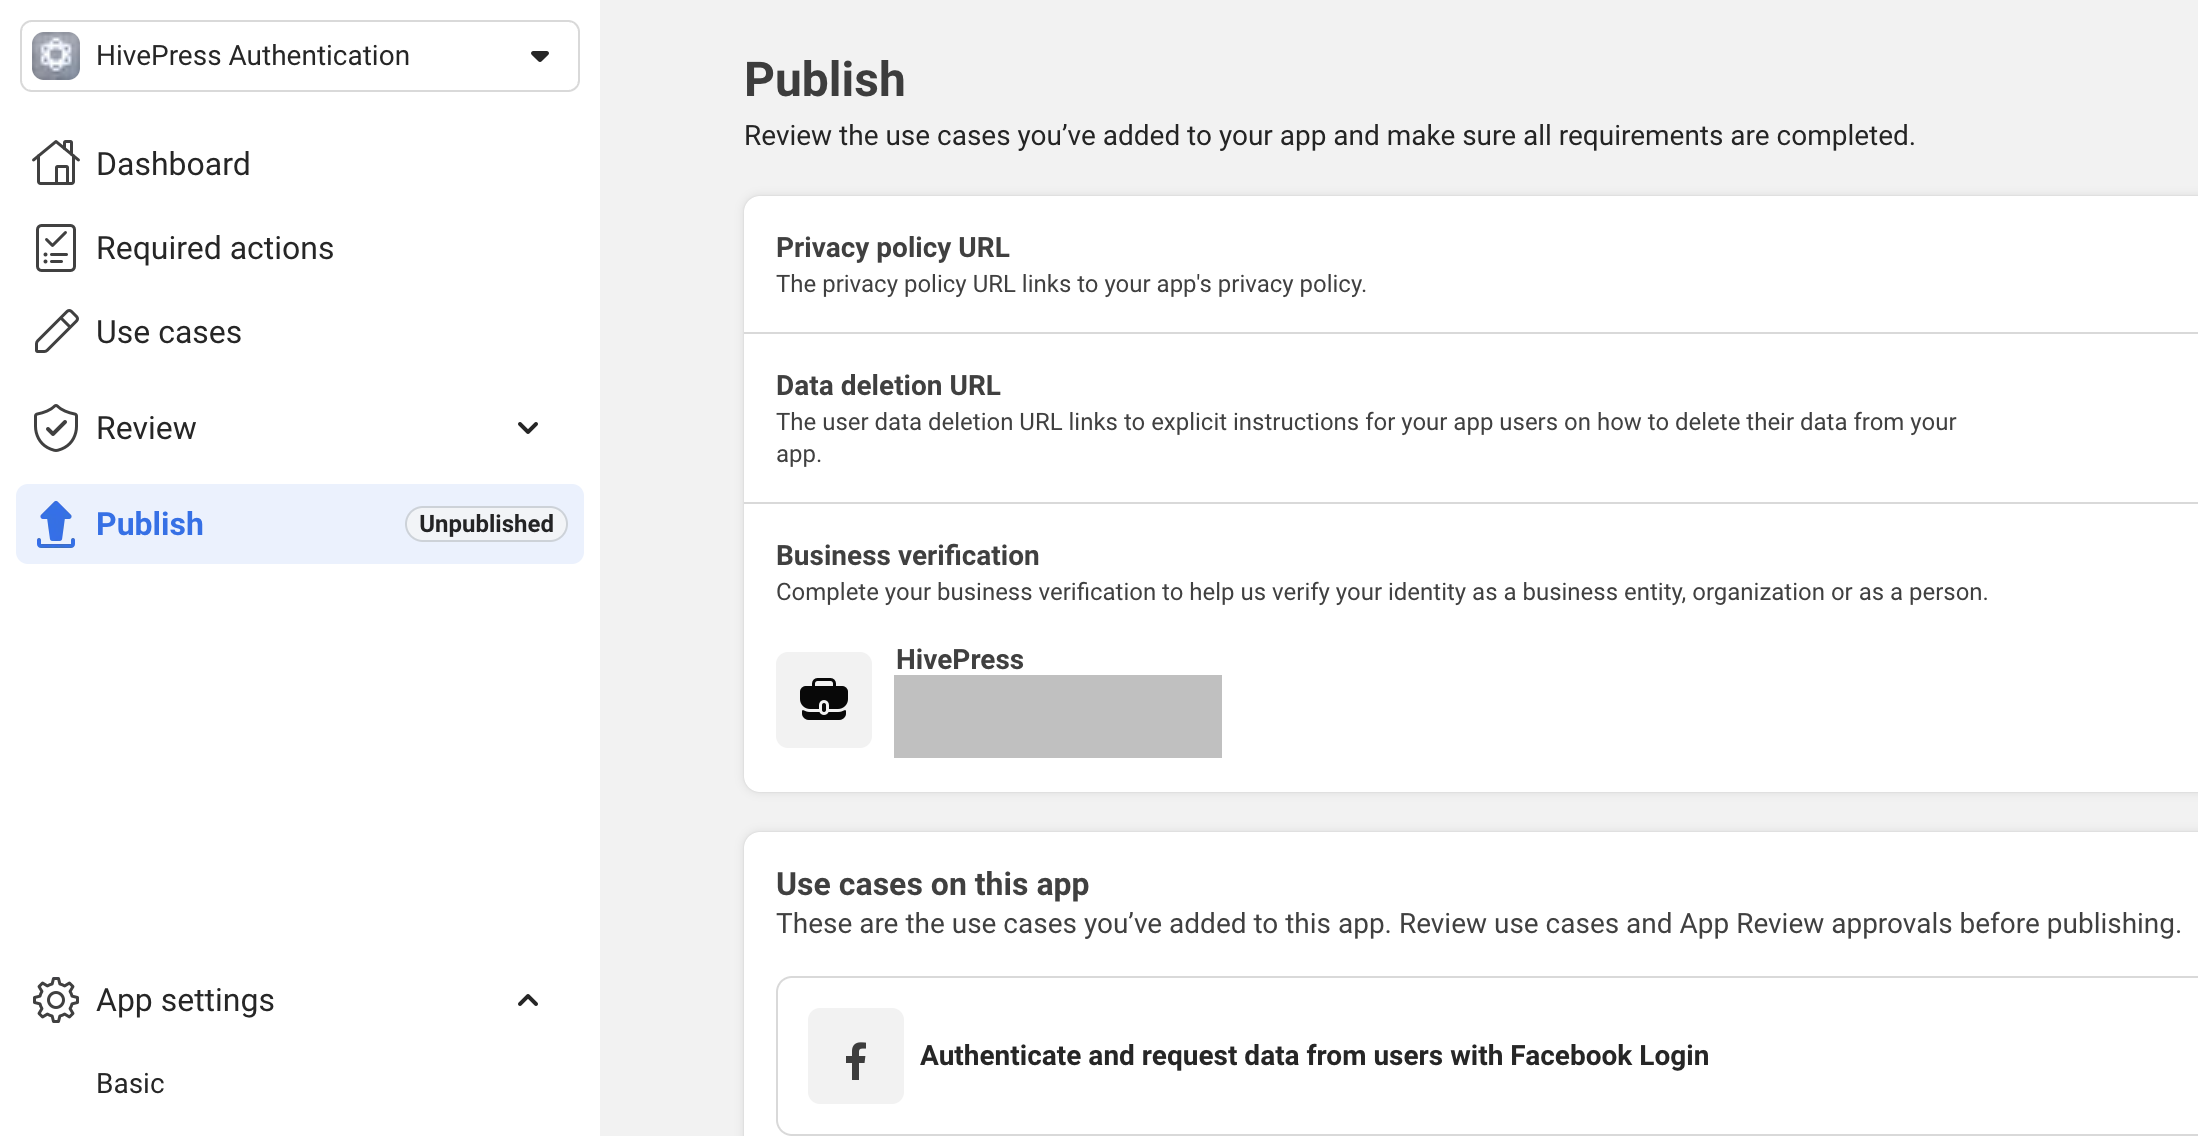
Once you add all the required details, save the changes. Then, you should go to the Go Live section and click on the “Go Live” button (please note that there will be a “verification step” that you also have to complete before you can go live).
Now, go back one more time to the App Settings > Basic sections and copy your App ID and App Secret. Then, navigate to your WP Dashboard > HivePress > Settings > Integrations section and paste your ID and Key into the corresponding fields.
Don’t forget to save the changes.
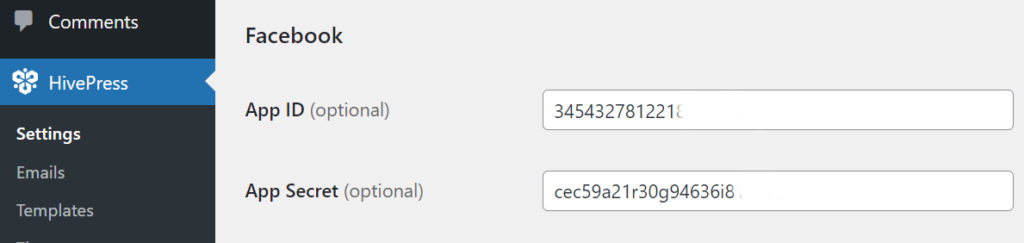
Please note that if you don’t see the “Facebook” section there, then you have to go to the WP Dashboard > HivePress > Settings > Users section and select Facebook in theAuthentication Methods field.
That’s it! Now, there should be a Facebook button in your sign-in form that allows users to sign in to your website via their Facebook accounts. However, you may have to wait a few minutes before the changes take place.
Now, let’s move to the next part of this tutorial to create and add the Google Login button.
If you want to add the “Log In with Google” button to your HivePress-powered website, you need to get a unique Client ID from Google that will link your website with the Google authentication API. So, let’s do it!
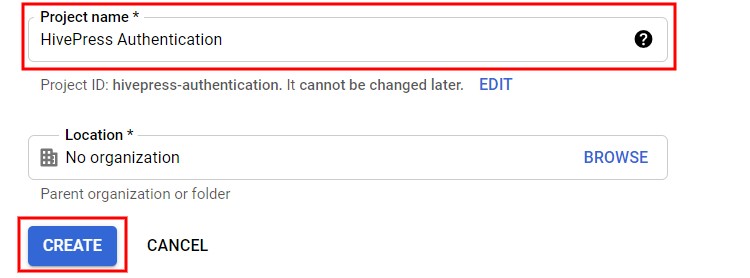
The first step is to create a new Google API project (you may use an existing project if you already have one). To do that, go to the Google API Console and click on the Create Project button. Then you need to enter the name of your project and click on the Create button.
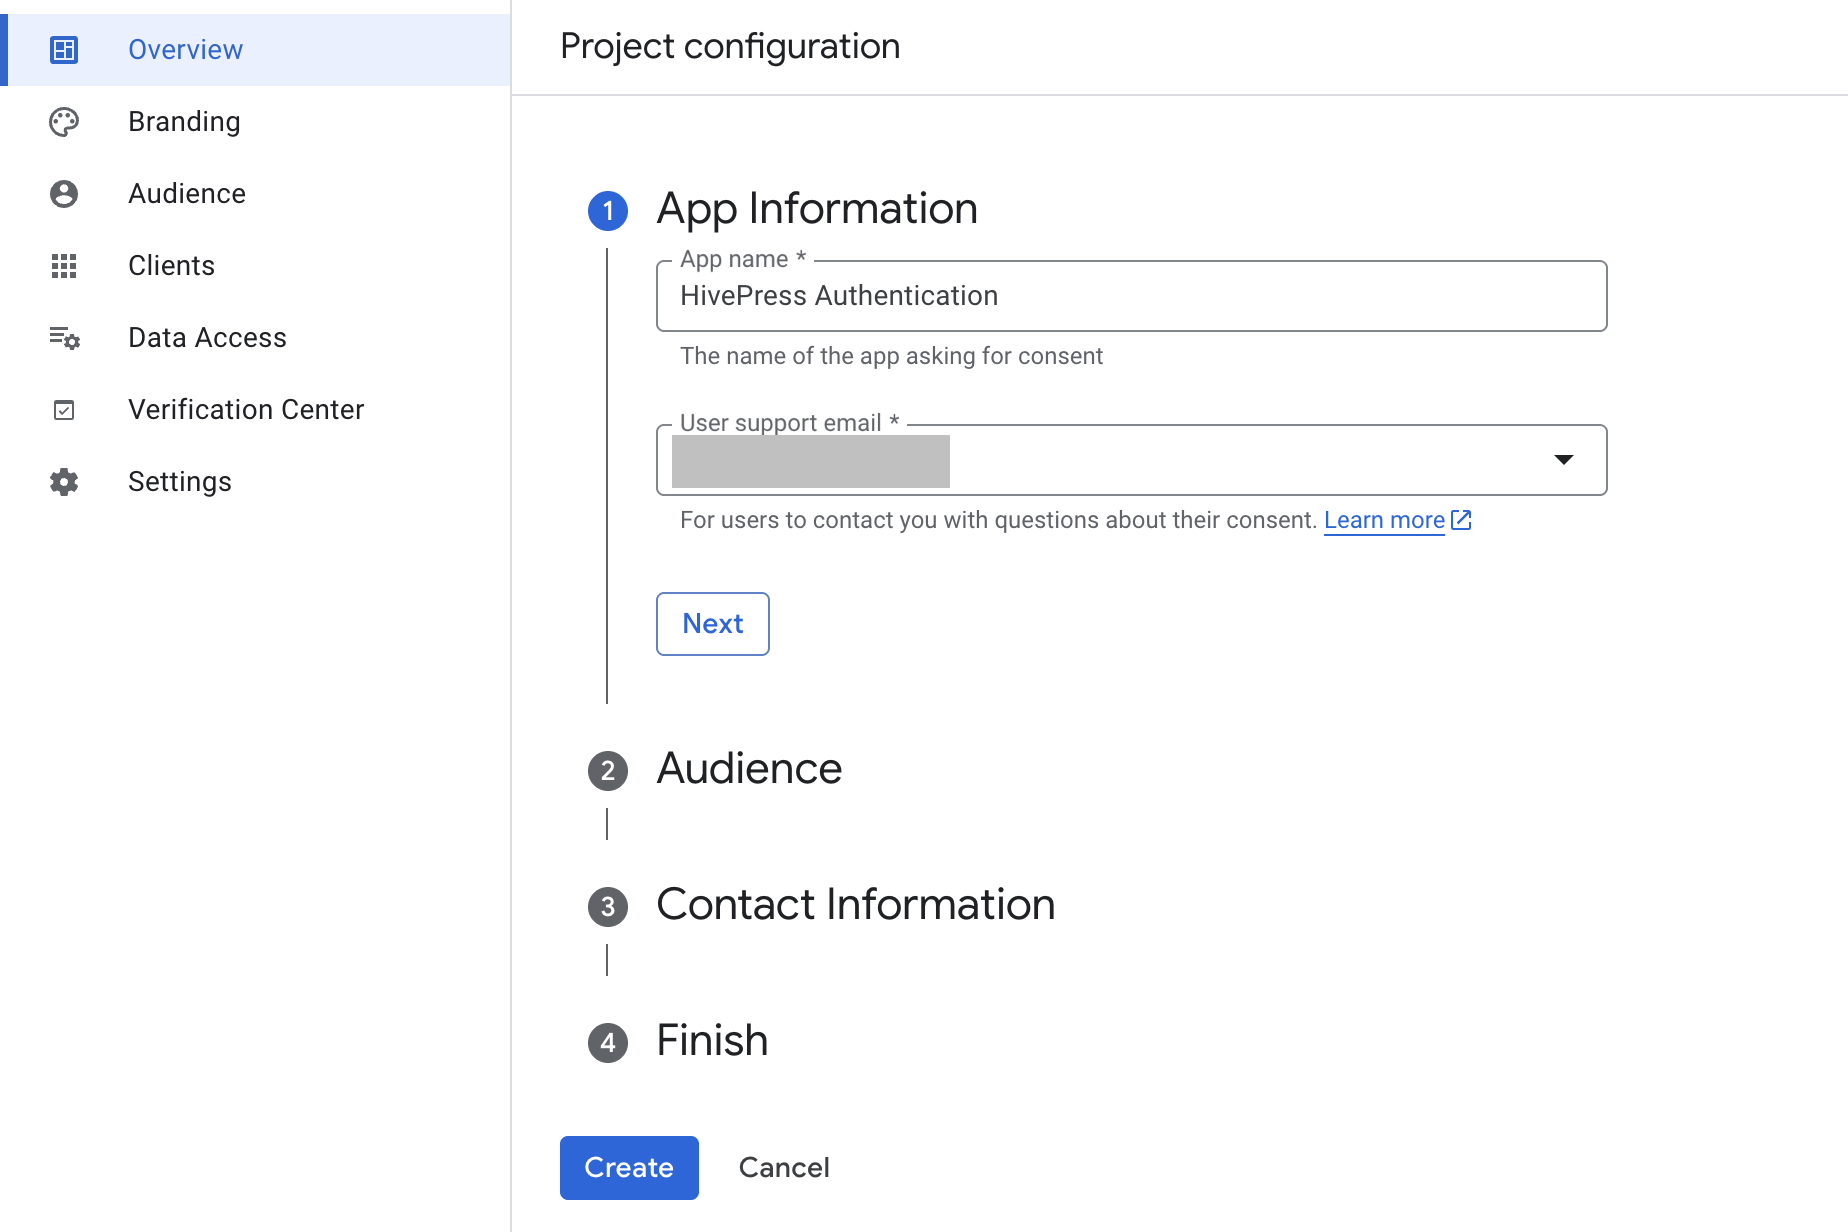
Now you have to go to the OAuth consent screen section and select the OAuth consent screen option (internal or external) according to your website requirements. For the sake of this tutorial, we’ll choose the External option.
Then you’ll be redirected to the Project configuration form. Within this form, you need to:
When finished, click on the Save button.
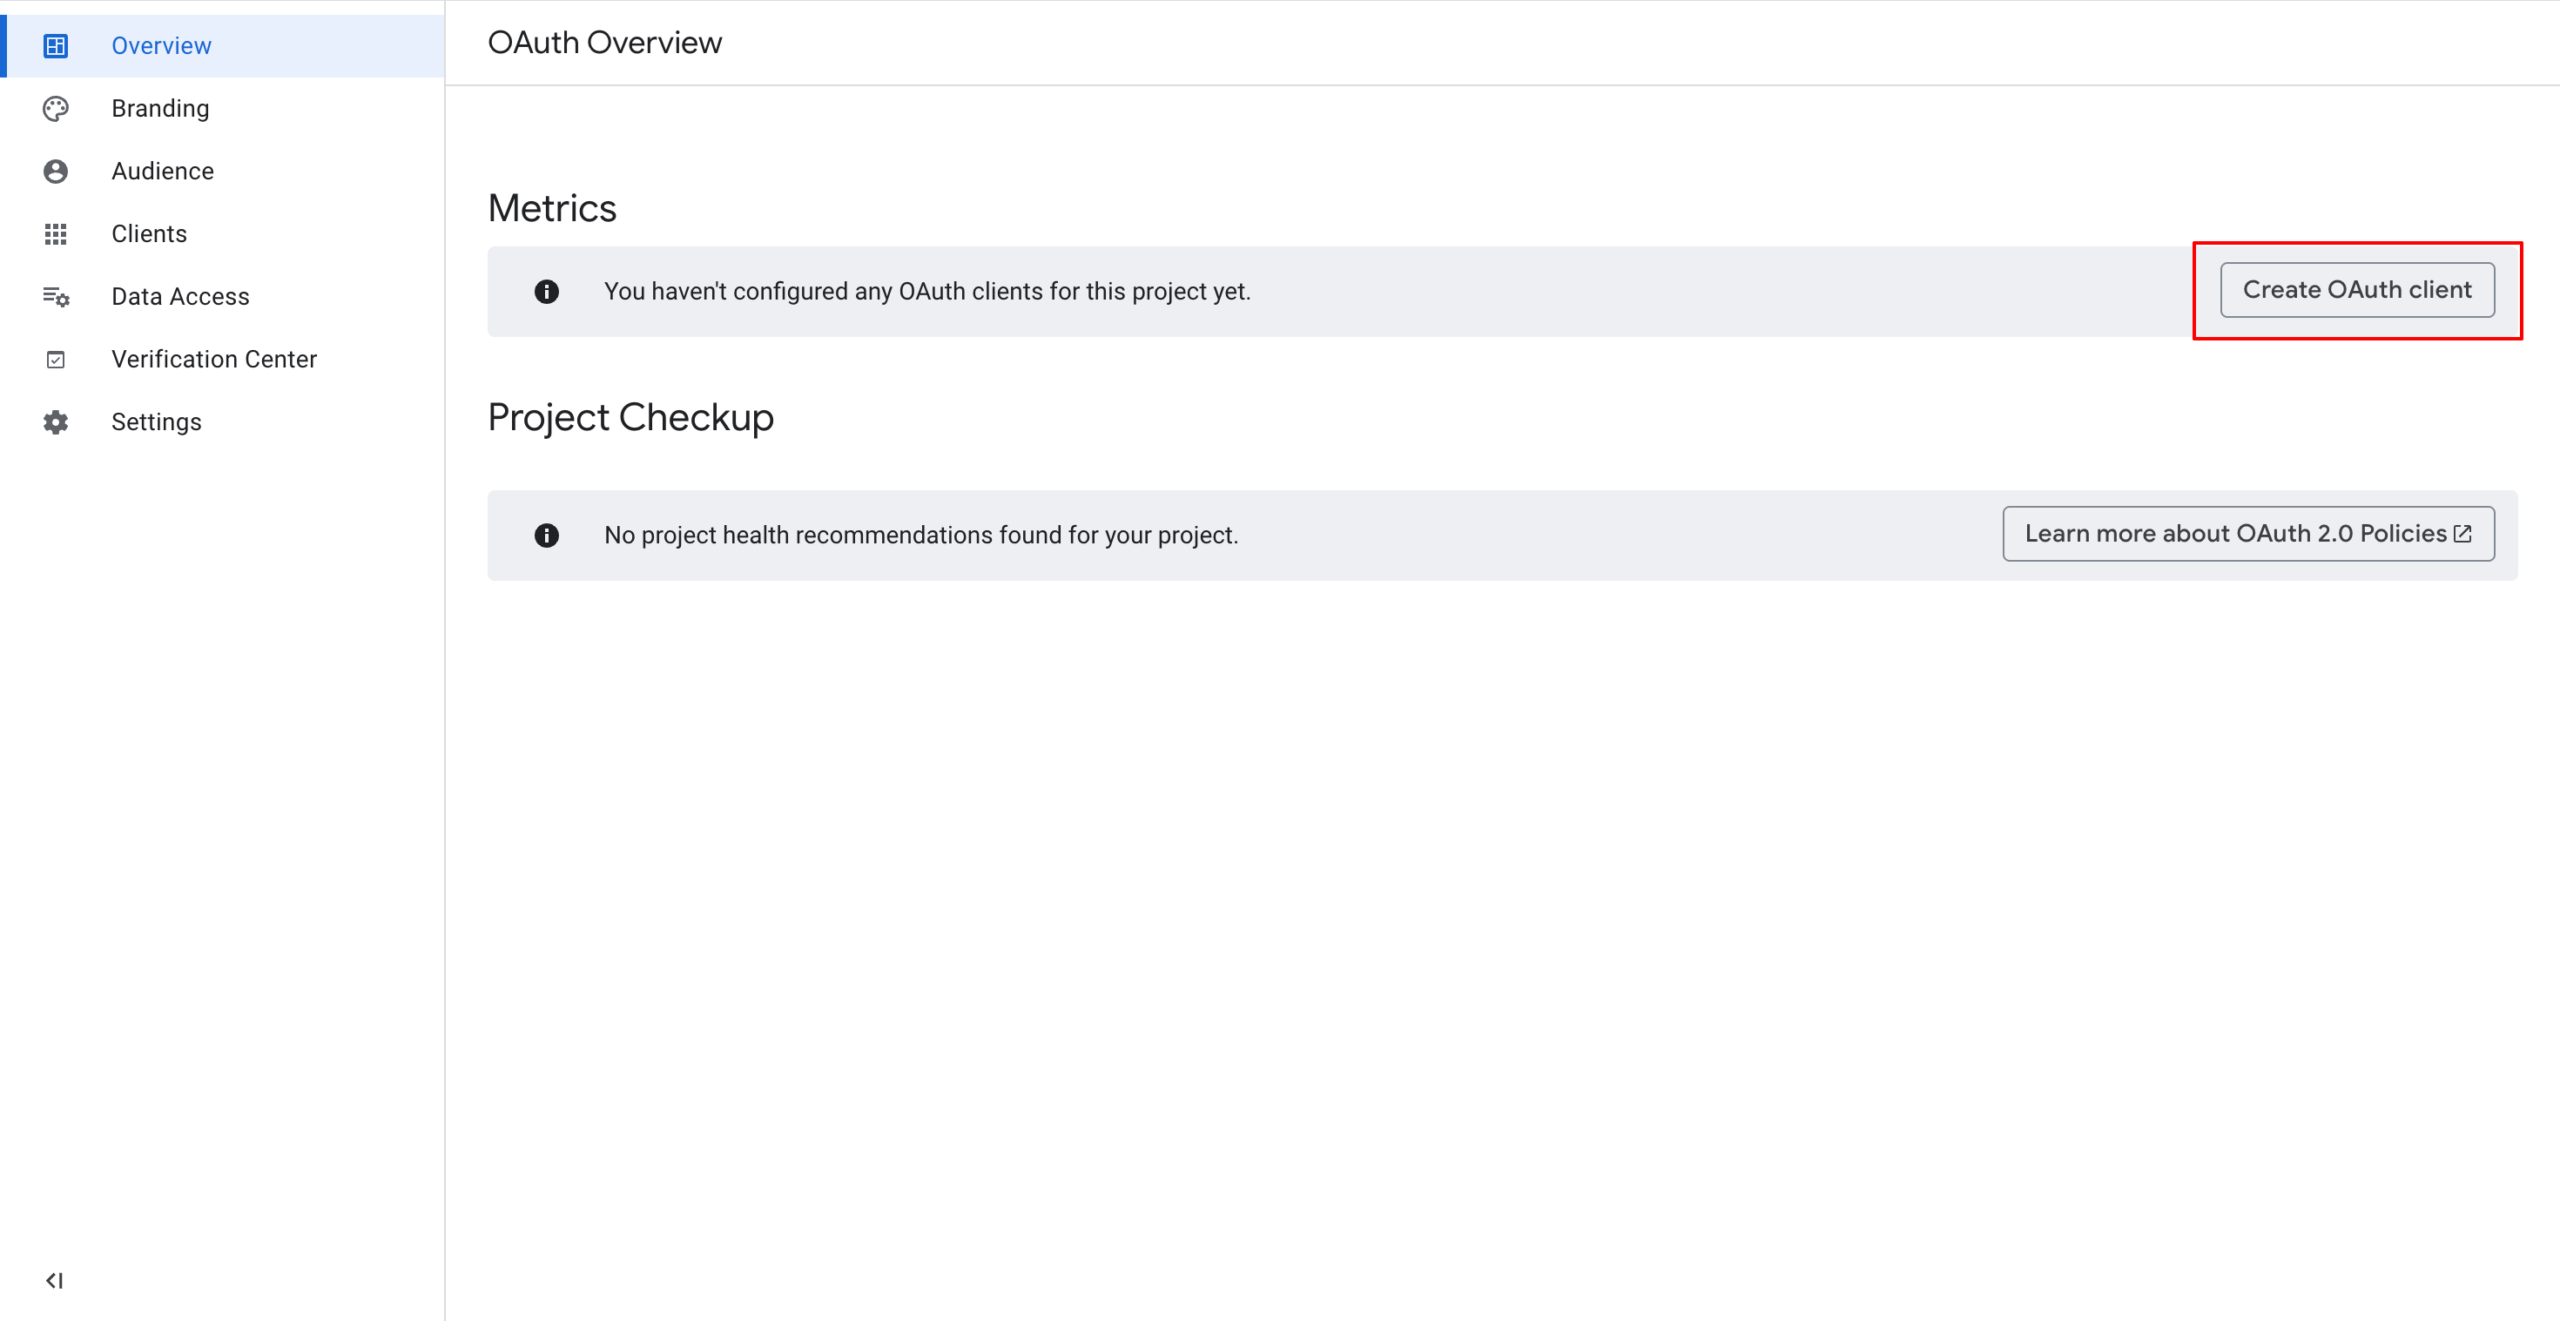
The next step is to create API credentials, namely – OAuth Client ID. You can do so by going to the Credentials > Create Credentials > OAuth Client ID section.
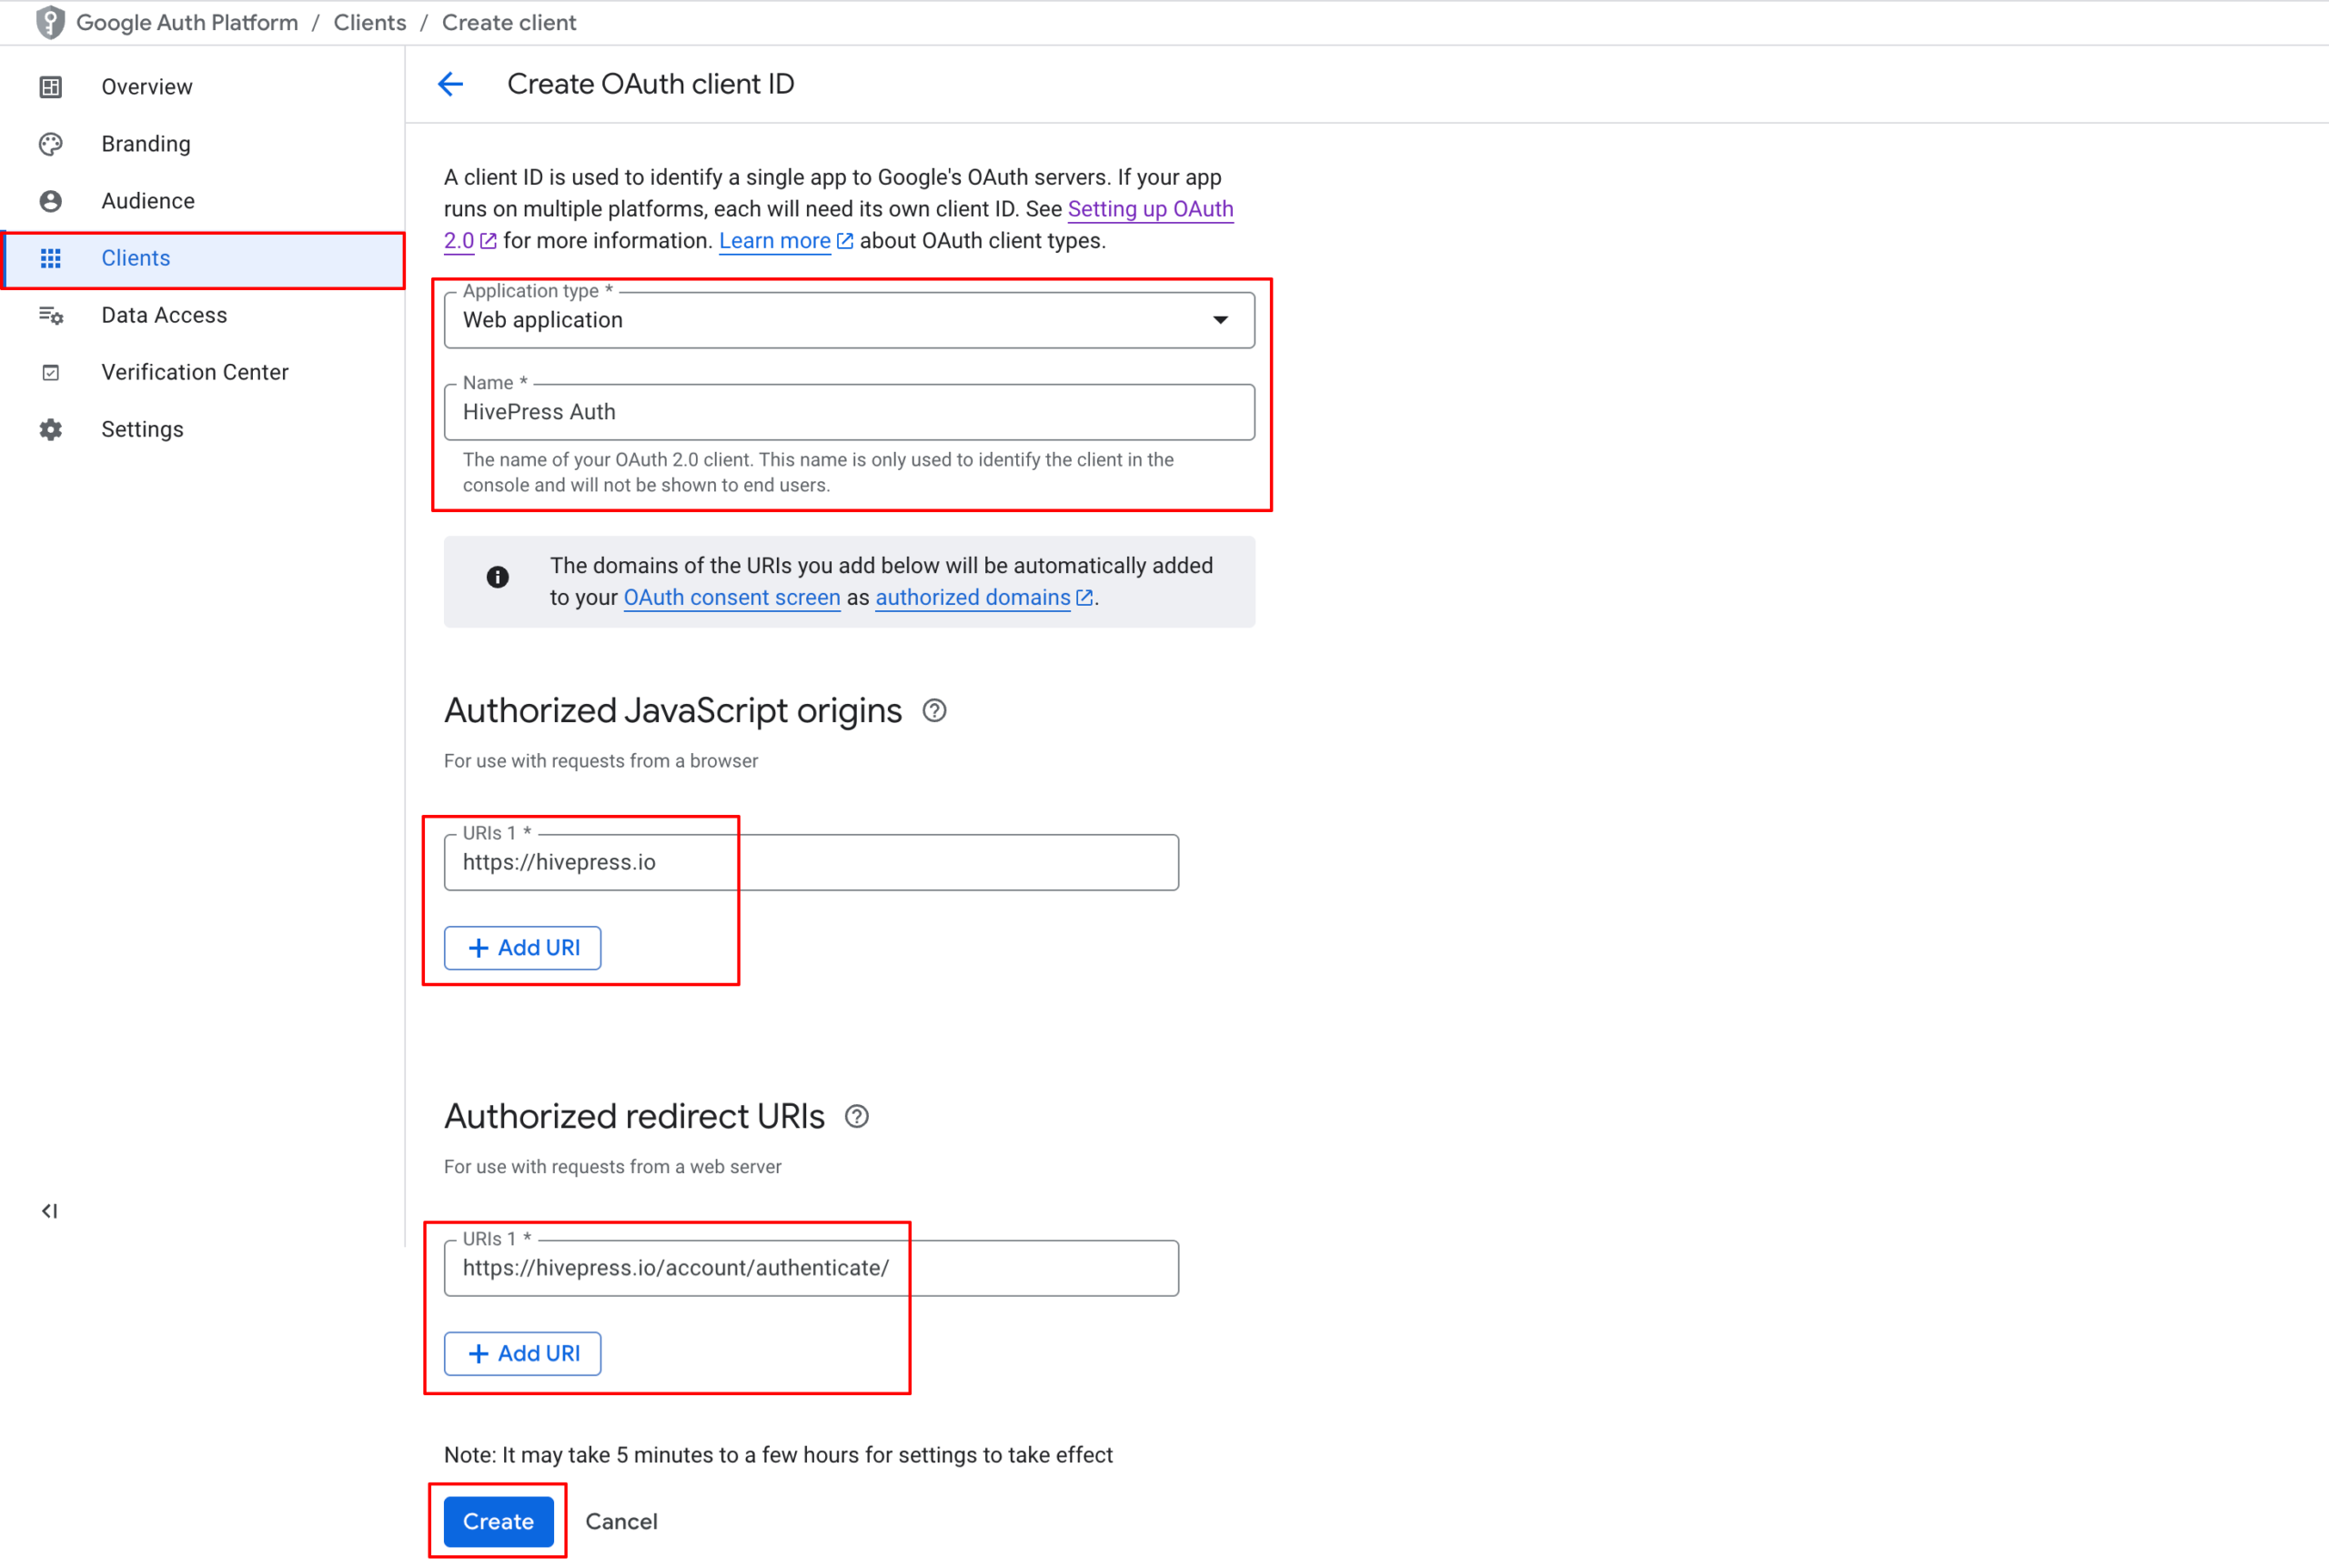
Within this section, you need to fill in the name field and enter your website’s URL in the “Authorized JavaScript origins” field. In the “Authorized redirect URLs” field, you need to place the link from HivePress > Settings > Users > Redirect URL. You can copy this URL directly from your HivePress settings and paste it here to ensure users are properly redirected after they’ve logged in with Google.
Once you are done, click on the Save button.
Finally, you got a unique client ID. Now you need to copy and paste it into the WP Dashboard > HivePress > Settings > Integrations > Client ID section. Don’t forget to save changes.

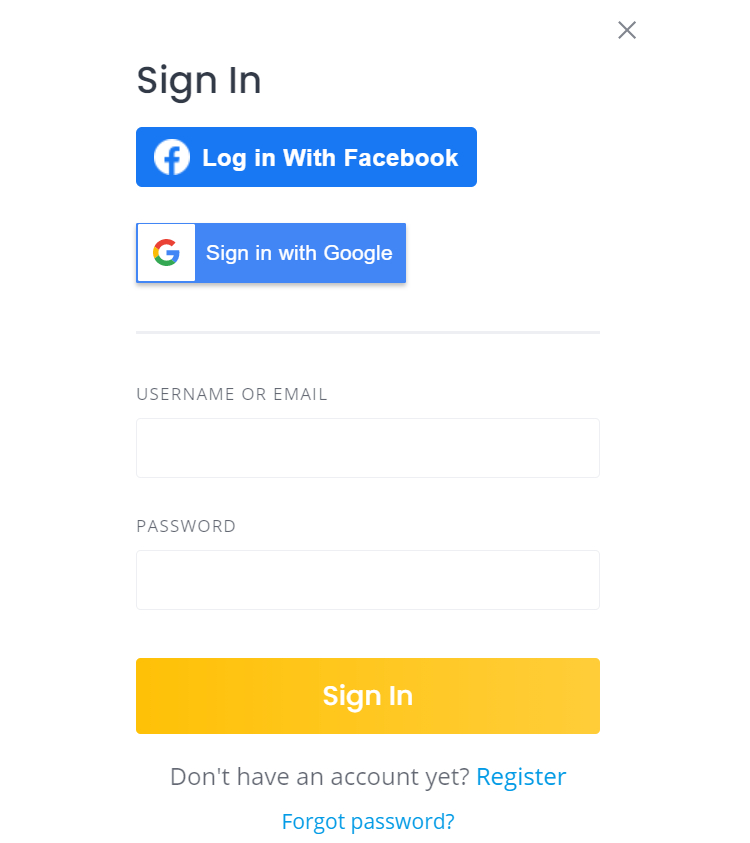
That’s it! By following the steps above, you can easily set up the Social Login extension and allow your users to log in via third-party services like Facebook and Google. Once you complete all the steps, you’ll have the same Facebook and Google buttons in the login form, as shown in the screenshot below.
If you have any trouble adding the social login buttons, please try disabling third-party plugins (there may be a caching issue or a conflict with third-party plugins). Also, please make sure that you have enabled the authentication methods in the WP Dashboard > HivePress > Settings > Users section and save changes.
Additionally, if you want to optimize your website, we recommend checking our tutorial on how to speed up a HivePress-built website.
You may also want to check some of our other articles:
Create a searchable database with WordPress for free.

Increase user engagement on your website with search alerts.

Launch your own influencer marketplace in 5 steps with WordPress.