
How to Enable Reviews on a WordPress Directory Website
A short guide on setting up the HivePress Reviews extension.
Skyrocket your WordPress website performance in a breeze.

Nowadays, website loading speed and overall performance are crucial for a good user experience and search engine rankings. Recently Google announced that it will begin to measure Core Web Vitals, such as visual stability scores and page load times, for websites to determine whether they will qualify for a ranking signal boost. Also, pages with a longer load time tend to have higher bounce rates and lower average time on page.
In this tutorial, we’ll explain how to skyrocket your website’s performance by setting up caching, optimizing styles and scripts, as well as optimizing the media content. We’ll use the LiteSpeed Cache plugin, an all-in-one website acceleration solution with tons of tools and features for making your website blazing fast.
For testing purposes, we’ll use a WordPress directory website built with WordPress, HivePress and a few extensions along with the ListingHive theme. However, if your website is not built with the HivePress plugin, you can follow the same steps for any other WordPress-powered website.
So, let’s start with the LiteSpeed Cache installation.
First of all, you need to install the LiteSpeed Cache plugin. You can easily do it directly from your WordPress dashboard by going to the Plugins > Add New section. Find it via the search bar and proceed by installing it. When the installation is finished, simply click on the “Activate” button to enable the plugin.
Once it’s installed and activated, you can start optimizing your website. Let’s go through the basic cache settings first.
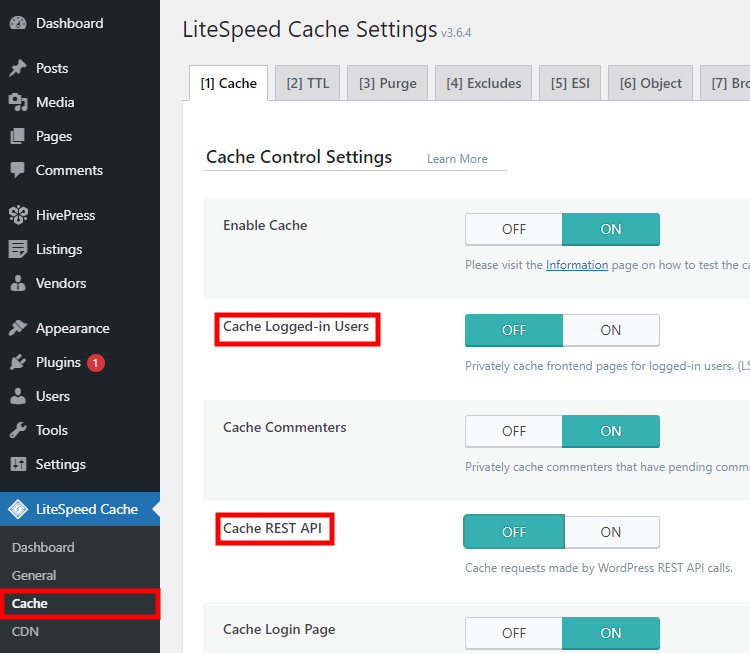
In order to adjust the basic cache settings, navigate to the LiteSpeed Cache > Cache page. There are many different sections within this page, but we’ll go through the most important settings only.
Here, we highly recommend disabling cache for logged-in users and REST API requests. This is required for the HivePress plugin to function properly. After you enable or disable any options, please don’t forget to save changes.
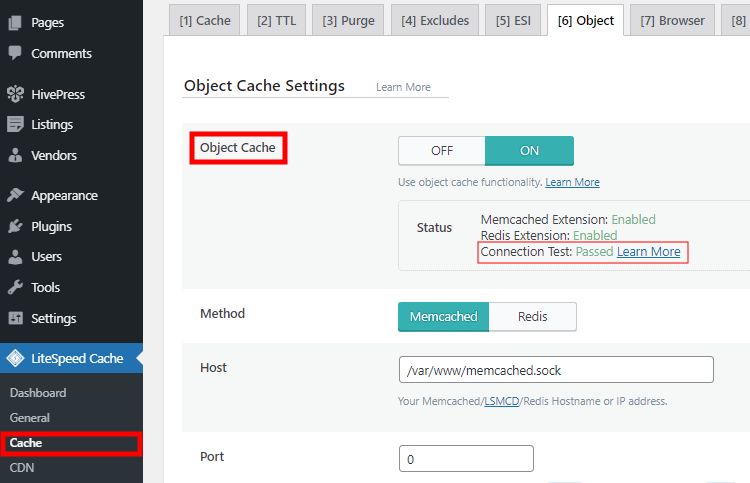
Next, let’s enable the Object Cache. Navigate to the Object section and check if the object cache is available on your site. The connection test should be displayed as “passed.” If so, you can enable the object cache, and this will drastically improve the website performance by caching duplicate database queries.
There should be no trouble passing the connection test if your website is based on the OpenLiteSpeed server or your hosting provider supports object caching.
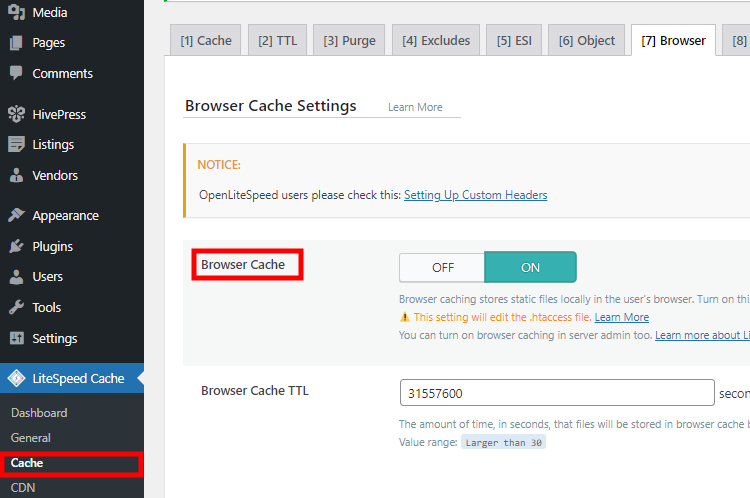
Finally, navigate to the Browser Cache section and make sure that it’s enabled. This will cache all the static content like styles, scripts, and images in the user’s browser.
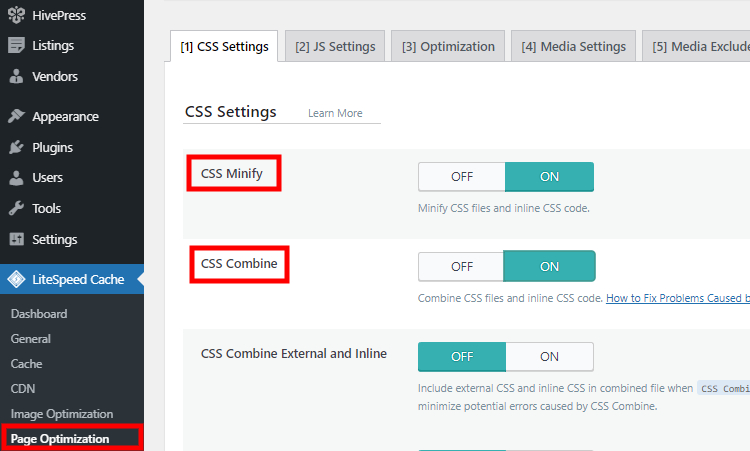
Your next step is to navigate to the LiteSpeed Cache > Page Optimization section in order to optimize the styles, scripts, and fonts.
Let’s start with the CSS Settings section. Here we recommend turning on the CSS Minify and CSS Combine settings.
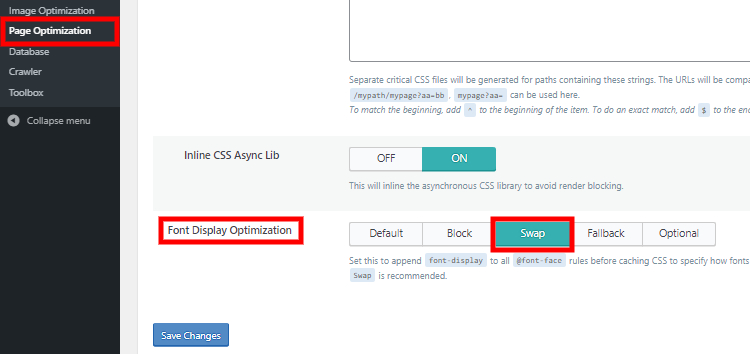
If your site uses Google Fonts, there are a few options for optimizing the font loading. In the same CSS Settings section, you can scroll down and set the Font Display Optimization option to Swap so the fallback font will be used to display the text until the custom font has fully downloaded.
Once you set the Swap option, go to the Optimization section within the same page and turn on the Load Google Fonts Asynchronously option in order to load Google Fonts in the background while the page is being rendered.
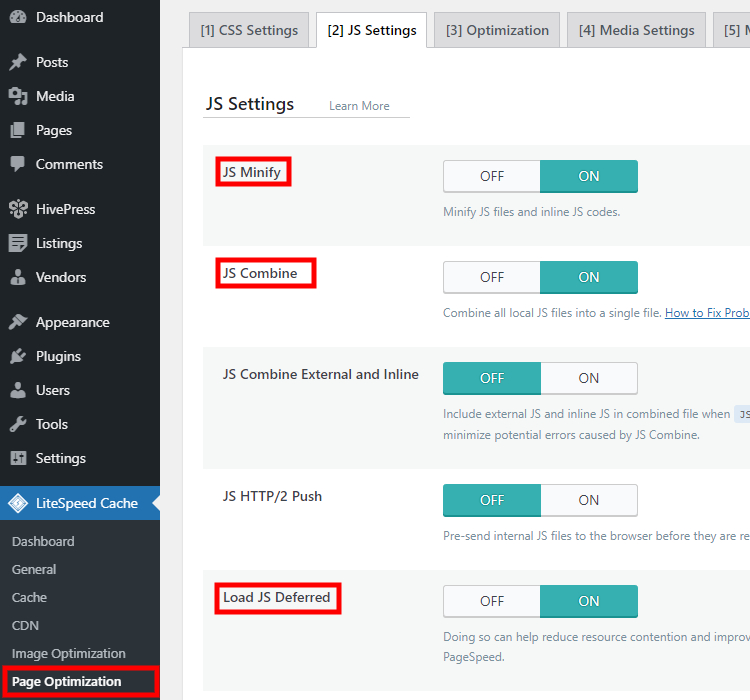
Now let’s go to the JS Settings section to optimize the JavaScript files. Here we recommend following the same steps as for the CSS settings. Simply enable JS Minify and JS Combine options so the JS files will also be minified and merged into a single file.
There’s also the Load JS Deferred option that can really make a difference. Once you enable this setting, scripts will be loading in the background while the browser renders the page layout and styles. Scripts are often “heavier” than HTML, so the loading and execution of scripts that are not necessary for the initial page render may be deferred and loaded later. It allows visitors to use the website almost immediately.
After you check this option, please make sure that the website front-end is not broken because some scripts may require loading before the page is rendered.
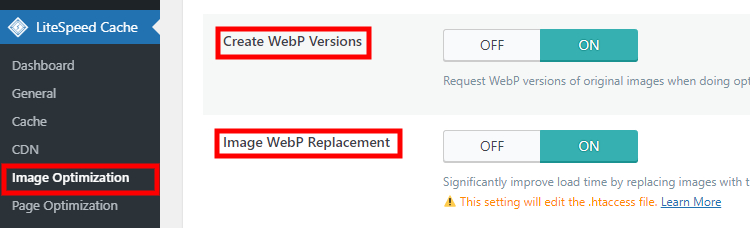
Finally, you need to optimize your media content. Since images often account for about half of a webpage’s content size, converting all images to WebP format (which is on average 30% smaller than other formats) can significantly improve your page load speed.
In the LiteSpeed Cache > Image Optimization > Settings section, you can convert your website images to the WebP format by enabling the Create WebP Versions and Image WebP Replacement settings.
After you check these options, navigate to the Image Optimization Summary section to get the domain key and optimize images by clicking on the “Send Optimization Request” button until the image optimization score reaches 100%.
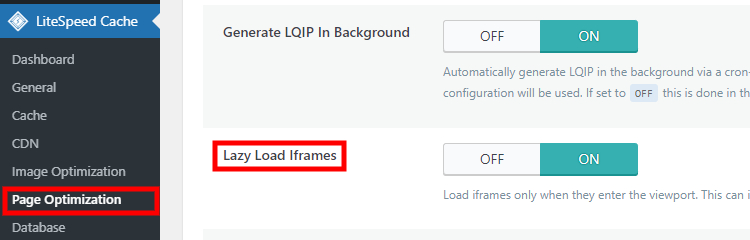
Also, if there are any embeds on your website (e.g., YouTube videos, Instagram posts or Tweets), it’s better to load the embedded content only when users scroll down to it, not during the initial page rendering. It will make the first page render much faster and reduce browser memory usage.
Navigate to the LiteSpeed Cache > Page Optimization > Media Settings section and enable the Lazy Load Iframes option.
Below is the screenshot of the Google PageSpeed results on mobile and desktop devices after we optimized the website performance following the steps in this tutorial.
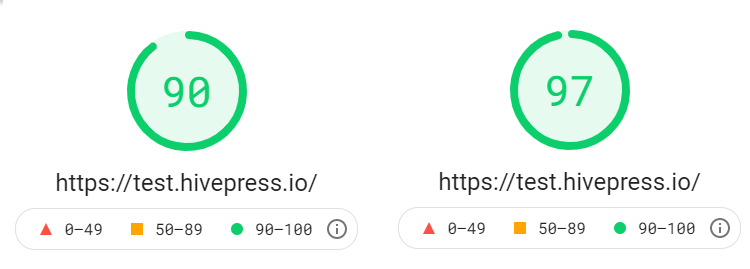
That’s it! If you built your directory or marketplace website with HivePress (or any other WordPress-based solution), you can follow the same steps to set up caching, optimize styles, scripts and fonts, as well as the media content like images or embeds. As a result, you will get a high score on Google PageSpeed (thus boosting your SEO rankings) and improve the overall user experience of your website.
Additionally, feel free to check the following articles:
A short guide on setting up the HivePress Reviews extension.

Start your own coupon website and make money with affiliate commissions.

Build a neighborhood directory in hours with WordPress and HivePress. No coding, minimal cost, maximum community impact.