
How to Create a Local Sports Directory with WordPress [Free]
A quick tutorial on how to create sports directory website.
Launch your own сar listing website in a few simple steps.
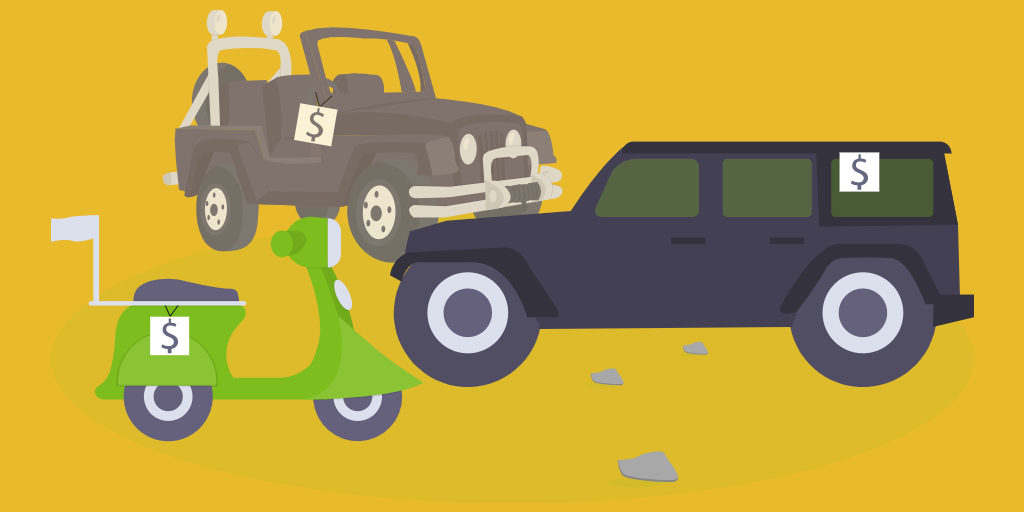
Many motorheads are thinking about building their own car listing website to connect local sellers and buyers or even turn it into a more extensive marketplace that matches customers and vendors around the country. It’s a pretty popular idea since running such a website may become a profitable online business.
What is even more tempting is that you can create a fully functional car listing website without writing a single line of code.
In this walkthrough, we’ll show you how to create a car dealer website with WordPress, the most popular content management system in the world.
So, fasten your seatbelts and let’s get started!
Nine times out of ten people start their own business because of a passion or interest in a particular subject. So if you decided to build a car listing website, you are probably a car guy or girl who enjoys driving and loves anything related to cars.
But before moving to the tutorial part of this article, where we’ll show you step-by-step how to create your own car dealer website, we’d like to explain to you what types of car listing websites are there. There are three most popular ones, and we’ll briefly cover each of them.
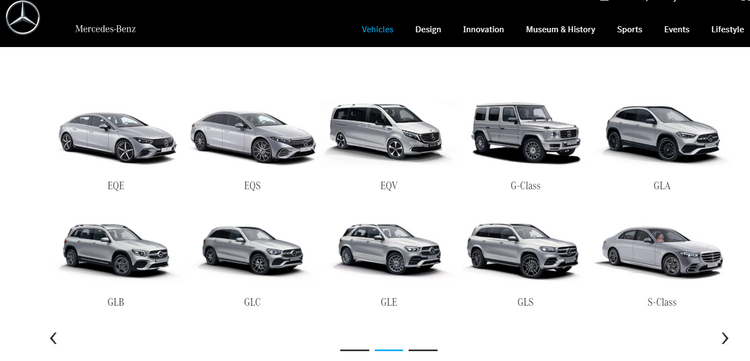
The first type is directory websites, where only website owners add new car listings, and users cannot list their own vehicles. This is a common model for a car dealer or vehicle manufacturers’ websites where vehicles of a single brand are listed.
As an example, you can choose any car manufacturer you like and visit their website or dealership center site (e.g., Mercedes-Benz).
The second type is online marketplaces, websites that allow users to buy and sell cars (primarily used ones) without any middleman. Such marketplaces provide many opportunities for the purchase and sale of cars (like the intuitive interface, car audit, insurance, etc.) so anyone can buy or sell a vehicle safely and comfortably with only a few clicks.
If you are looking for an example of an online car marketplace, you may check out Carvago. It’s one of the biggest online vehicle marketplaces in Europe that lists more than 2 million cars.

Finally, there are car rental platforms that allow people to rent a vehicle in different parts of the world, like Hertz or Enterprise. These websites are household names for frequent travelers, road trippers and those with a car in the shop.
You can check out our tutorial on how to create a car rental website with WordPress in a breeze and without any coding skills.
Okay, now you know what types of car listing websites there are. Now let’s find out what you need to create a car dealer website with WordPress.
If you want to build a car dealer website using WordPress, you’ll need to have 5 essential components:
While it’s pretty easy to come up with a domain name, choose a WordPress hosting and set up WordPress, there may be some difficulties with choosing the right car dealer WordPress theme and a reliable directory plugin.
That’s why you should have a clear understanding of the functionality you need for your car dealer website and choose a theme & plugin that has all the necessary features to meet your requirements.
Here’s a list of some of the most crucial features you should look for when searching for a directory plugin & car dealer theme for your website:
We have mentioned some of the basic features that any car dealer website should have. So we recommend keeping them in mind when looking for a plugin & theme for your site.
For the sake of this tutorial, we’ll use the free ListingHive theme. It’s a multipurpose WordPress theme for building directory and listing websites of any type. Also, we’ll use HivePress, a free and highly customizable WordPress directory plugin that is fully compatible with ListingHive.
Okay, let’s move to the tutorial part of this article!
Here are 6 simple steps between you and your WordPress car dealership website.
The first step is to install the WordPress theme for your car dealer website. Since we’re using the free ListingHive theme, you can install it directly from your WordPress dashboard by going to the Appearance > Themes page. Next, click on the Add New button and use the search bar to find ListingHive. Then, proceed by installing and activating the theme.
Once you activate ListingHvie, there will be a link to install the recommended plugin – HivePress. It’s crucial to install this plugin since it’ll power the directory functionality on your website. Simply follow the suggested link and install the plugin.
When finished with the theme installation, you can move to the next step and install several add-ons to enhance your website with extra functionality.
If you have any issues with installing the theme, you can follow the step-by-step screencast below.
Bear in mind that a car listing site is a complex platform that requires dozens of specific features, and that’s where ListingHive extensions come in handy. There are 15+ add-ons that you can install from your WordPress dashboard in order to extend the functionality of your car directory. Let’s briefly take a look at some of them.
For example, you can install the Favorites extension that allows users to keep a list of favorite car listings while browsing your website. It’s a useful feature that improves the user experience on your website.
Also, if you want to easily integrate your website with Google Maps, you can’t go wrong with the Geolocation add-on. It enables location-based search and allows your customers to search car listings by location. It’s a crucial search filter for any car dealership website since most of the users narrow down the search to some certain area.
One more helpful feature is to allow users on your website to communicate with each other via private messages. In order to enable this option, you can install the Messages extension, so customers will be able to reply to car listings, send attachments and simply chat with car sellers.
We mentioned only three extensions, but you can check the whole list of add-ons available for ListingHive and install those that are required for your website.
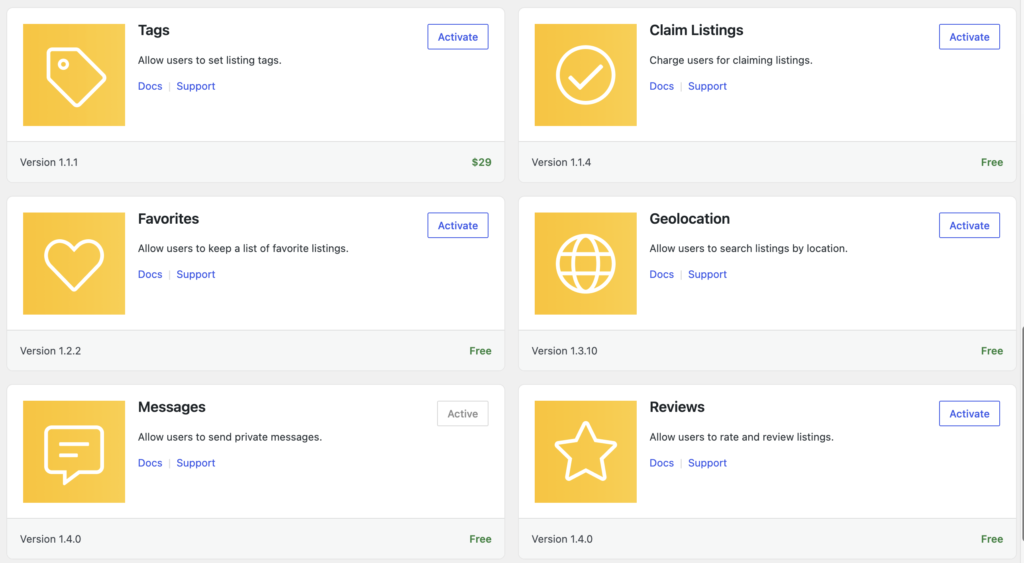
In order to install any extension, navigate to the HivePress > Extensions section, locate the feature you want to add, click on the Install button and proceed by activating it. Similarly, you can install other extensions necessary for your car listings directory.
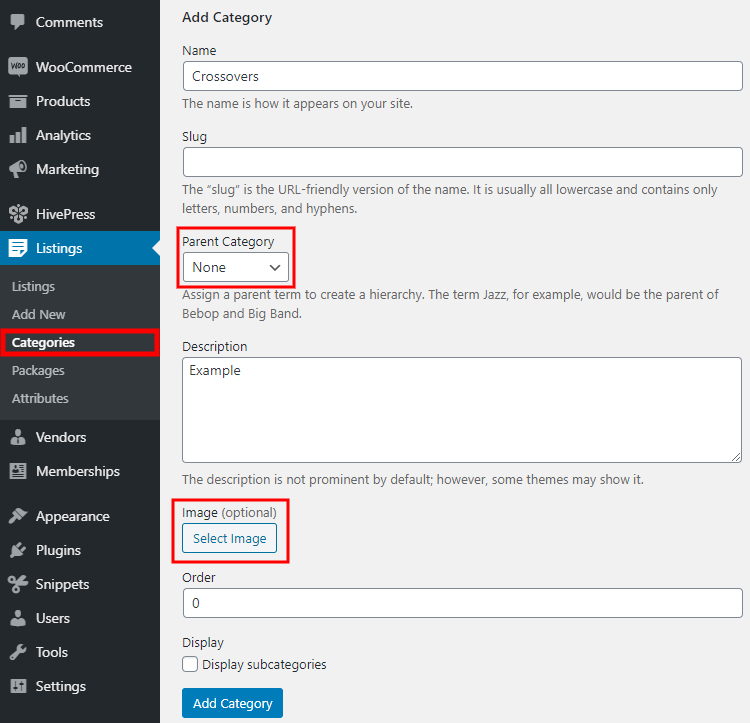
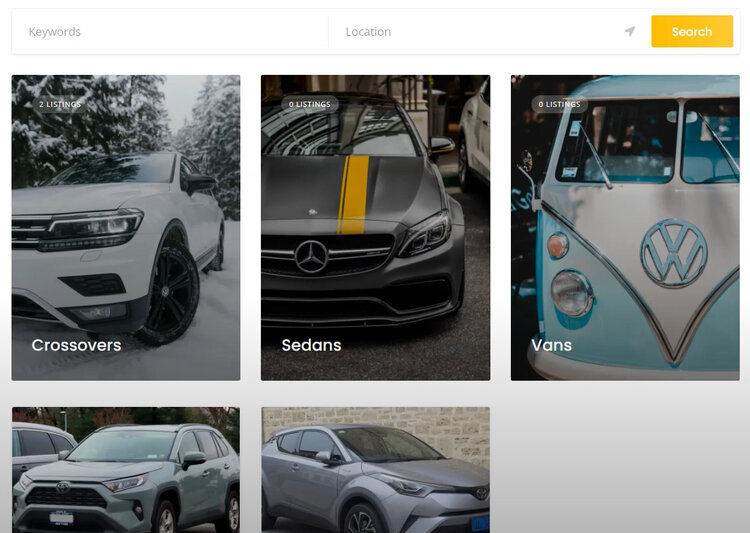
Once you are done with setting up the core functionality, let’s dive into the content creation for your car dealer website. We suggest dividing your website into categories first. For example, let’s add several categories depending on the vehicle type, e.g., “Sedans,” “Vans,” and “Crossovers” categories to make it easier for customers to navigate your directory.
To add a new category, go to the Listings > Categories section. Within this section, you can enter the category name, fill in the description, upload the category image, set its order among other categories, and even organize your categories into a hierarchy.
When finished setting up your category, click on the Add Category button. Keep in mind that you can add as many categories as required for your automotive directory and easily customize them in the way you like.
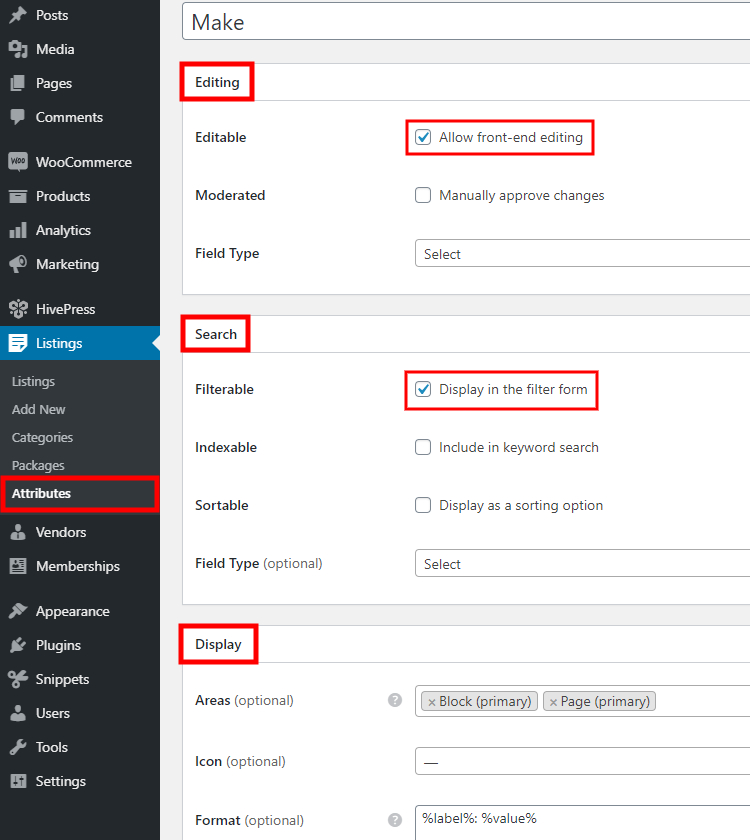
Okay, now it’s time to add some fields specific to car listings. You’ll be happy to know that ListingHive goes without any hard-coded search filters or fields, so you can easily create custom ones in the Listings > Attributes section. For example, let’s add the “Make” attribute so users will be able to filter car listings by manufacturers.
Please note that any attribute can be customized in the following three types of context:
Once you are done with the attributes settings, click on the Publish button.
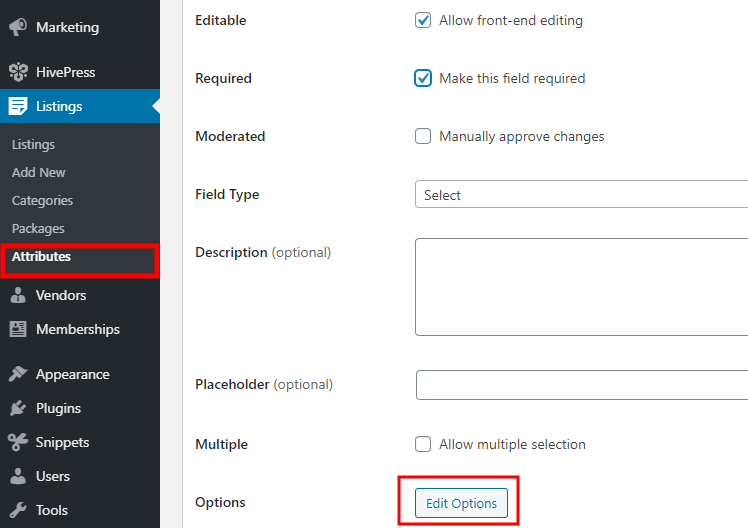
Your next step is to add the attribute options by clicking on the Edit options button. For example, let’s add “Toyota” and “Chevrolet” options. Similarly, you can add as many options as needed for your automotive directory.
Additionally, you can add the “Year” attribute to allow setting a year of manufacture for each car listing. To do that, navigate to the Listings > Attributes section one more time and click on the Add New button.
Now set the attribute name, allow its front-end editing and select the attribute type. For this one, we’ll use the “Number” field type. In the next section, mark it as filterable and sortable. Then select the search field type. It’s better to select the “Number Range” field type to allow filtering listings by the year range instead of some specific year. Finally, set a custom display format if required.
That’s it! In the same way, you can add more custom fields and search filters, depending on your automotive directory niche and requirements.
In order to get a better idea of how your car dealership website works for users, let’s check the workflow of adding a new listing from the front-end. For example, let’s add the first listing to the “Crossovers” category. To do this, go to your website, click on the Add Listing button, and select the “Crossovers” category.
You’ll be taken to the submission form containing several required and optional fields that you have to fill out to submit a new listing. Firstly, you can upload the listing image and enter the listing title, let it be “Toyota RAV4 in perfect condition”. Then, you need to indicate the car make and set its manufacturing year (the custom attributes we previously added). Finally, fill in the description and submit the listing.
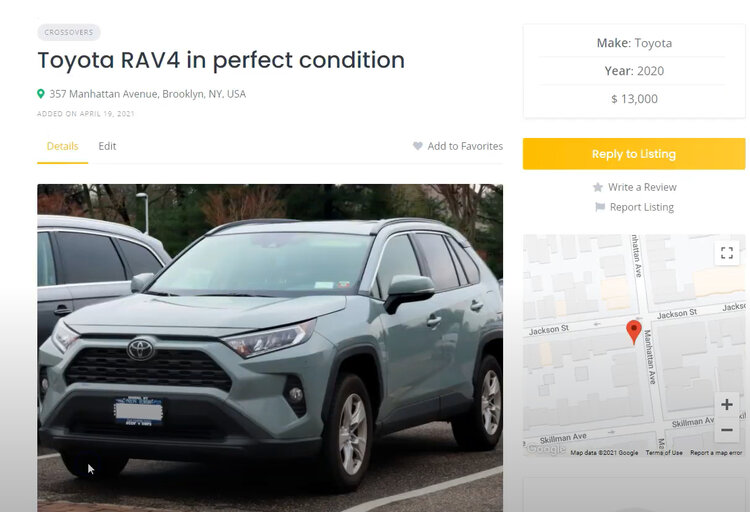
If moderation is enabled, an admin has to approve a new listing in the Listings section. Once it is approved, the car listing will appear on the front end. However, if you don’t want to validate every new listing manually, you can disable moderation in the HivePress > Settings section.
Finally, you need to set up a homepage for your car listing website. You can easily customize the page layout using familiar blocks since ListingHive is fully compatible with Gutenberg and Elementor page builders.
In order to add a new page, go to the Pages > Add New section. First of all, enter the page title (e.g., Home) and add some layout blocks. For example, you can add the listing search bar to allow customers to search car listings by keywords right from the homepage. Simply click on the ➕ icon and choose the necessary block. Also, you can add a block that displays your directory categories and another one that shows recently added car listings.
Once you’re done with homepage settings, click on the Publish button. Your next step is to set this page as a front page of your car dealership website. To do that, go to the Settings > Reading section and choose your page in the drop-down list. Then save changes.
We’d like to devote the last step to the possible monetization models for a car dealer website. One of the best ways of making money with your directory is by charging car sellers for adding new listings. For example, you can create various listing plans with different restrictions and sell them to users.
Additionally, you can easily set up network adverts using Google AdSense, thus creating adverts that are relevant to a visitor’s recent internet search. Also, one of the simplest ways of making money on your website is by displaying banners or text ads in different areas of your website.
There are multiple ways to make money through a website. Some monetization methods are simple, some a bit more complex, but each of them can be a reliable source of revenue. We strongly recommend not chasing them all at once and picking one that resonates with your website, especially if you have a new website with unstable traffic.
That’s it! As you can see, building a car dealership website with WordPress is not a big deal if you’re using the right tools, so even a rookie can do it. However, launching a directory website is only half the battle, and now you need to put a lot of effort and time into making your automotive directory a rising star. You have to be patient and consistent in order to win customers’ trust, but once you get solid traffic – you can start monetizing your website.
If you are thinking of building your own automotive directory with WordPress, you may consider ListingHive. It’s a multipurpose WordPress theme that goes with all the necessary features for building an automotive directory right of the box. Couple it with the HivePress plugin, and you will get a ready-to-go site tailored to your business niche.
A quick tutorial on how to create sports directory website.

A complete walkthrough on launching a property rental website like Vrbo.

A short tutorial on how to create a pet services website with WordPress.