
How to Enable Reviews on a WordPress Directory Website
A short guide on setting up the HivePress Reviews extension.
A short tutorial on how to build an AI tools directory website with WordPress.

We’ve all witnessed this incredible leap in artificial intelligence over the past few years. It is rapidly becoming more integrated into both the digital and real worlds. What are we even talking about – the day has come when there are so many AI directories that there is a clear need to sort and organize them.
In this tutorial, we’ll explain how to build your own AI tools directory with WordPress. We’ll walk you through the whole process of building your directory website, from installation and customization to monetization.
Let’s dive in!
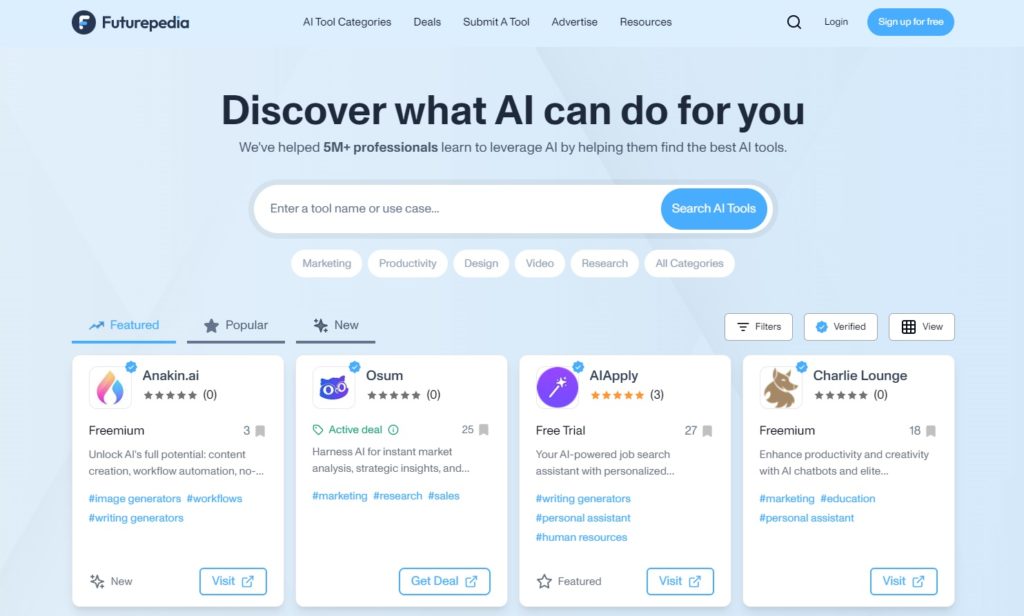
An AI tools directory is a platform that lists and provides information about various AI software, allowing users to explore and discover new tools and find the right ones for their projects. A good example of such a site is Futurepedia.
Choosing the right prerequisites is crucial when setting up your directory website. Here’s a checklist to get you started:
In this tutorial, we are going to use the ListingHive directory theme on top of HivePress, a free and powerful WordPress directory plugin that will handle most of the website’s features.
Now let’s move to the tutorial part of this article, where we’ll show you how to start an AI tools directory. With everything ready, let’s kick off by installing the theme and plugin.
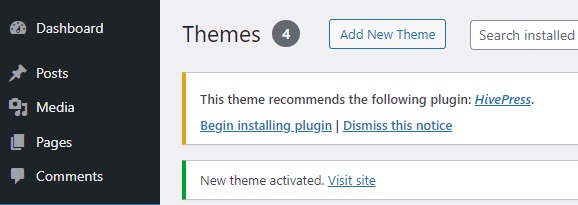
Let’s start by setting up the foundation of your AI tools directory. Go to the Appearance > Themes > Add New Theme page and find ListingHive by typing its name in the search bar. Then, install and activate it. After this, you’ll be suggested to install HivePress. Simply click on the provided link to do it.
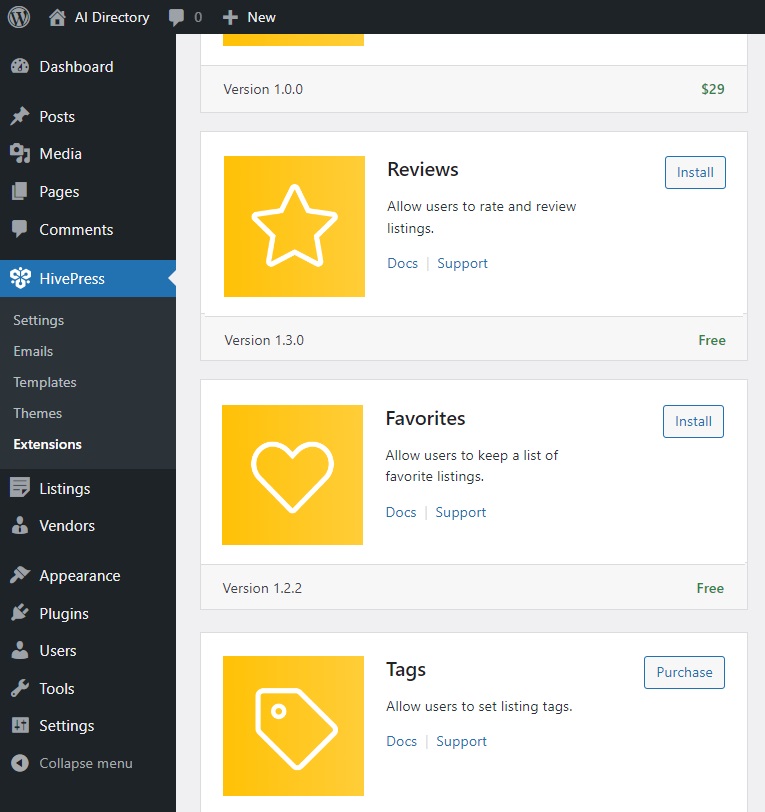
That’s it! Now let’s extend the functionality of the directory, since HivePress offers only the core features out of the box.
To add some additional features, we’ll visit the HivePress > Extensions page. There are 15+ HivePress extensions that are fully compatible with each other and work perfectly with ListingHive. For example, for an AI tools directory, you might want to install:
The next step is to add tool categories to simplify the navigation on your AI tools directory. ListingHive comes without default categories, so you can create as many custom ones as you’d like in the Listings > Categories section. First, name your category. Then, describe it if necessary and upload the category image. You can also create a hierarchy by setting a parent category, which can be helpful if you want to have subcategories. To finish, click Add Category.
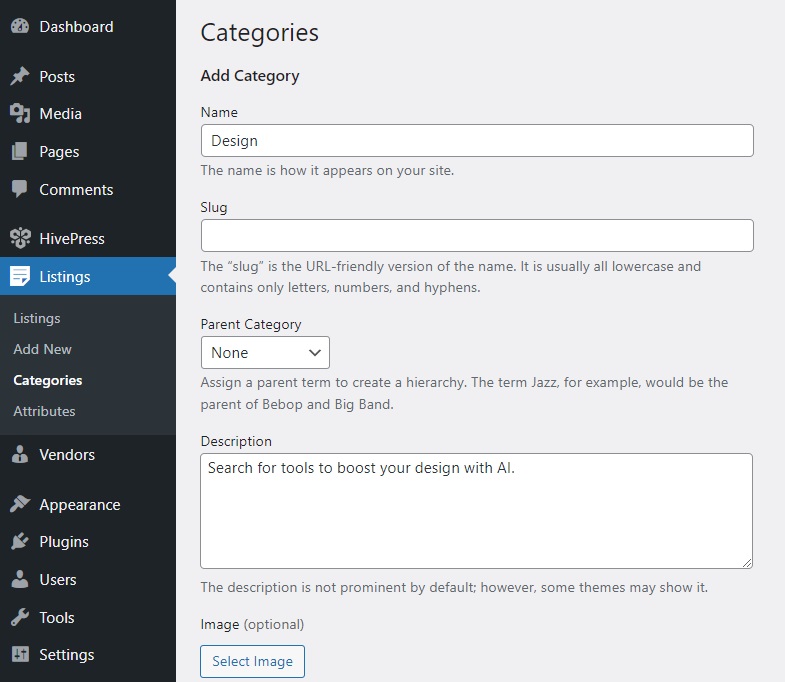
SEO Tip: Use descriptive category names that include relevant keywords naturally.
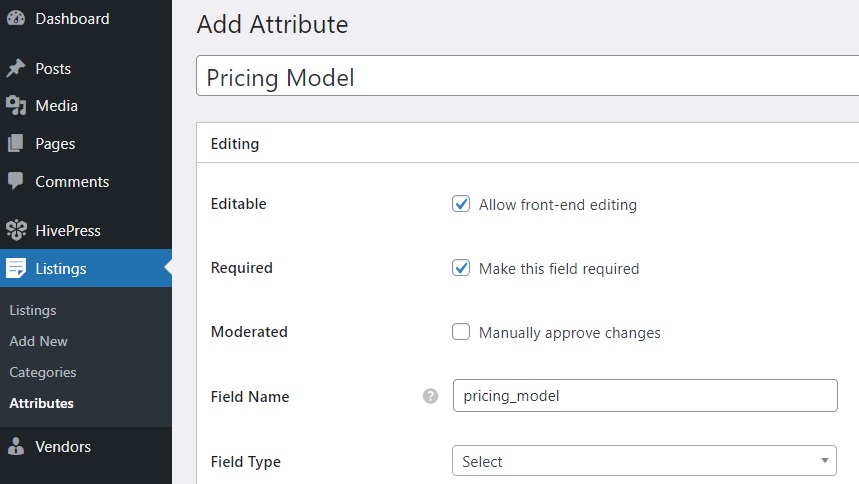
Once you’re done with categories, you can create custom listing fields. They will help users obtain information about every tool. For instance, let’s add a “Pricing Model” field. Go to the Listings > Attributes > Add New page and write the field’s name. In the Editing section, you can allow users to fill in this field when adding new tools to your website. To do this, mark it as editable. Additionally, you can make it required. Also, don’t forget to choose the field type. In our case, it’ll be “Select”.
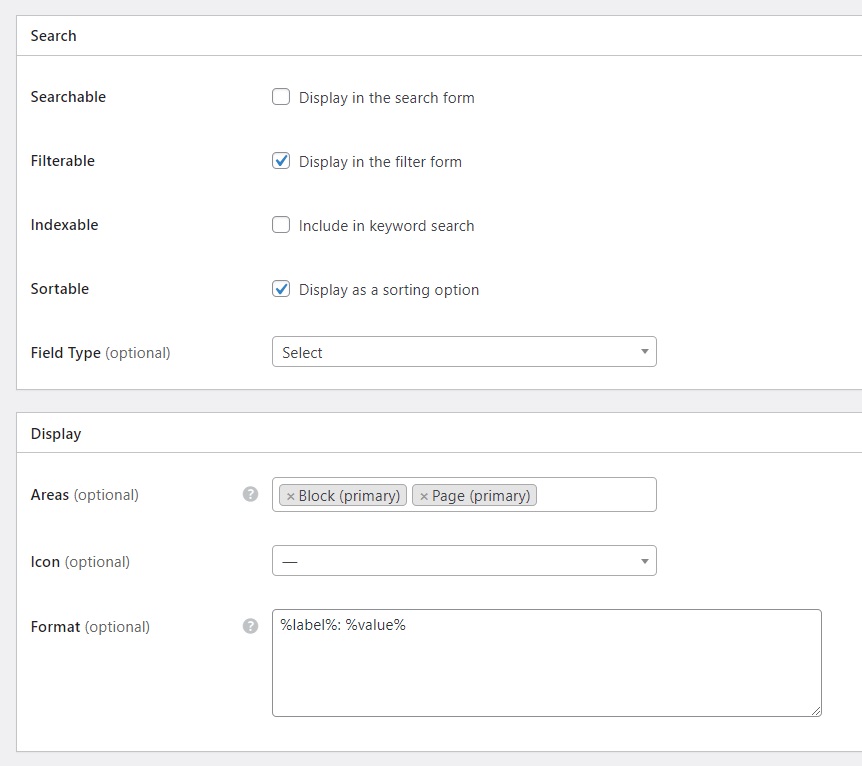
Within the Search section, you can turn your field into a search filter. Let’s mark it as filterable and sortable to allow website visitors to filter and sort tools depending on their pricing model. Also, we’ll use the “Select” field type again.
In the last section, you can set up how your custom field will appear on pages. Let’s select Block (primary) and Page (primary) as our display areas (check our doc to better understand how to set up attributes). As for the display format, we’ll use this one: %label%:%value%.
When done, hit Publish. After this, the Edit Options button will appear. Follow it to add different options, like “Free”, “Premium”, “Free Trial”, and so on.
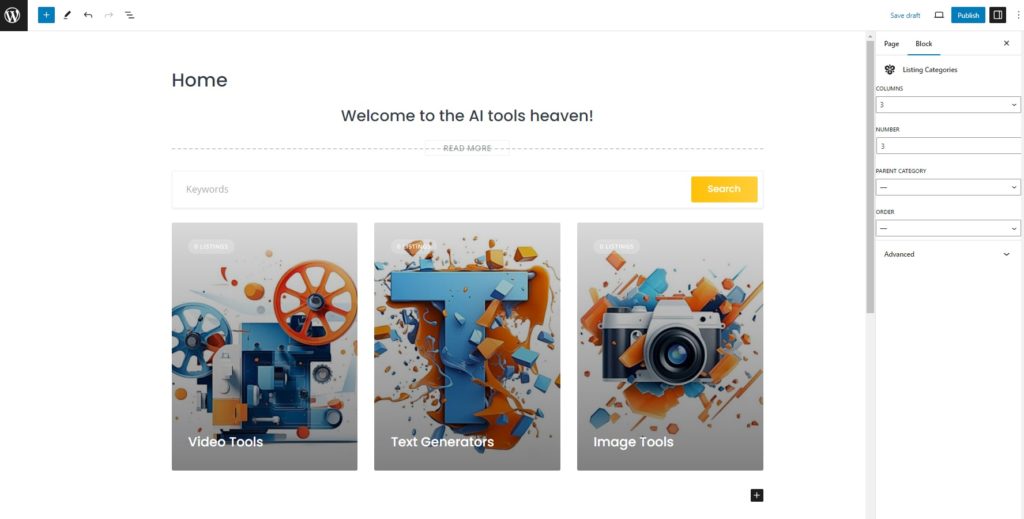
Now, it’s time to create an eye-catching homepage for your AI tools directory. ListingHive is fully compatible with the WordPress native page builder, so we can use blocks to build pages. Let’s go to Pages > Add New Page and name it “Home”. After this, you should write a header text. Finally, you can start adding different blocks to the page by clicking the Plus icon and typing “HivePress”.
For example, let’s add “Listing Search Form” and “Listing Categories” blocks. Additionally, you can customize blocks using the settings column on the right side.
When you’re finished, press the Publish button. After this, visit the Dashboard > Settings > Reading section and select this page from the drop-down list to make it a homepage.

After adding your homepage, you can customize its look and feel by going to the Appearance > Customize section and going through all the settings. You can choose colors, fonts, a header image and so on. Feel free to check this video to get a better idea of how to customize your website.
Now, let’s add the first tool to our AI tools directory. Note that there are two ways to do this: via the front-end as a user and via the back-end as an admin (if you want to be the only person who can add listings on your website, turn off the front-end listing submission option in the HivePress > Settings > Listings section). We’ll proceed with adding a listing via the front-end.
Visit your site and click on the Add Listing button. You’ll see a submission form, where you need to write the name of the tool, select a category, add images, and fill in custom fields you’ve created.
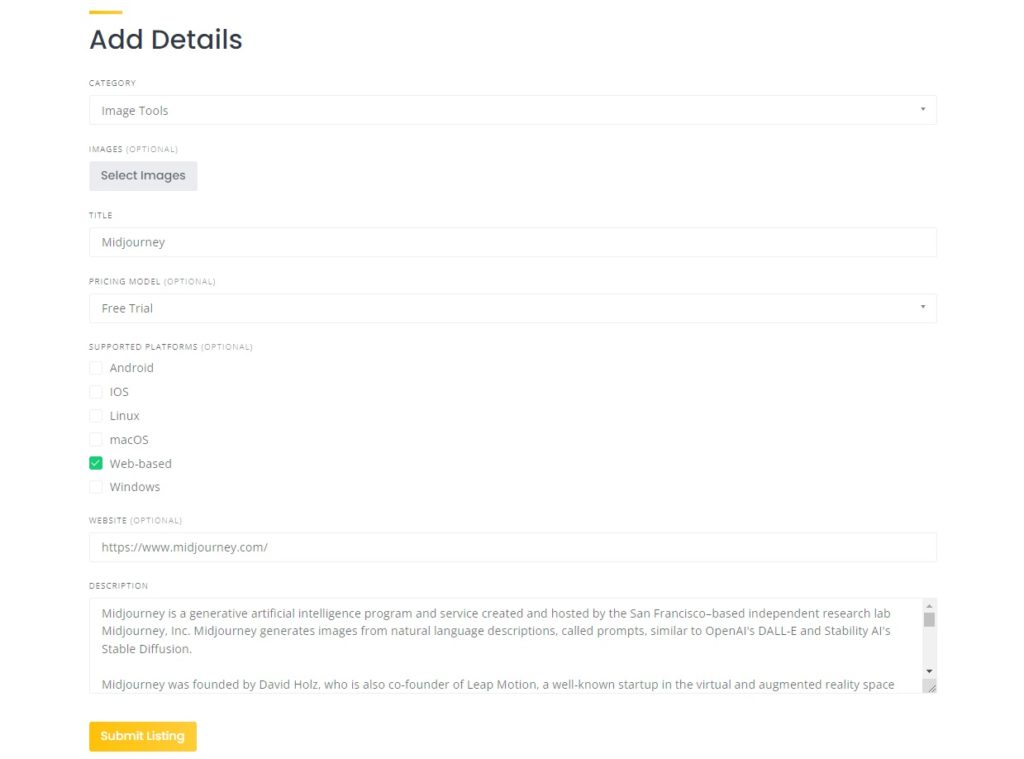
Once you’ve entered all the details, simply click the Submit Listing button. If manual moderation is enabled, you can then review and approve the listing in the Dashboard > Listings section. Finally, the listing will be added to your AI tools directory.

So, now we’d like to show how you can make money with your AI tools directory website. There are several monetization models for directory websites, and you can find all of them in our article on how to monetize a WordPress directory website, but here, we’ll focus on one of the most effective approaches.
Please note that this business model require WooCommerce, the most popular e-commerce plugin, and the HivePress Memberships extension.
You can turn your AI directory into a members-only platform by restricting access to categories, single listings, or even specific details. This creates a premium experience where users need to purchase a membership plan to unlock full access to your AI tools database.
This model works particularly well for AI directories because users often seek comprehensive information about tools, pricing comparisons, and detailed features. By offering tiered membership plans, you can provide basic access for free while reserving advanced search filters, complete tool specifications, and exclusive AI tool recommendations for paid members.
The screencast below walks you through the complete setup process, showing you how to create membership plans and configure access restrictions for your AI tools directory.
Creating an AI tools directory with WordPress is more accessible than ever, thanks to powerful plugins like HivePress and themes like ListingHive. The AI market’s explosive growth creates tremendous opportunities for well-executed directory websites.
Remember, success comes from focusing on user value first – provide genuine utility, maintain high-quality standards, and the revenue will follow. Start with a solid foundation, launch quickly, and iterate based on user feedback.
Additionally, feel free to check our article on how to create a searchable database with WordPress.
A short guide on setting up the HivePress Reviews extension.

Get your marketplace of digital assets up and running with WordPress.

Easily monetize your valuable content by creating a members-only directory.