
Increase User Engagement on WordPress Directory Website
Increase user engagement on your website with search alerts.
Build & monetize your own restaurant listing website with WordPress for free.
If you ever tried to find a great place for a meal when visiting a new city, you know how difficult it may be. You have to google a lot and check different lists of so-called “best restaurants in town” that are often embellished.
That’s where restaurant directory websites come into play. Such websites collect all the necessary information in one place, allowing website visitors to get a good idea of each restaurant, bar or cafe without the need to visit multiple websites.
In this article, we’ll explain how to create a restaurant directory website with WordPress without any coding knowledge and an enormous budget. We’ll go step-by-step from the basic installation to extending the website functionality. Additionally, we’ll show how you can successfully monetize your restaurant listing website.
So let’s dive in!
A restaurant directory is a website that allows foodies to find all the necessary information about a certain place without even leaving their homes. Probably, the most prominent example of a restaurant listing website is Zomato.
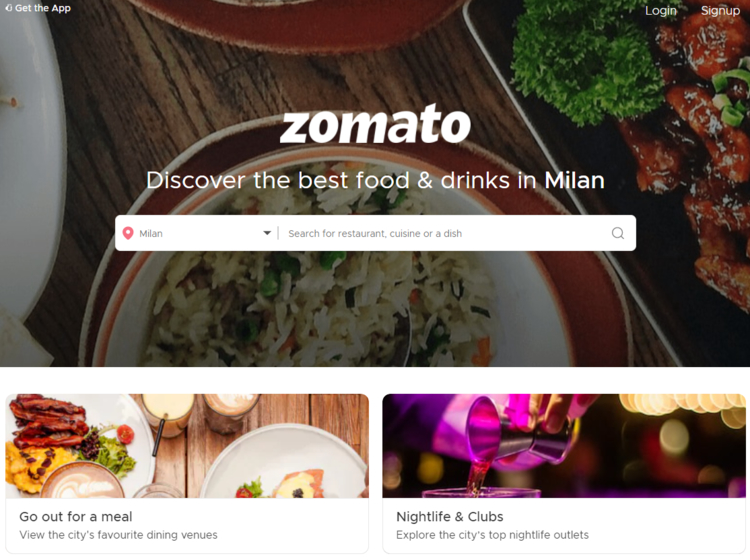
Websites like Zomato provide their visitors with tons of information, starting with the cuisine and ending with an average check. So if you are a person who likes experimenting with new places, you can find out everything you need before physically visiting the restaurant.
In the next section, we’ll briefly cover what functionality is necessary if you want to launch your own restaurant directory website.
For your business to succeed online, you need to make sure that your website is feature-packed. While there are many small details that make the difference in giving your website visitors trust and giving them extra functions, here are some crucial features that any restaurant listing site should have:
These are only some of the essential features your directory of restaurants should have. There are many other ways of improving the user experience on your website and delivering the best service. However, when just starting a website, it’s necessary to have at least the above-mentioned features.
So, if you want to create a restaurant directory website like Zomato using WordPress and start listing restaurants, cafes, bars, etc., of your city or even country, you’ll need:
When building a new website, your starting point should be coming up with an eye-catching domain name. It is the address people type into a browser in order to reach any website, like example.com.
Here are a few tips on how to choose a domain name for your future website:
Your next step is to find a reliable hosting provider for your restaurant directory website. There are tons of options on the market, so it may be a bit challenging to pick the one. That’s why we recommend using some of the popular hosting providers.
Using one of the recommended hostings lets you rest assured that your website will operate fast and smoothly. Moreover, all of them offer a 1-click WordPress installation tool that eliminates the tedious manual steps of installing WordPress.
Last but not least, you need a high-quality directory plugin that will power most of the features of your website and a lightweight directory theme.
Choosing the right plugin and a theme is probably one of the most crucial parts when it comes to launching a website with WordPress. However, since there are so many directory plugins and even more directory themes out there, it becomes difficult to choose one that suits your project the best.
So, to keep things simple, we made an overview of the:
You can check out both comparisons to get a better idea of the available options on the market. But for the sake of this tutorial, we are going to use the HivePress plugin and the ListingHive theme.
Here are some of the reasons why you may consider HivePress as a directory plugin for your restaurant listing website:
At the time of writing, ListingHive is the most popular free WordPress directory theme in the WordPress repository, and it allows you to build a listing website of any type. Moreover, it’s powered by HivePress, so no compatibility issues occur.
It’s one of the most frequent questions people ask when starting their website.
Often it may be tricky to estimate everything as it depends on your niche and goals you’ve set for your business. But here is a rough calculation of how much do you need to create a directory of restaurants with WordPress:
So generally, if you are building a WordPress website on your own, it may cost you about $150 – $250 to get started. However, if you are going to use the free WordPress directory theme, you can get your website up and running for about $50 – $150.
Alright, now let’s move to the tutorial part of this article, and start with the ListingHive theme installation.
The first step is to install the theme for your restaurant directory. You can install ListingHive directly from the WordPress dashboard like any other free theme. Simply go to the Appearance > Themes section and click “Add New”. Now find it with the search bar, install it, and finally activate the theme. Once activated you’ll get a suggestion to install the HivePress plugin. We recommend installing and activating it to enable the core functionality of your directory.
Also, if you have any troubles with installing ListingHive – you may follow the screencast that shows the whole process step by step.
That’s it, you’ve made the first step towards building your own restaurant listing website. Let’s move to the next one.
Now you need to split the directory into categories to make it easier for users to browse restaurant listings. Let’s imagine you want to add the “Breakfasts” category. In order to do this, navigate to the Listings > Categories section. Then specify the name of the category, fill in the description field if necessary, and don’t forget to upload the category image. Finally, just click the “Add Category” button to make this category available on the front-end.
Now let’s add some more categories in the same way, for example, “Lunches” and “Evening Meals”. Keep in mind that you can create as many categories as you need. It may be different cuisines or types of meals as in our example.

Once you are done with categories it’s time to add some basic listing fields. You can do it in the Listings > Attributes section, just click on the “Add New” button and fill in the fields depending on the type of attribute you want to add. For example, let’s add an “Average Cost” attribute. To get a better understanding of how it works let’s go over each section:
$%value% format to add the currency symbol before the value.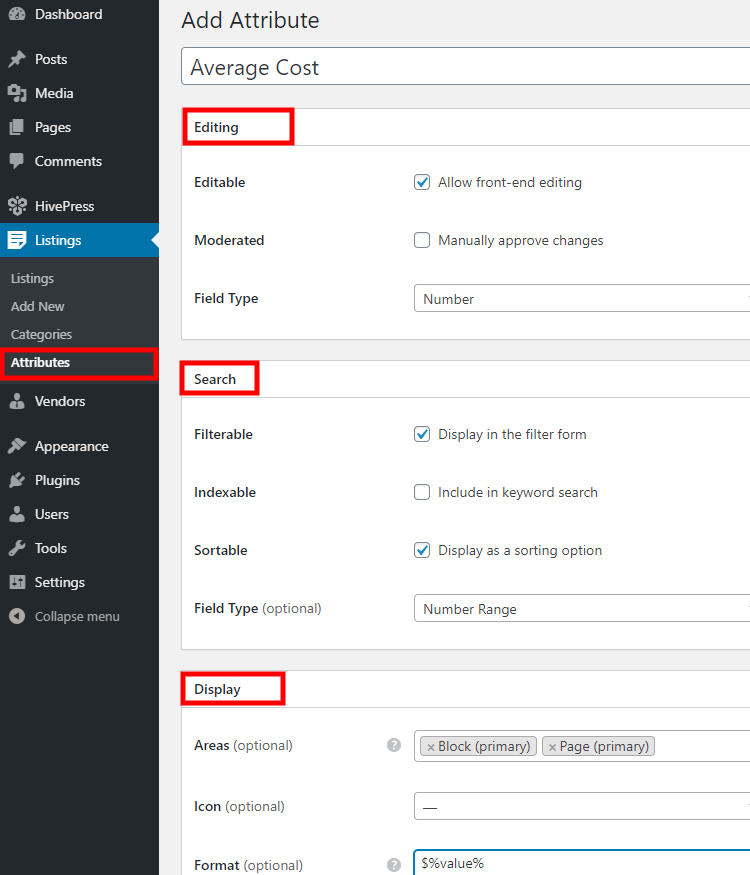
That’s it, now you can add as many attributes as you want in the same way. For example, it may be a “Delivery” one or “Outdoor Sitting” or “Cuisine Type” – this depends on your restaurant directory niche and requirements. But don’t forget to make them searchable so users can narrow down the search and find exactly what they were looking for.
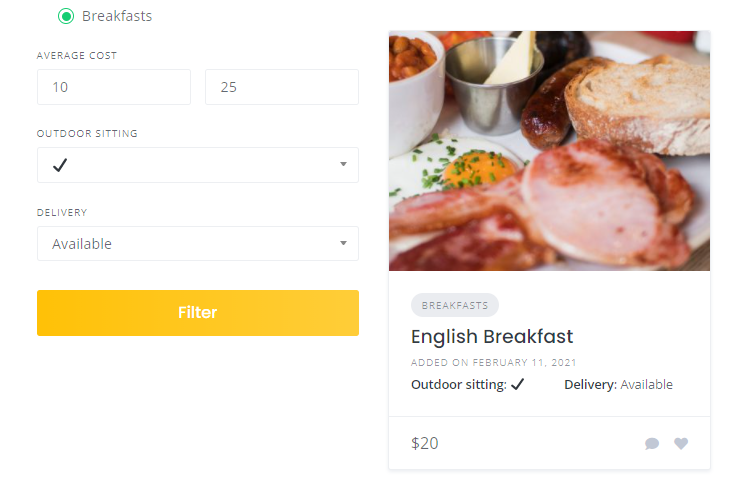
Now, let’s add a new listing. For example, let’s add the first listing to the Breakfasts category and name it “English Breakfast”. However, let’s do it from the front-end to get a better understanding of how it works for users. To do this, go to your website, click the “Add Listing” button and select a certain category.
Upload the listing image, fill in the listing title (e.g., “English Breakfast”), description and other required fields. Once you complete the listing submission, you’ll be redirected to the listing page. If the listing moderation is enabled in HivePress > Settings > Listings > Submission section, the listing has to be approved by the admin before it appears on the front-end.
Additionally, we recommend going through all the HivePress settings in the HivePress > Settings section just to make sure that your website will function in the same way as you expect it to.
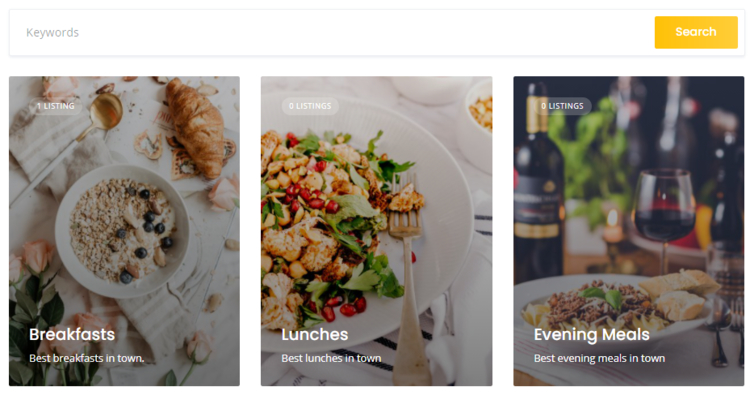
Now it’s time to add and set up a homepage for your restaurant directory. Since HivePress is integrated with the WordPress block editor, it’s really easy to create and edit any layouts. For example, let’s add a new page to display the search bar and the categories. To do that, go to the Pages section in the WP dashboard and click the “Add New” button.
Next, you can fill in the page title (e.g., “Home”) and start adding the layout blocks. Simply click on the “Plus” icon and select the “Listing Search Form” block. That’s it, now there’s a search bar on the page. In the same way, you can add any of the directory-specific blocks, for example, a “Listing Categories” block that displays the restaurant listing categories.
The finishing touch is to navigate to the Settings > Reading section and set this newly created page as the front page. Now you can check the homepage and the new blocks you added.
The next step is to enhance your website with extensions. In the previous steps, you’ve created a restaurant directory and set up its basic functionality but now it’s time to extend it a little bit. There are many different features you may add to your website to make it great instead of just good.
For example, you may install the Geolocation extension that allows users to search listings by location. It’s vital for the restaurant directory to have a location search, so foodies can easily reach the place that they found on your website. Another useful extension is Reviews, which allows visitors to rate and review each restaurant. It’s an essential feature for any successful restaurant directory because users always check the place’s rating before visiting it.
One more necessary feature for a directory is to show users when the place is open for visitors. You can enable this functionality with a few clicks by installing the Opening Hours extension.
As you can see, there are lots of options of how to extend the functionality of a restaurant directory and make it more user-friendly. All the top-level directories, like Yelp or Zomato, have the features mentioned above. Remember that there’s always room for improving the usability of your website.
The following screencast shows how to install extensions step by step. Also, if you need to install any of the premium extensions, you check the screencast on how to do it manually.
Finally, we are going to talk about the revenue and how to make money with the restaurant directory. The first thing you should bear in mind is that monetization is possible only with decent traffic on your website. So, first of all, you should take care of the user experience and the quality of the content. Only after you gain enough credibility and build a wide audience, it’s time to think about monetization.
There are several ways to monetize a directory website but we’ll cover three that are the most popular for a restaurant directory:
The first way is to let businesses claim their listings for a fee. For example, you can list restaurants by yourself and then get in touch with the owners of those restaurants and offer to claim the listings. They will be able to edit their listing details, view statistics, and reply to customer messages and reviews.
Besides being a highly profitable yet simple monetization model, it’s also a great method to keep your directory up-to-date. The business owners will be updating their listing by themself so the correct and relevant info will always be displayed on your website.
With HivePress, you can do it by using the Claim Listings extension that is created especially for this purpose. Once you install it you can start charging users for claiming listings.
Another great way to monetize a restaurant directory is to make certain listings featured for an additional fee. For example, some restaurant owners may want to have their listings at the top of the search results on your website. If you have a sought-after directory, then many owners are probably willing to stand their listings out from the hundreds of similar ones.
Here you may find helpful the Memberships extension that allows you to mark any listing featured and as a result, it’ll appear at the top of search results.
One more killer option to make money is by hosting ads in your restaurant directory. You can simply integrate your website with Google AdSense and earn money by displaying ads. In this case, your revenue will depend on the number of clicks on those ads.
However, beware of displaying too many ads in your directory. It may negatively affect the experience your users receive, and too many ads will make your site look unprofessional and as a result, users are less likely to return to it.
That’s it! As you can see, creating a restaurant directory website with WordPress is as simple as following the 6 steps discussed before. After you build a restaurant directory you should focus on driving traffic to your website. Once there is a decent amount of traffic you’ll be able to turn your directory into a profitable business in several different ways.
So, if you decided to build a restaurant directory website using WordPress, keep in mind that you can easily create it with the ListingHive theme and the HivePress plugin. They are both free, lightweight and suitable for building any type of directory and listing websites.
Additionally, you can check our overview of the most common mistakes to avoid when building a WordPress listing website.
Increase user engagement on your website with search alerts.

A quick tutorial on how to create sports directory website.

A short tutorial on how to create a pet services website with WordPress.