Create a Vacation Rental Website with WordPress [8 Steps]
A complete walkthrough on launching a property rental website like Vrbo.
Increase user engagement on your website with search alerts.

User engagement is highly correlated with overall website profitability. More customer interactions lead buyers to find your brand more valuable and provide you with customer insights. So companies should focus on effective ways to increase user engagement for their businesses, and the search alerts feature is one of such ways.
The search alerts feature saves valuable research time for your users and can be set up to provide automatic e-mail notifications whenever new search results become available. Thus your customers may come back to your website if there are new offers that match their search criteria, and eventually, it may increase your conversion rates.
In this short walkthrough, we’ll explain how to increase user engagement on your WordPress directory or marketplace website with the search alerts function.
In order to show you how everything works, in this tutorial, we’ll use HivePress, a multipurpose WordPress directory plugin and its default ListingHive theme. They are both free, lightweight and suitable for building any type of WordPress directory website. We’ll also combine them with the Search Alerts extension, which is fully compatible with any HivePress theme.
So let’s get started!
If you haven’t built your directory website yet, then the starting point for you is to install ListingHive. However, if you already have an active directory or marketplace website, you can skip the first step and move on to the next one.
Feel free to check our walkthrough on how to create a directory website for free using WordPress.
In order to install a free WordPress theme, go to the Appearance > Themes section and look for it using the search bar. Then click on the Install button and proceed by activating the theme. Upon activation, you’ll receive a suggestion to install the HivePress plugin. It’s an essential plugin for your directory website since it powers most of the core directory features. Simply follow the recommended link to install and activate HivePress.
For the sake of this tutorial, we’ll also import the ListingHive demo content to show you how to use search alerts with existing listings. First of all, you need to install the demo import plugin by going to the Plugins > Add New section. Then simply type “one click demo import” in the search field to find and install the plugin.
Now go to the Appearance > Import Demo Data page and upload the demo content files. Finally, click on the Import button. After the import is successfully finished, you should get the same content and layout as on the ListingHive demo. You can check it by visiting your website.
If you have any issues with importing demo files, simply follow the screencast below.
Okay, now we have a fully organized directory website and can move to the next step in order to set up the search alerts feature on your website.
Firstly, you need to install the Search Alerts extension. In order to do that, navigate to the Plugins > Add New section one more time and click on the Upload Plugin button. Then select the extension ZIP file to upload and continue with installing and activating the extension.
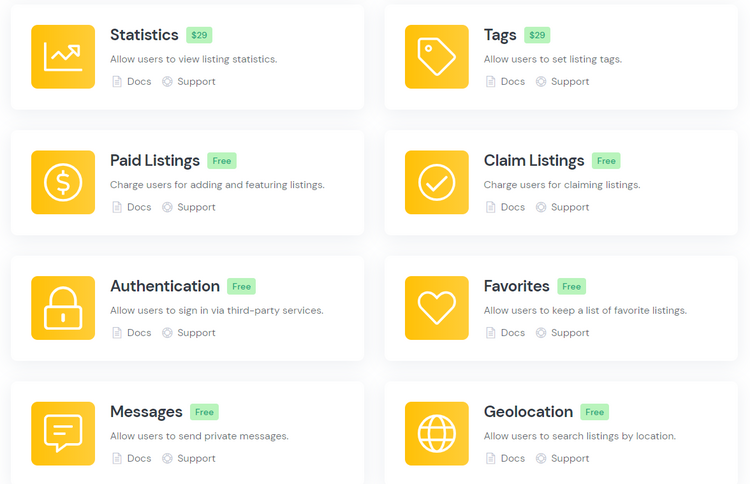
That’s it! Now you have everything necessary for enabling search alerts on your website. But before moving on, you can check the other HivePress extensions that you can install to enhance your website with some extra features. To view the whole list of available add-ons, go to the HivePress > Extensions section.

Once you install all the prerequisites, let’s try out search alerts with some listings.
In order to check the whole workflow of setting a search alert as a regular user and getting notified about new listings that match the search criteria, you need to sign out and register a new account. Simply log out from your admin account and go to the Sign in > Register section, then fill in all the required fields for registering a new user.
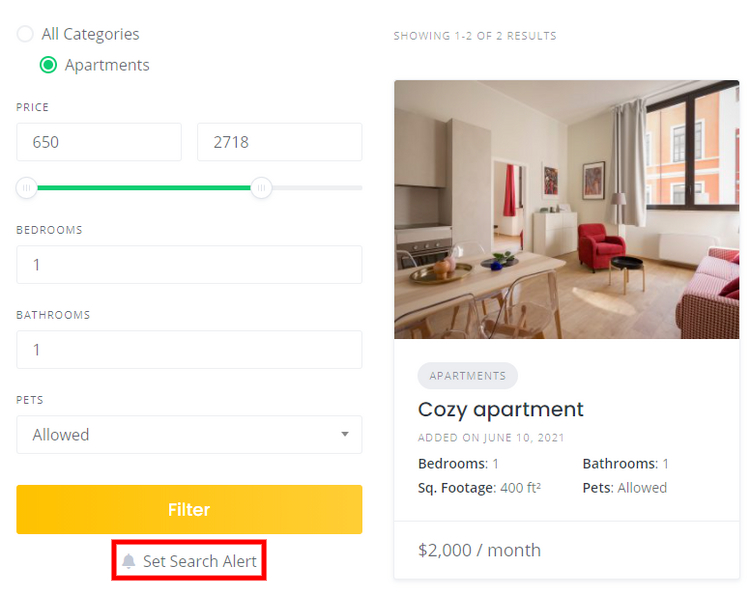
When you finish the registration, go to the Listings page. If you’re using the ListingHive demo content on your website, try searching for some real estate listings. In case you are running a website with a different niche, simply look for any listing on your directory using one of the available search filters.
For example, let’s search for an apartment with one bedroom, one bathroom and without any pet restrictions. You’ll notice that the ListingHive demo content goes with only one offer that fits our requirements, so let’s set a search alert to get notified about new listings that match these search criteria. To set an alert, click on the 🔔 sign.

Once you set a search alert, you can manage it in the My Account > Searches section.

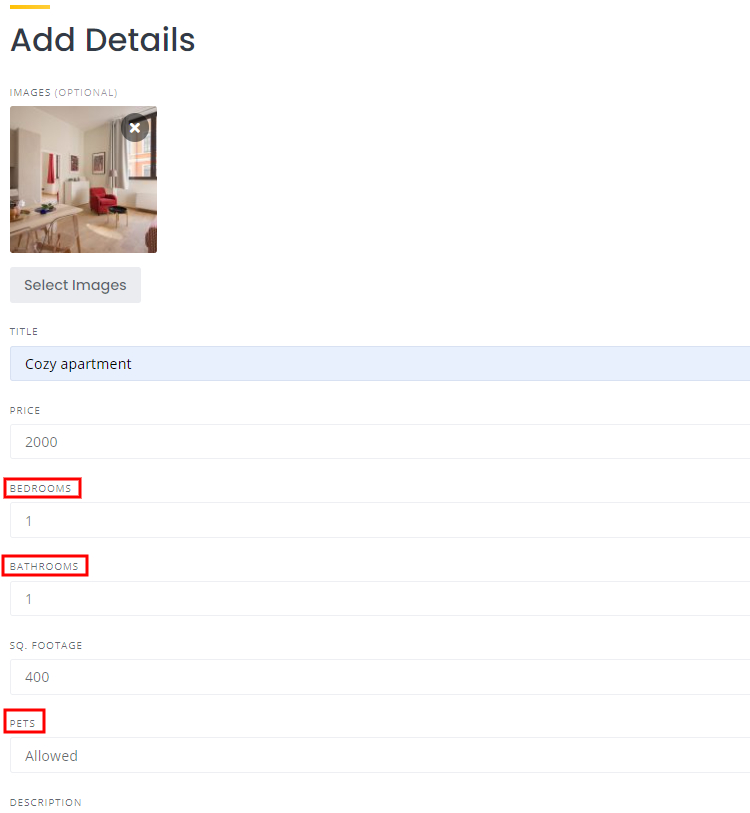
After setting an alert as a regular user, let’s switch back to the admin account and try adding a new listing with the matching details to check how users are gonna be notified about it. To do that, sign in as an admin and click on the Add Listing button, then select the “Apartments” category.
You’ll be taken to the listing submission form, where you can upload the listing image, enter the listing title, set the price, indicate the number of bedrooms and bathrooms, describe the listing, and so on. Let’s add an apartment with one bedroom, one bathroom and mark it pet-friendly. When you fill in the required fields, click on the Submit Listing button.

That’s it! Now all the users who set a search alert for an apartment with these search criteria will be notified via email. Let’s check the user’s inbox of our recently created account and look for an email notification.

As you can see, there’s a new email with a suggestion to check new apartments. Simply follow the link to check new offers.
That’s all for today! So, if you want to enhance your directory or marketplace functionality with extra features and improve user experience, you can easily do it with the Search Alerts extension. Keep in mind that the search alerts feature may be an enticing hook for your customers to come back and check new listings on your website. It’s not only a handy feature that improves UX on your website, but it also increases user engagement which may lead to better conversion rates.
If you want to extend the functionality of your directory or marketplace website, you can check the collection of HivePress extensions. There are more than a dozen different add-ons, so you can pick and install those that you need according to your website niche and requirements.
Additionally, you may want to check our overviews of the:
A complete walkthrough on launching a property rental website like Vrbo.
Easily monetize your valuable content by creating a members-only directory.
Build & monetize your own restaurant listing website with WordPress for free.


