
How to Create a Booking Website Easily [5 Steps]
A short tutorial on how to create a booking website without any coding skills.
A quick guide on building your own stock media marketplace with WordPress.

Our daily digital experience is filled with different media. Images, videos, or audio have become an integral part of it, so everyone, from web designers to bloggers, is constantly searching for high-quality stock media. That’s why in this tutorial, we’ll show you how to create your own stock media website using WordPress. We’ll walk you through the whole process of how to launch your marketplace and show you how to monetize it successfully.
Without any further ado, let’s get started!
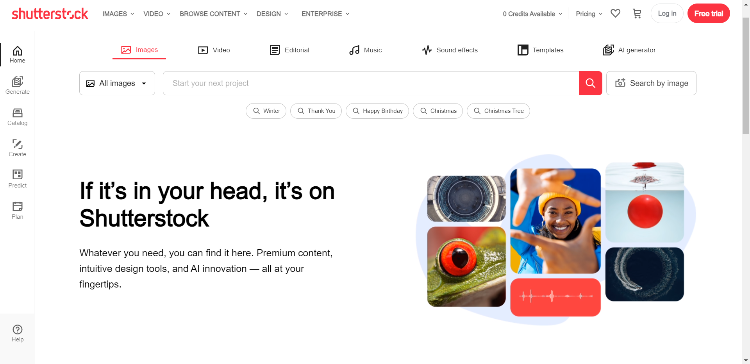
A stock media website is an online platform where creators can showcase and sell various digital assets such as images, videos, 3D models, textures, etc. These platforms serve as a one-stop shop, enabling users to get the ideal digital elements for their projects. A well-known example of such a website is Shutterstock.
To create a stock media website, you’ll need the following prerequisites:
For the sake of this tutorial, we’ll use TaskHive, an all-in-one digital marketplace WordPress theme, and HivePress, a free multipurpose WordPress plugin.
Now, let’s move to the tutorial part of this article. By following these steps, you’ll be able to create your stock media website in next to no time. Let’s jump in. Our starting point is the installation of the theme and recommended plugins.
To install the theme, go to the Appearance > Themes > Add New > Upload Theme page in your WordPress Dashboard to upload the TaskHive theme’s ZIP file. Then install and activate it.
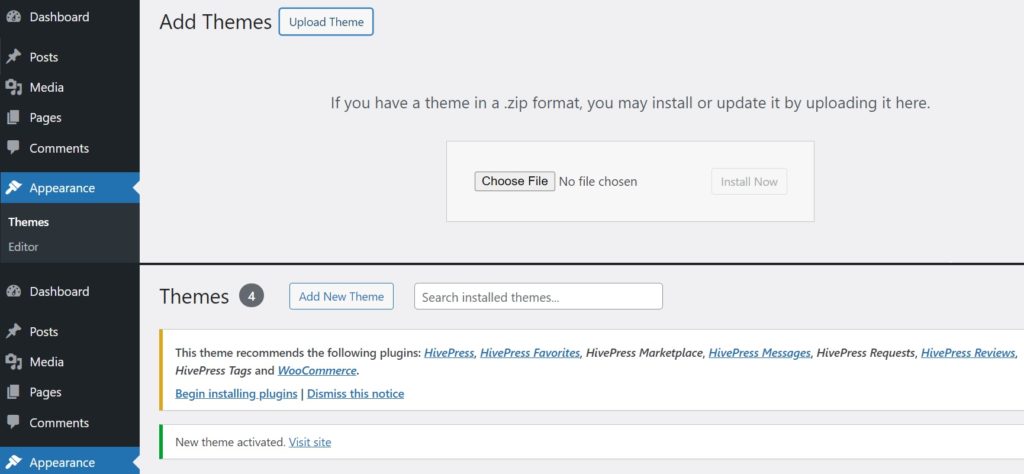
After activating the theme, you need to install the recommended plugins, including HivePress, which will handle most of the website features, and WooCommerce, which will add the necessary e-commerce functionality to your site.
With all the essential elements, we can move on.
The next step is to create listing categories for your stock media website so users can browse listings effortlessly. Let’s add some common categories like Photos, Videos, Illustrations, Graphics, 3D Models, and Textures. To do this, head to the Listings > Categories section. Here, you can define category names, provide descriptions, select a parent category, and upload fitting category images. Finally, click on the Add Category button.
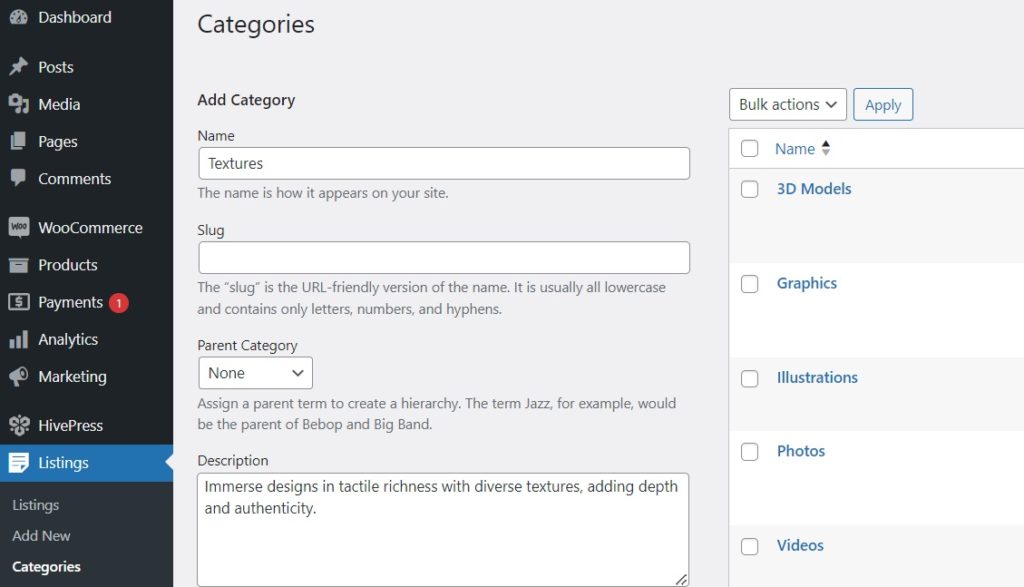
Note that you can add as many categories as you need by following the same steps.
After adding categories, the next important step is creating custom listing fields, which allow users to describe listings in more detail. Since HivePress has no hard-coded fields, you are able to create as many different fields and search filters for your stock media website as you want.
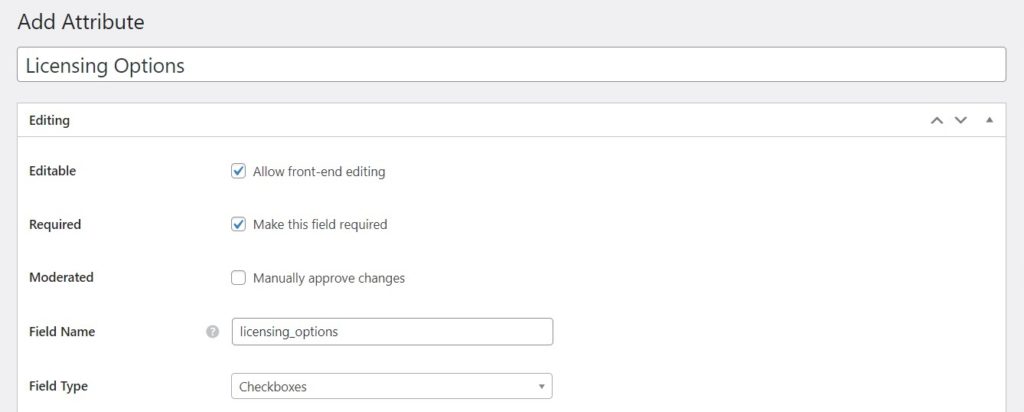
To add your first custom field, go to the Listings > Attributes section and click Add New. Let’s create a “Licensing Options” field as an example. Begin by entering a name and enabling front-end editing in the Editing section. Also, make this field required and choose the “Checkboxes” field type.
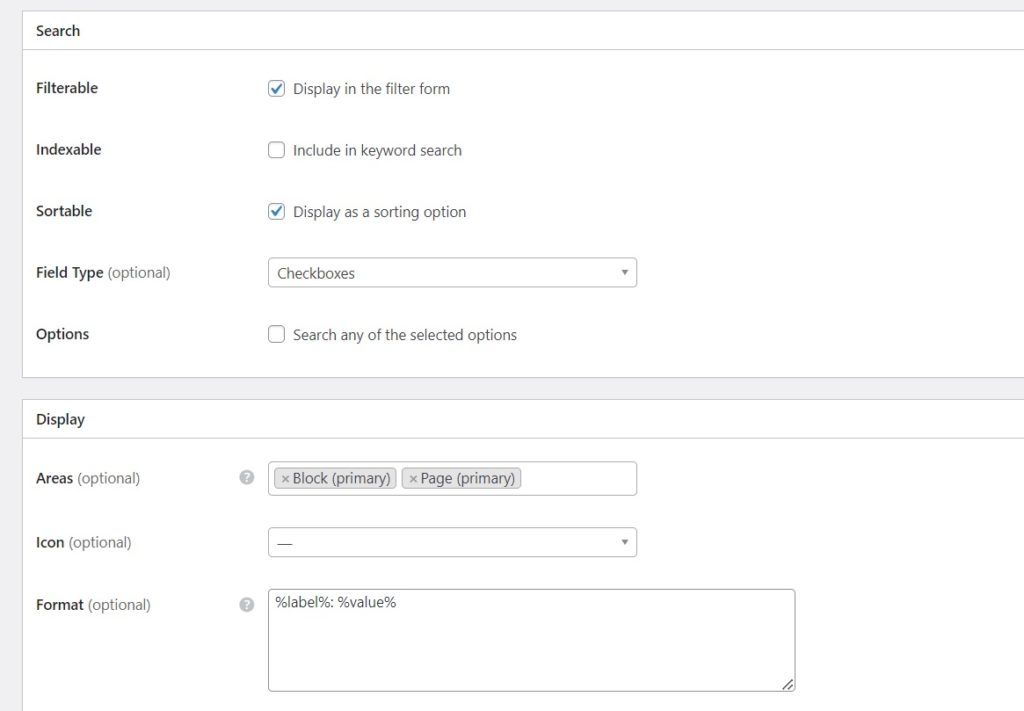
In the Search section, you can adjust the field’s search settings and turn this field into a search filter so that people can filter and sort listings based on the licensing options. Let’s make it “Filterable” and “Sortable”, and choose the “Checkboxes” search field type.
The Display settings define how the field appears on pages. In our case, let’s go for Block (primary) and Page (primary) and use a %label%: %value% format. You can discover all available tokens through the question mark symbol tooltip.
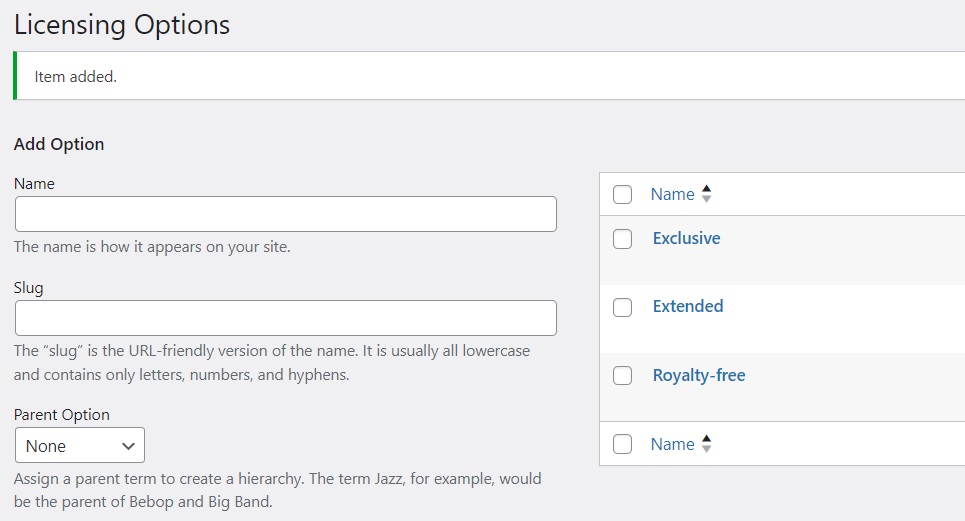
To finish the process, press Publish. Now you have to add available licensing options. To do that, click on the Edit Options button. For example, you can add “Royalty-free,” “Extended,” and “Exclusive” options.
We created this field as an example, but you can add other various fields depending on the niche of your stock media website.
You can also add fields to vendors’ profiles if you wish – HivePress allows you to create vendor profile fields, too. This way, vendors will be able to tell more information about themselves during registration, whereas users will be able to review this info in vendor profiles. To add a vendor field, go to WP Dashboard > Vendors > Attributes section and click Add New. For instance, let’s create the “Portfolio” field.
The process is similar to listing fields, but here, we’ll choose the “Attachment” field type to let creators upload their portfolios.

In the Display section, we’ll use this display format: %label%: %value%.

Once you are done, simply click on the Publish button. Similarly, you can add more custom fields to vendor profiles.
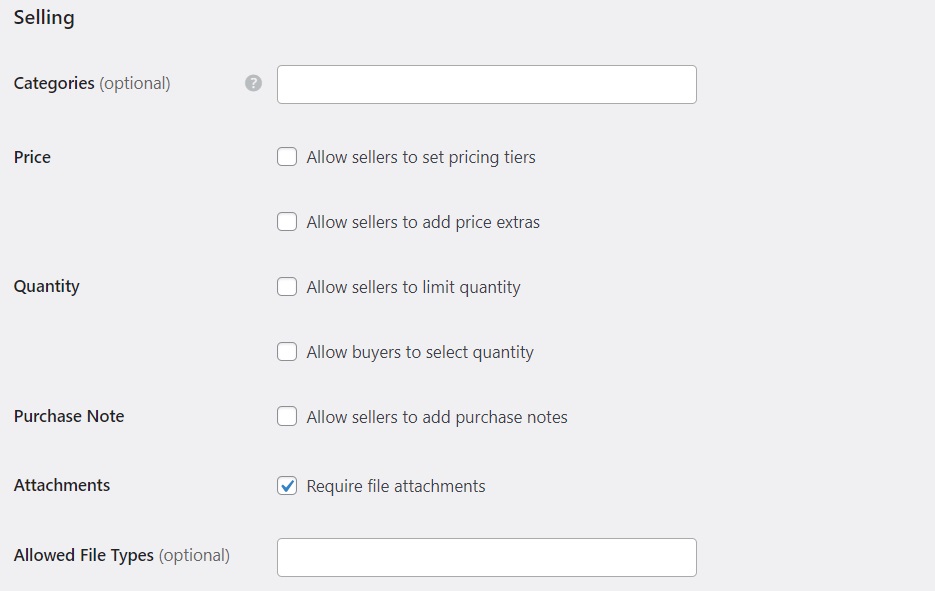
Now, you need to visit the WP Dashboard > HivePress > Settings section and go through all settings to ensure the smooth operation of your stock media marketplace. First of all, it’s important to let users download the purchased media, which is why you should enable this feature in the Settings section. To do this, enable the Attachments feature in the Listings tab. Besides that, you can allow sellers to set pricing tiers, which lets them offer different packages at varying prices, or price extras, which lets them add extra charges for special services.
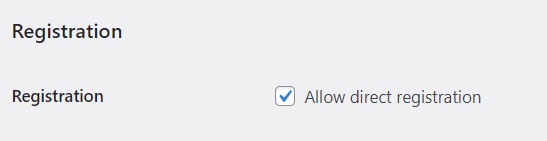
Also, by default, in HivePress, you must add at least one listing to become a vendor. However, you can change that by allowing direct vendor registration in the Vendors tab. In that case, website visitors will be able to register on your platform as vendors without even adding listings.
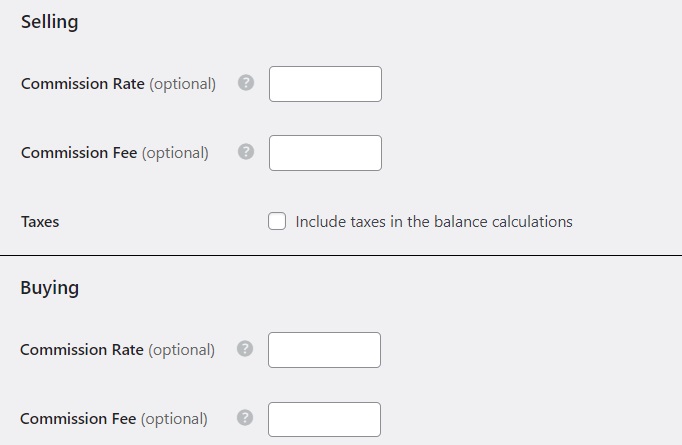
Additionally, if you plan to monetize your platform, you can set the selling and buying commission rates and fees in the Vendors and Users tabs. This way, the commission will be included in every purchase made on your website. We’ll talk a bit more about monetization later in this article.
We recommend checking out all the other settings tabs in the WP Dashboard > HivePress > Settings section to ensure that your stock media website works in the way you want.
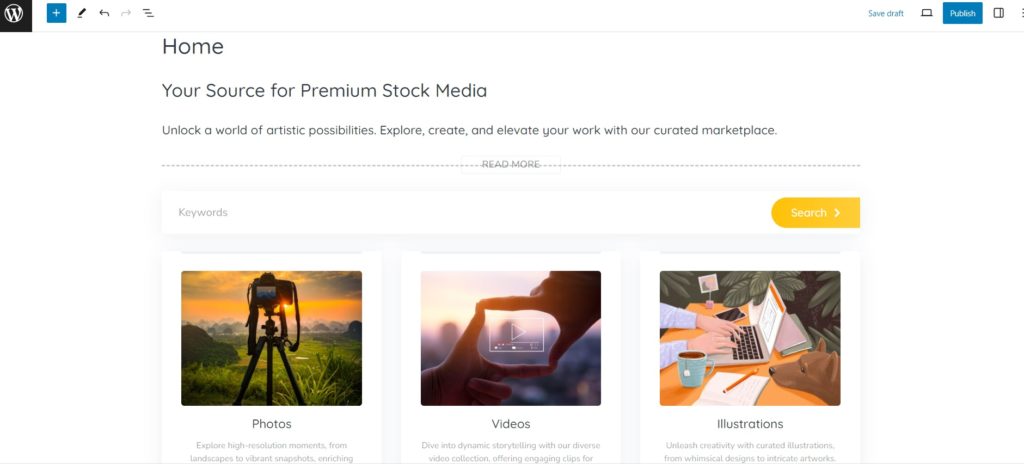
Next, you need to create a homepage for your stock media marketplace, which should effectively highlight the range of assets available. Go to Dashboard > Pages, click Add New, and write the page title, like “Home”. Then, you can start adding layout blocks by clicking the Plus icon and choosing different blocks, such as “Listing Search Form” or “Categories”. Also, in the right column, you can customize each block (e.g., you can choose the number of listings displayed). After setting everything up, click Publish.
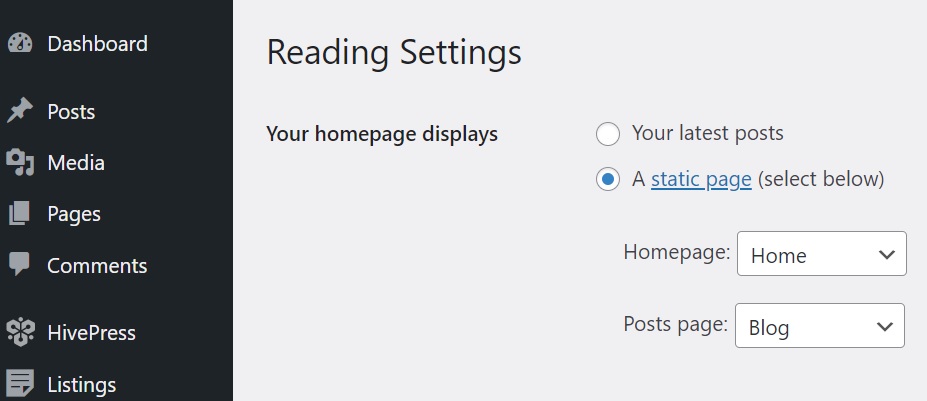
To make this newly created page your website’s homepage, go to WP Dashboard > Settings > Reading and select your page from the drop-down list.
Now, your website has a new homepage. However, each website should have a unique look and feel, so you have to customize it to your liking. To customize the styles of your stock media website, please check the video below:
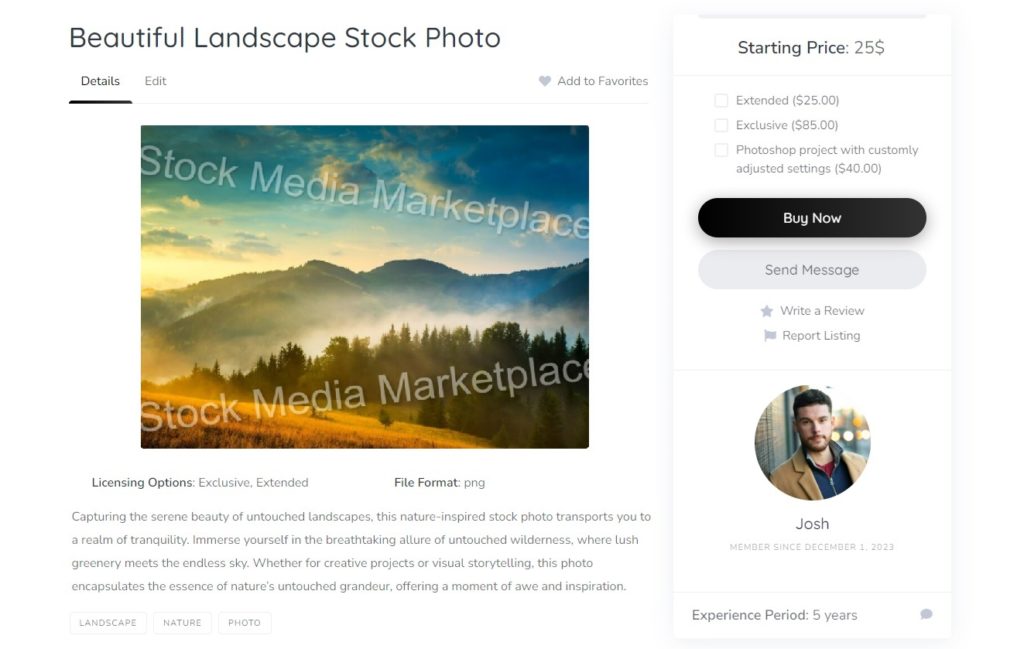
Finally, it’s vital to check how your stock media marketplace works from a user’s point of view. You, as an admin, can add listings via the backend in the Listings > Add New section. But to get a better understanding of how everything works for users, let’s add the first listing via frontend. Visit your website homepage and click on the List a Service button. On the listing submission page, you have to fill out all the necessary fields, including those that you added in previous steps.
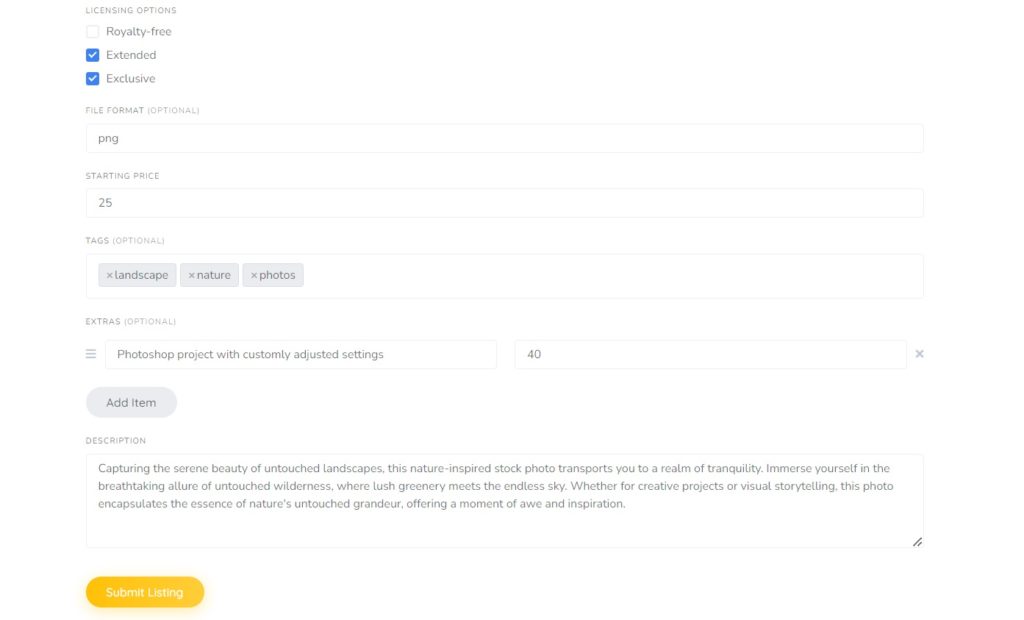
Click the Submit Listing button when finished. Please note that if moderation is enabled, each new listing goes through a review process. As an admin, you can approve or reject listings in the WP Dashboard > Listings section. Once approved, listings become visible on the site.
As your stock media marketplace starts to gain sufficient traffic, the idea of monetization naturally comes to the forefront. Consider the following strategies to generate revenue from your platform:
You can use each strategy separately or use several at once. Also, we recommend checking our article on how to monetize a service marketplace to get a better idea of how to make money with your website.
That wraps up our guide! As you can see, building a stock media website with WordPress can be easy and without any coding skills. Armed with the right tools like HivePress and TaskHive, your marketplace has the potential to become a successful platform one day. Good luck!
Also, feel free to check out our article about the most common mistakes people make when starting a new website with WordPress.
A short tutorial on how to create a booking website without any coding skills.

Learn how to create a fully-featured freelance platform with WordPress.
Build & monetize your own restaurant listing website with WordPress for free.