
How To Create a Stock Media Website With WordPress [7 Steps]
A quick guide on building your own stock media marketplace with WordPress.
A quick guide on how to create a tour booking website using RentalHive theme.

Tours are arguably the most effective way to get a complete picture of the place you are visiting. They can definitely tell you a lot more than a Wikipedia article. However, it’s better to think of everything in advance so that you can spend your trip exploring and enjoying rather than trying to do everything in the last seconds, right? That’s why tours are so popular these days, and many people are using reliable tour booking websites.
In this tutorial, we’ll show you how to create a tour booking website with WordPress hassle-free. So, pack your virtual bags, and let’s get going!
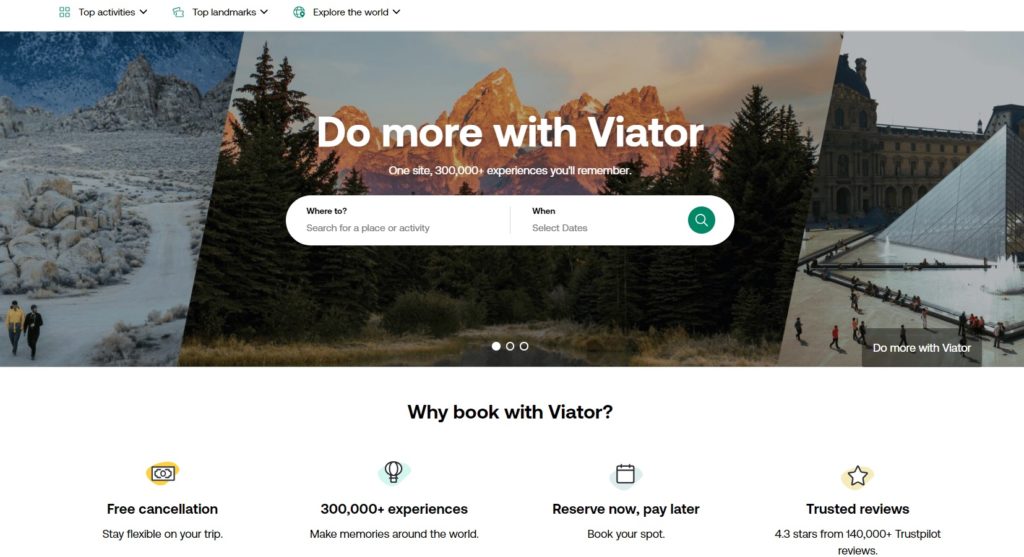
Generally, a tour booking website is an online platform that helps travelers find and book tours and activities in various destinations. Such sites act as intermediaries, connecting travelers with local tour operators or guides who offer a wide range of experiences. Popular examples include Viator, GetYourGuide, and Expedia.
There are plenty of different tour types. Not every traveler would like to simply wander through the city, so options like wildlife, adventure, or culinary tours exist.
So, we recommend starting with a niche-oriented or location-oriented tour booking website instead of creating an all-in-one platform. It’s better to focus on a specific niche, like wildlife tours or provide tours solely in one city or region to narrow your audience.
Okay, now let’s discuss the tools required to build a tour booking website with WordPress. Before starting the creation process, make sure that you have the following prerequisites:
For the sake of this tutorial, we’ll use RentalHive, a powerful booking WordPress theme and the free HivePress plugin that will power booking and marketplace features on your website.
Now, let’s dive into the tutorial part and explore the step-by-step process of building a WordPress tour booking website.
Firstly, we need to install the RentalHive theme. Go to the Appearance > Themes > Add New > Upload Theme page to do this. Upload the theme ZIP file, install it, and then activate it.
Once RentalHive is activated, it’s necessary to install the recommended plugins, including HivePress. Simply follow the suggested link to install and activate them.

Additionally, you can check out HivePress add-ons in the Dashboard > HivePress > Extensions section. For example, for a tour booking website, you may want to install:
With everything in place, you can proceed to the next step.
The next step is to add listing categories to make your website easier to navigate and find the experiences they want.
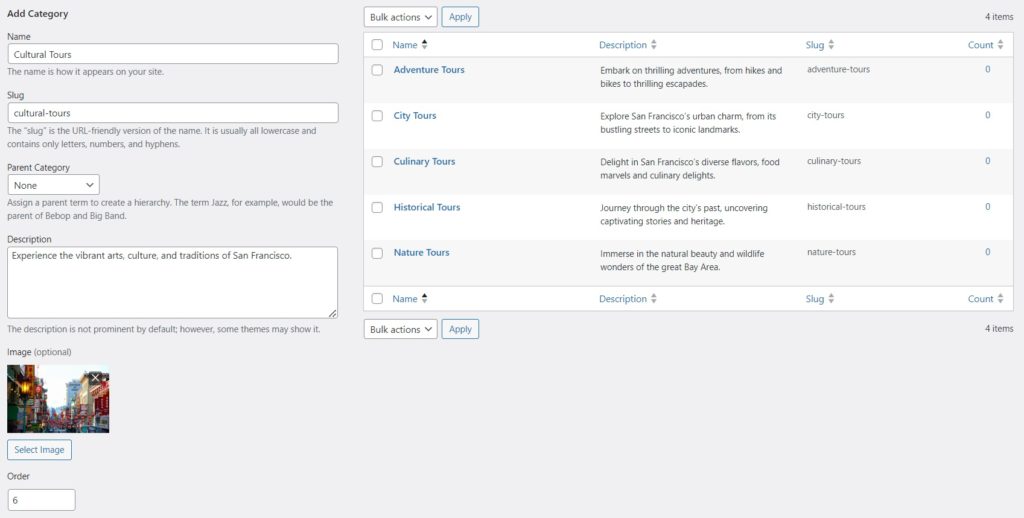
Go to Listings > Categories. Within this section, you can create categories and sub-categories. For instance, let’s add the following categories: “City Tours”, “Historical Tours”, “Culinary Tours”, “Nature Tours”, “Adventure Tours”, and “Cultural Tours”.
Start by naming a category. Then, provide a brief description and, if necessary, define a parent category to create a hierarchical structure. Also, you can upload a suitable category image. Once all the details are in place, simply click the Add Category button.
Remember that you can add as many categories and subcategories as you need for your WordPress tour booking website.
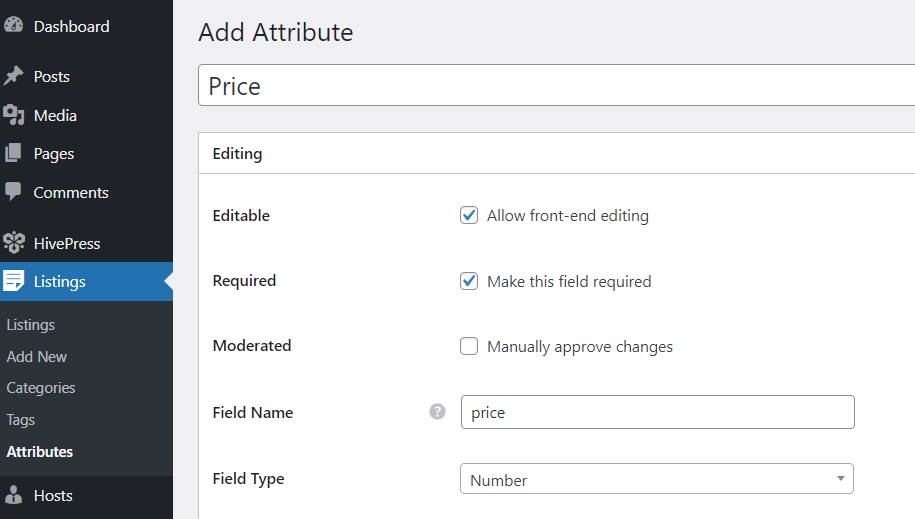
Once you add listing categories, you have to create some custom listing fields. Since HivePress has no hard-coded fields, you can create different fields & search filters according to your website needs. For example, let’s add the “Price” field to show the price of each tour.
Navigate to the Listings > Attributes section and click Add New. Set a name, enable front-end editing so that users can specify prices when creating listings, and make this field required. Also, for the “Price” field, it’s better to use the “Number” field type.
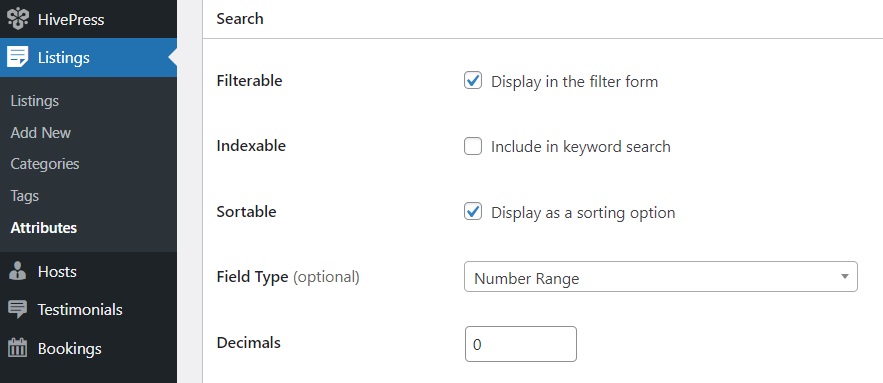
In the Search section, you can allow users to search and filter listings by the custom field value (i.e., filter by price). To do that, simply mark it as filterable and sortable. Also, it’s better to set the “Number Range” field type here.
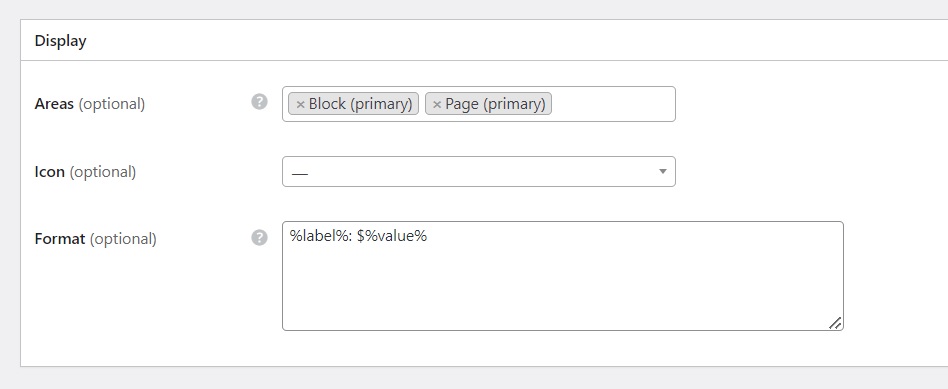
Finally, in the Display section, you can specify where this field should appear. For example, you can select Block (primary) and Page (primary) as the placement areas. Then, you have to choose a display format for your field. You can use this one %label%: $%value%.
When finished, click on the Publish button.
Keep in mind that you can create as many custom fields as you need by following the same steps. For example, you can add fields like “Duration”, “Spoken Languages”, “Special Gear/requirements”, etc.
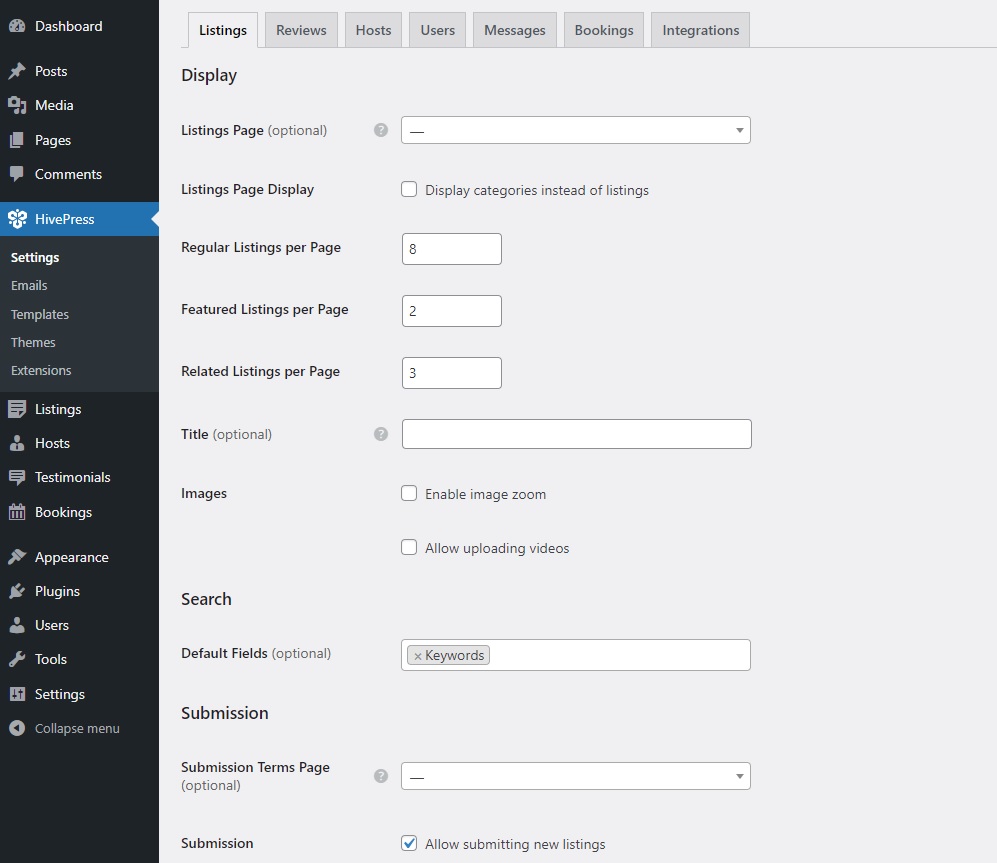
Now, you need to adjust the settings in the HivePress > Settings section to ensure your tour booking website is set up and functions properly. It’s better to go through all the settings sections, but there are a few that we’d like to emphasize.
In the Listings tab, you can allow or restrict user listing submissions by ticking the Submission box (it depends whether you want to create a single-vendor website or a marketplace where others can add tours).
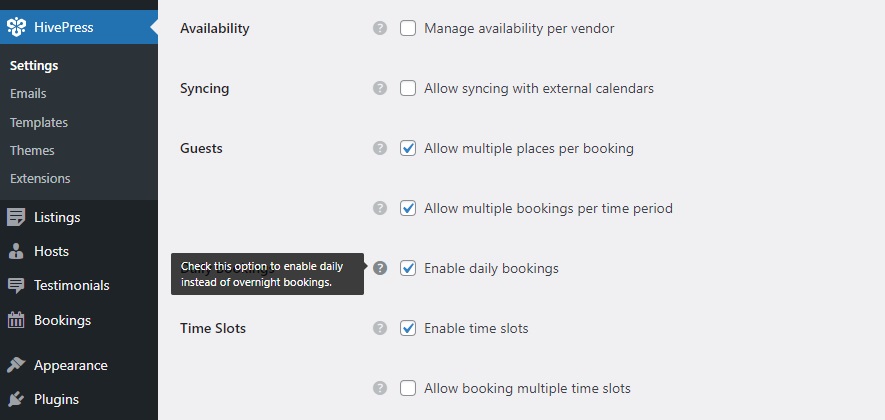
In the Bookings tab, you can allow multiple bookings by ticking the checkbox in the Guests section, enabling reservations until the places are filled. In that case, you’ll be able to set how many persons can participate in one tour.
Also, there’s an option to allow time-based bookings instead of the daily & nightly ones. It’s a useful feature if you want to offer tours that last not the whole day.
With everything set up, you can move on to the homepage creation.
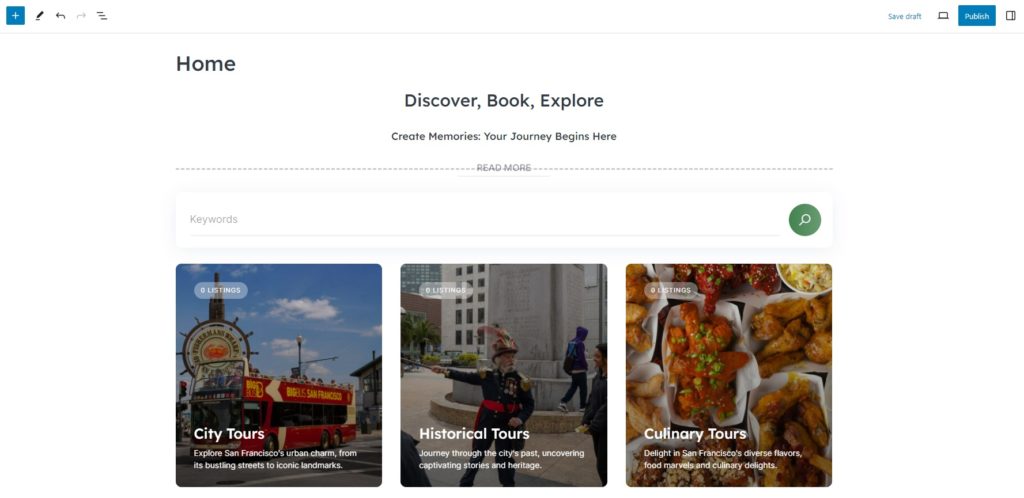
An attractive homepage is vital for your successful online presence. To create a new page, go to Dashboard > Pages and click Add New. Write a page title like “Home” and start adding blocks.
For instance, you can add a listing search form by clicking on the “Plus” icon. Similarly, you can add your categories by adding the Listing Categories block. To find other HivePress blocks, type “HivePress” in the search bar and add the necessary ones. Once done, click Publish.
To set this newly created page as the homepage, go to Dashboard > Settings > Reading, and choose it from the drop-down menu, then save the changes.
That’s it! Now that you’ve laid the groundwork, you can give your page a unique look and feel. For detailed instructions on customization, watch the video tutorial below:
It’s time to add the first tour listing and check how it works. As a website admin, you can add listings either from the back end through the Listings > Add New section or from the front end using the listing form. Let’s see how to add a new listing from the front end to check the future user experience.
Visit your website and click the List a Property button. Then, fill in all the required details, including custom fields added earlier.

There is also a “Booking requests” option at the end of the listing form, which you can enable in order to accept each booking request manually. When you complete the listing form, hit the Submit Listing button.
If you have moderation enabled, all new listings will go through a review process. The admin can approve or reject them in the Dashboard > Listings section. Once approved, the listing will be visible on the site.
What about the booking process? Let’s check it as well.
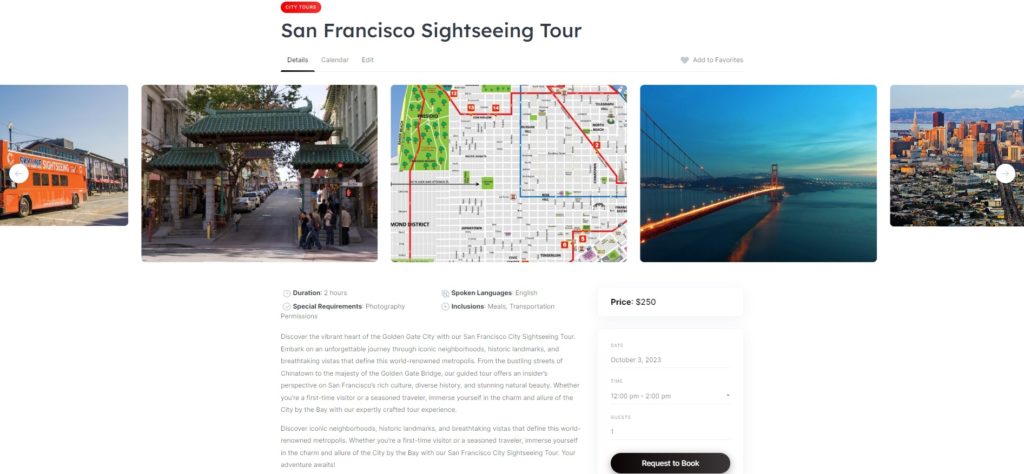
To book a tour, users have to choose a listing category and then select a tour they like. Then, they can check the description and photos and select the date or time.
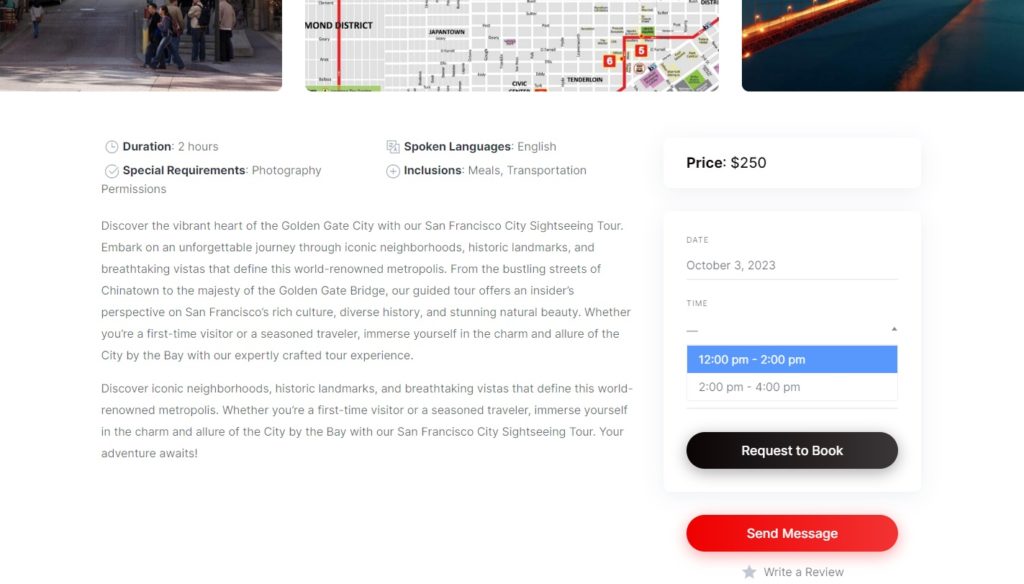
After clicking on the Request to Book button, they will be redirected to the confirmation page, where all the details can be reviewed before sending the request.
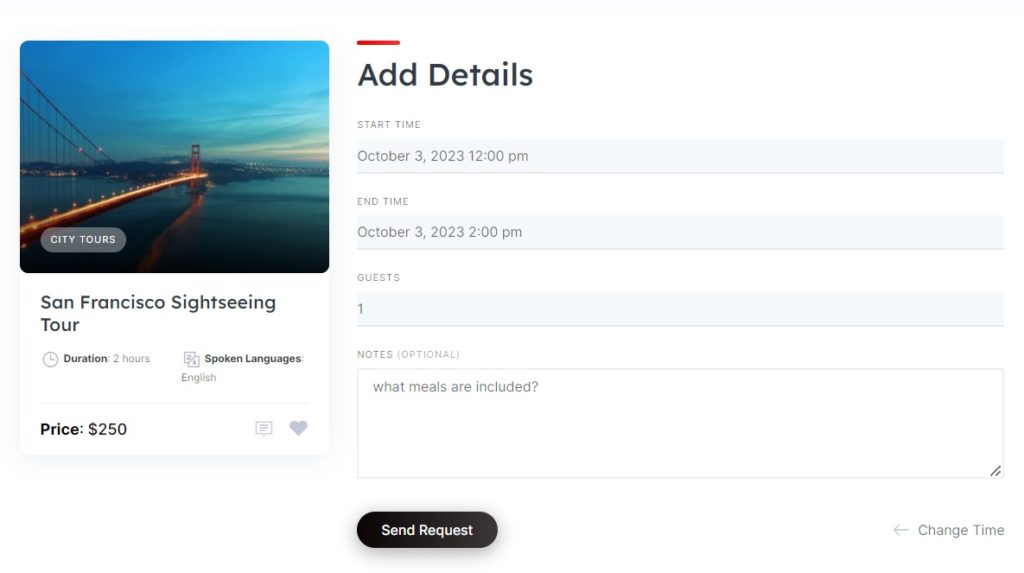
Once a user clicks on the Send Request button, a vendor (i.e., a person who offers the tour) will be able to see a pending request for booking in the My Account > Bookings section, where they can either accept or decline it.
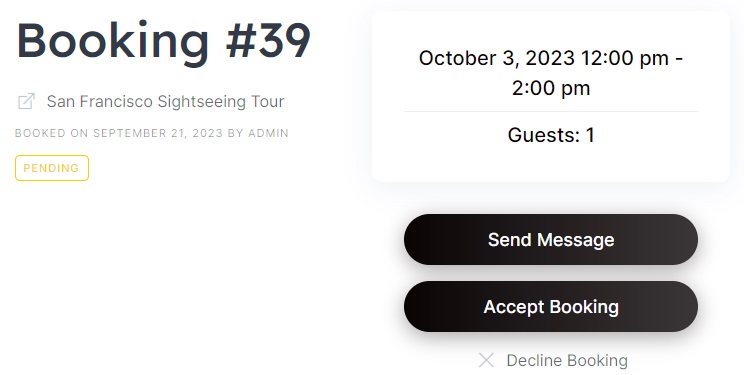
Simple as that! After the booking is accepted, the user receives a booking confirmation via email.
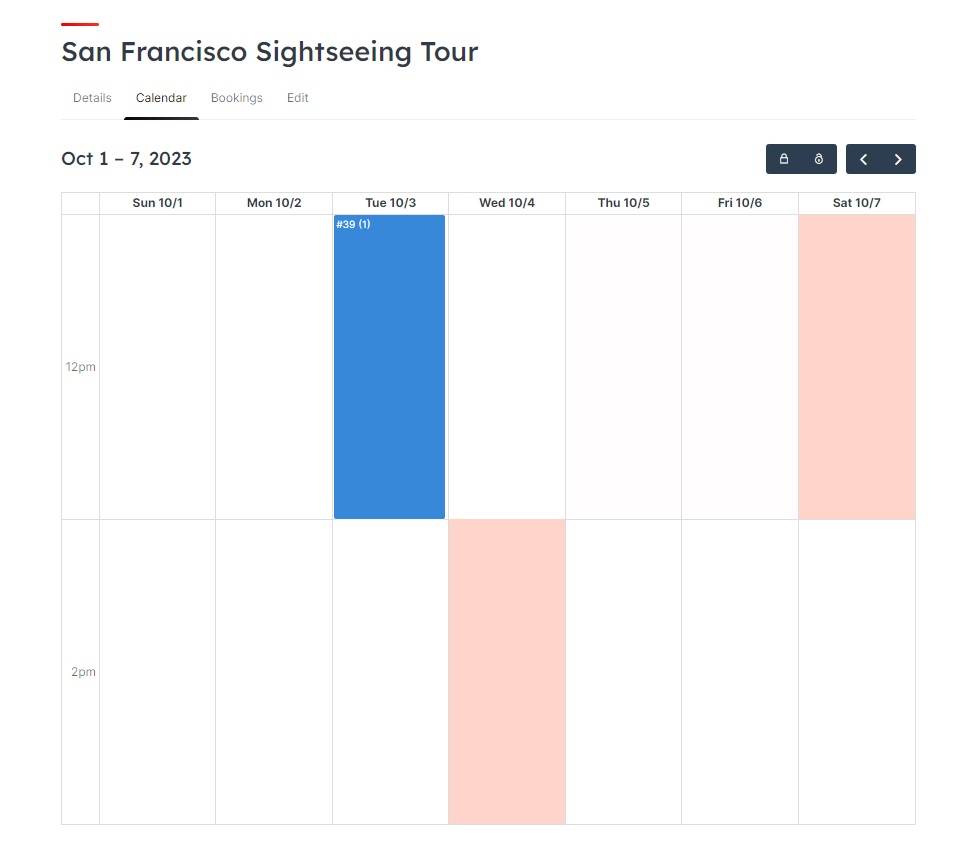
Additionally, vendors have access to a useful calendar feature that will help them manage their availability. They can easily block or unblock specific dates, making them either available or unavailable for new tour bookings. This feature provides a clear and organized overview of the tour schedule.
Last but not least, we’d like to discuss the monetization options for your WordPress tour booking website. Let’s take a look at two key ways you can get the most out of your platform and turn it into a successful business.
You can charge a commission for each successful tour booking. For example, you can earn a percentage of the total booking cost, like 5%, or set a fixed fee, for instance, $10 per booking.
You can charge users for adding tour listings, offering a free plan with a limited number of listings and a premium plan for those who want to post more. You can also charge for featuring listings on the homepage or at the top of search results — a premium option that helps vendors attract more bookings while you generate additional revenue.
Keep in mind that it’s best to start making money from your tour booking website only after it has become valuable to users and gained decent traffic.
And that’s it for today! We hope this guide was helpful to you and now you know how to create a tour booking website with WordPress. Although getting your first users may take some time and marketing efforts, stay patient and remember that consistency is the key. Good luck!
A quick guide on building your own stock media marketplace with WordPress.

Skyrocket your WordPress website performance in a breeze.
Launch your own appointment booking platform using WordPress.