
Top 5 Ways to Monetize a Job Board Website
Best revenue models for job board websites built with WordPress.
Learn 3 ways of how to make money with your classified ads website.

If you’ve created a classifieds website not only for aesthetic pleasure but aiming to turn it into your business, you’re probably considering implementing some monetization models.
There are several common ways of making money with classified ads websites, such as Craigslist. In this article, we’ll explain what prerequisites you’ll need to successfully monetize a classifieds website and how to set up each business model.
Let’s get started!
The monetization model used by Craigslist is pretty straightforward. The company uses the freemium model. Most publications are free, but the platform charges a fee for listings publications in specific categories, such as Job postings, Apartment rentals in selected regions, Real Estate, etc. The prices for posting in these sections are pretty small, which constitutes Craigslist’s advantage over classic newspapers and other classified ads websites.

Before considering monetization, ensure that your classifieds website generates sufficient traffic and that you’ve set up a suitable payment system.
A good amount of monthly visitors is a must if you want to monetize a classified ads website. For sellers to be interested in publishing on your platform, it needs to attract them with sufficient numbers. Craigslist is one of the most popular platforms in the world; it wins users over with democratic prices and the presence of its websites in numerous countries and regions. However, its impressive audience coverage has both positive and negative sides. Let’s see why.
Consider vintage car dealers. They’re interested in getting their ads seen by as many people as possible, but there’s a catch. On Craigslist, their ad will be viewed by ten website users, of whom approximately one or two share a passion for antique cars, and the rest will simply pass by in search of a new minivan model.
Suppose you’re an owner of a classifieds website for vintage cars, and your platform receives enough traffic to attract potential sellers. In that case, you can easily compete with more extensive and non-specialized platforms. Let it be 3-5 website visitors instead of 10, but all of them will be interested in the product you advertise. Thus, thanks to the already formed and selected target audience, you can increase ad publication prices and prevail over larger classifieds by aiming at quality, not quantity. Thus, the more restricted your website’s niche is, the better it is for attracting potential ads sellers.
You should find and set up a payment system that supports different payment gateways to accept and process payments. It should be convenient for users and guarantee secure money transfers.
There are three main ways of monetizing classifieds websites:
Now we’ll show you how to set up each monetization model.
For the sake of this tutorial, we’ll use a classifieds website built using the multifunctional HivePress plugin with its extensions and the free ListingHive theme.
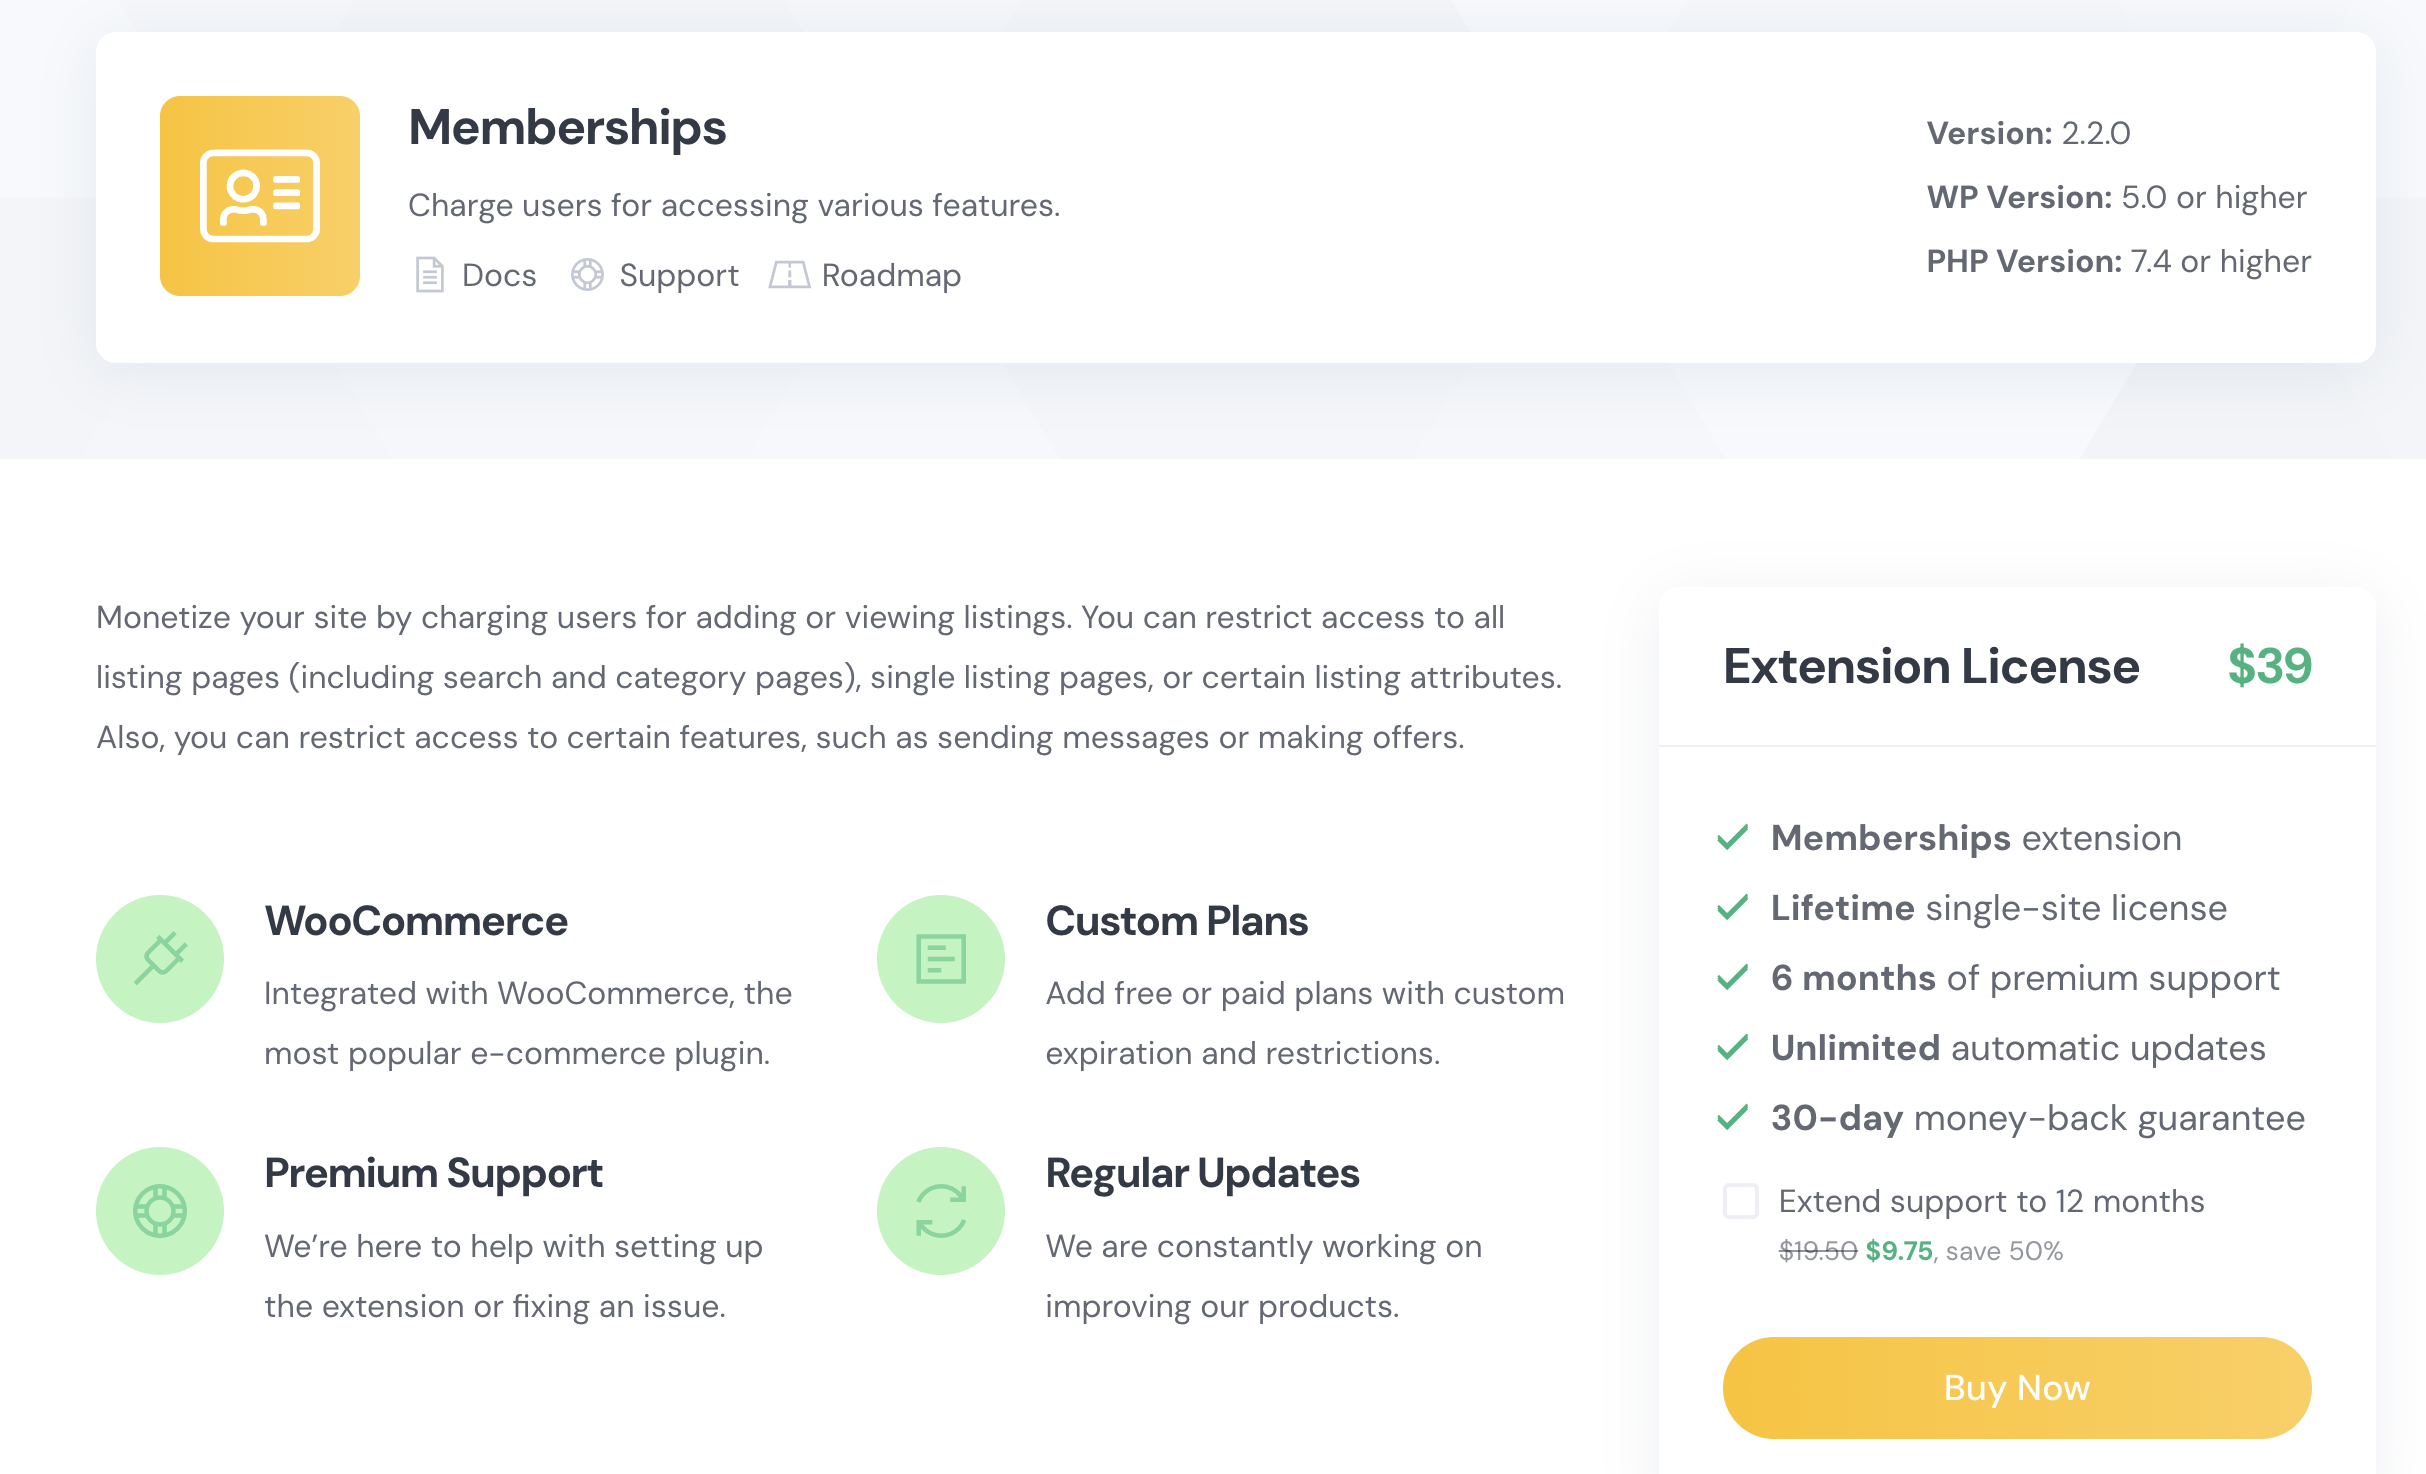
If you’ve already installed the HivePress plugin and the ListingHive theme, proceed to add the premium HivePress Memberships extension. It’ll allow you to charge users for adding, featuring, and renewing listings. You can also restrict access to features like sending messages or viewing specific pages, and more.
Then install WooCommerce, the most popular eCommerce plugin. It supports dozens of payment gateways and ensures secure and fast transactions.
Once you activate WooCommerce, it will launch its setup wizard. Follow the instruction and keep in mind that completing all required fields is essential to configure payments of your platform.
When the necessary plugins are set up, you can proceed to the next section.
Let’s start with the overview of how to charge users for adding listings.
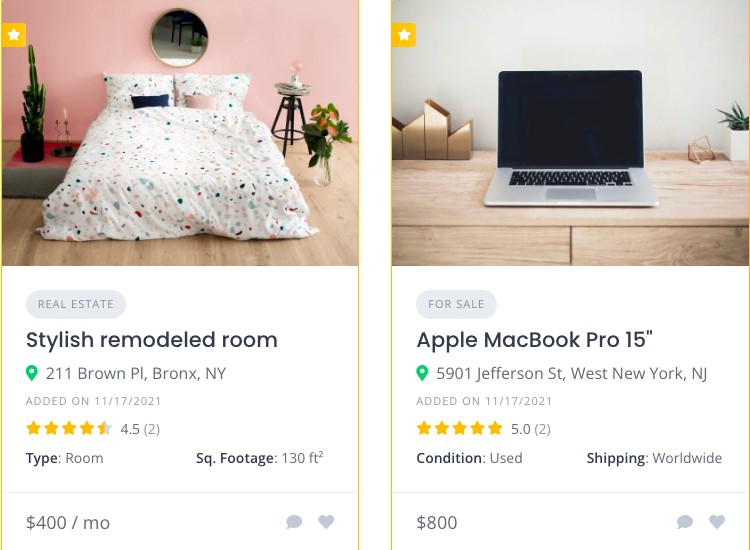
Take, for example, a classified website with the following categories: For Sale, Real Estate, and Jobs. Similarly to Craigslist, we’ll leave the first category free of charge and make the other two the paid options.
The starting point is to add the WooCommerce products that will be used for payments. To create them, go to Dashboard > Products > Add New. Write the product name, tick the Virtual box, and set the price. As you finish, click the Publish button.
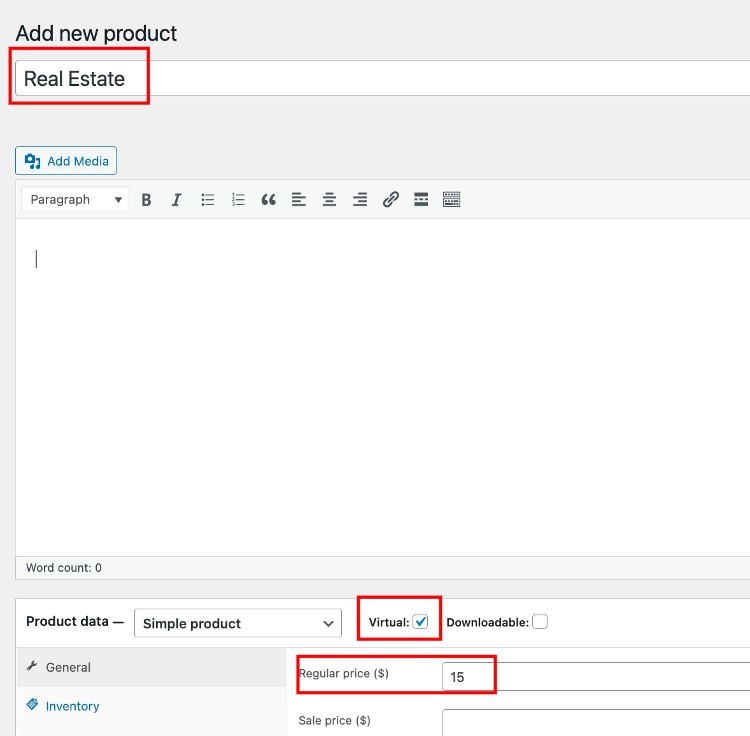
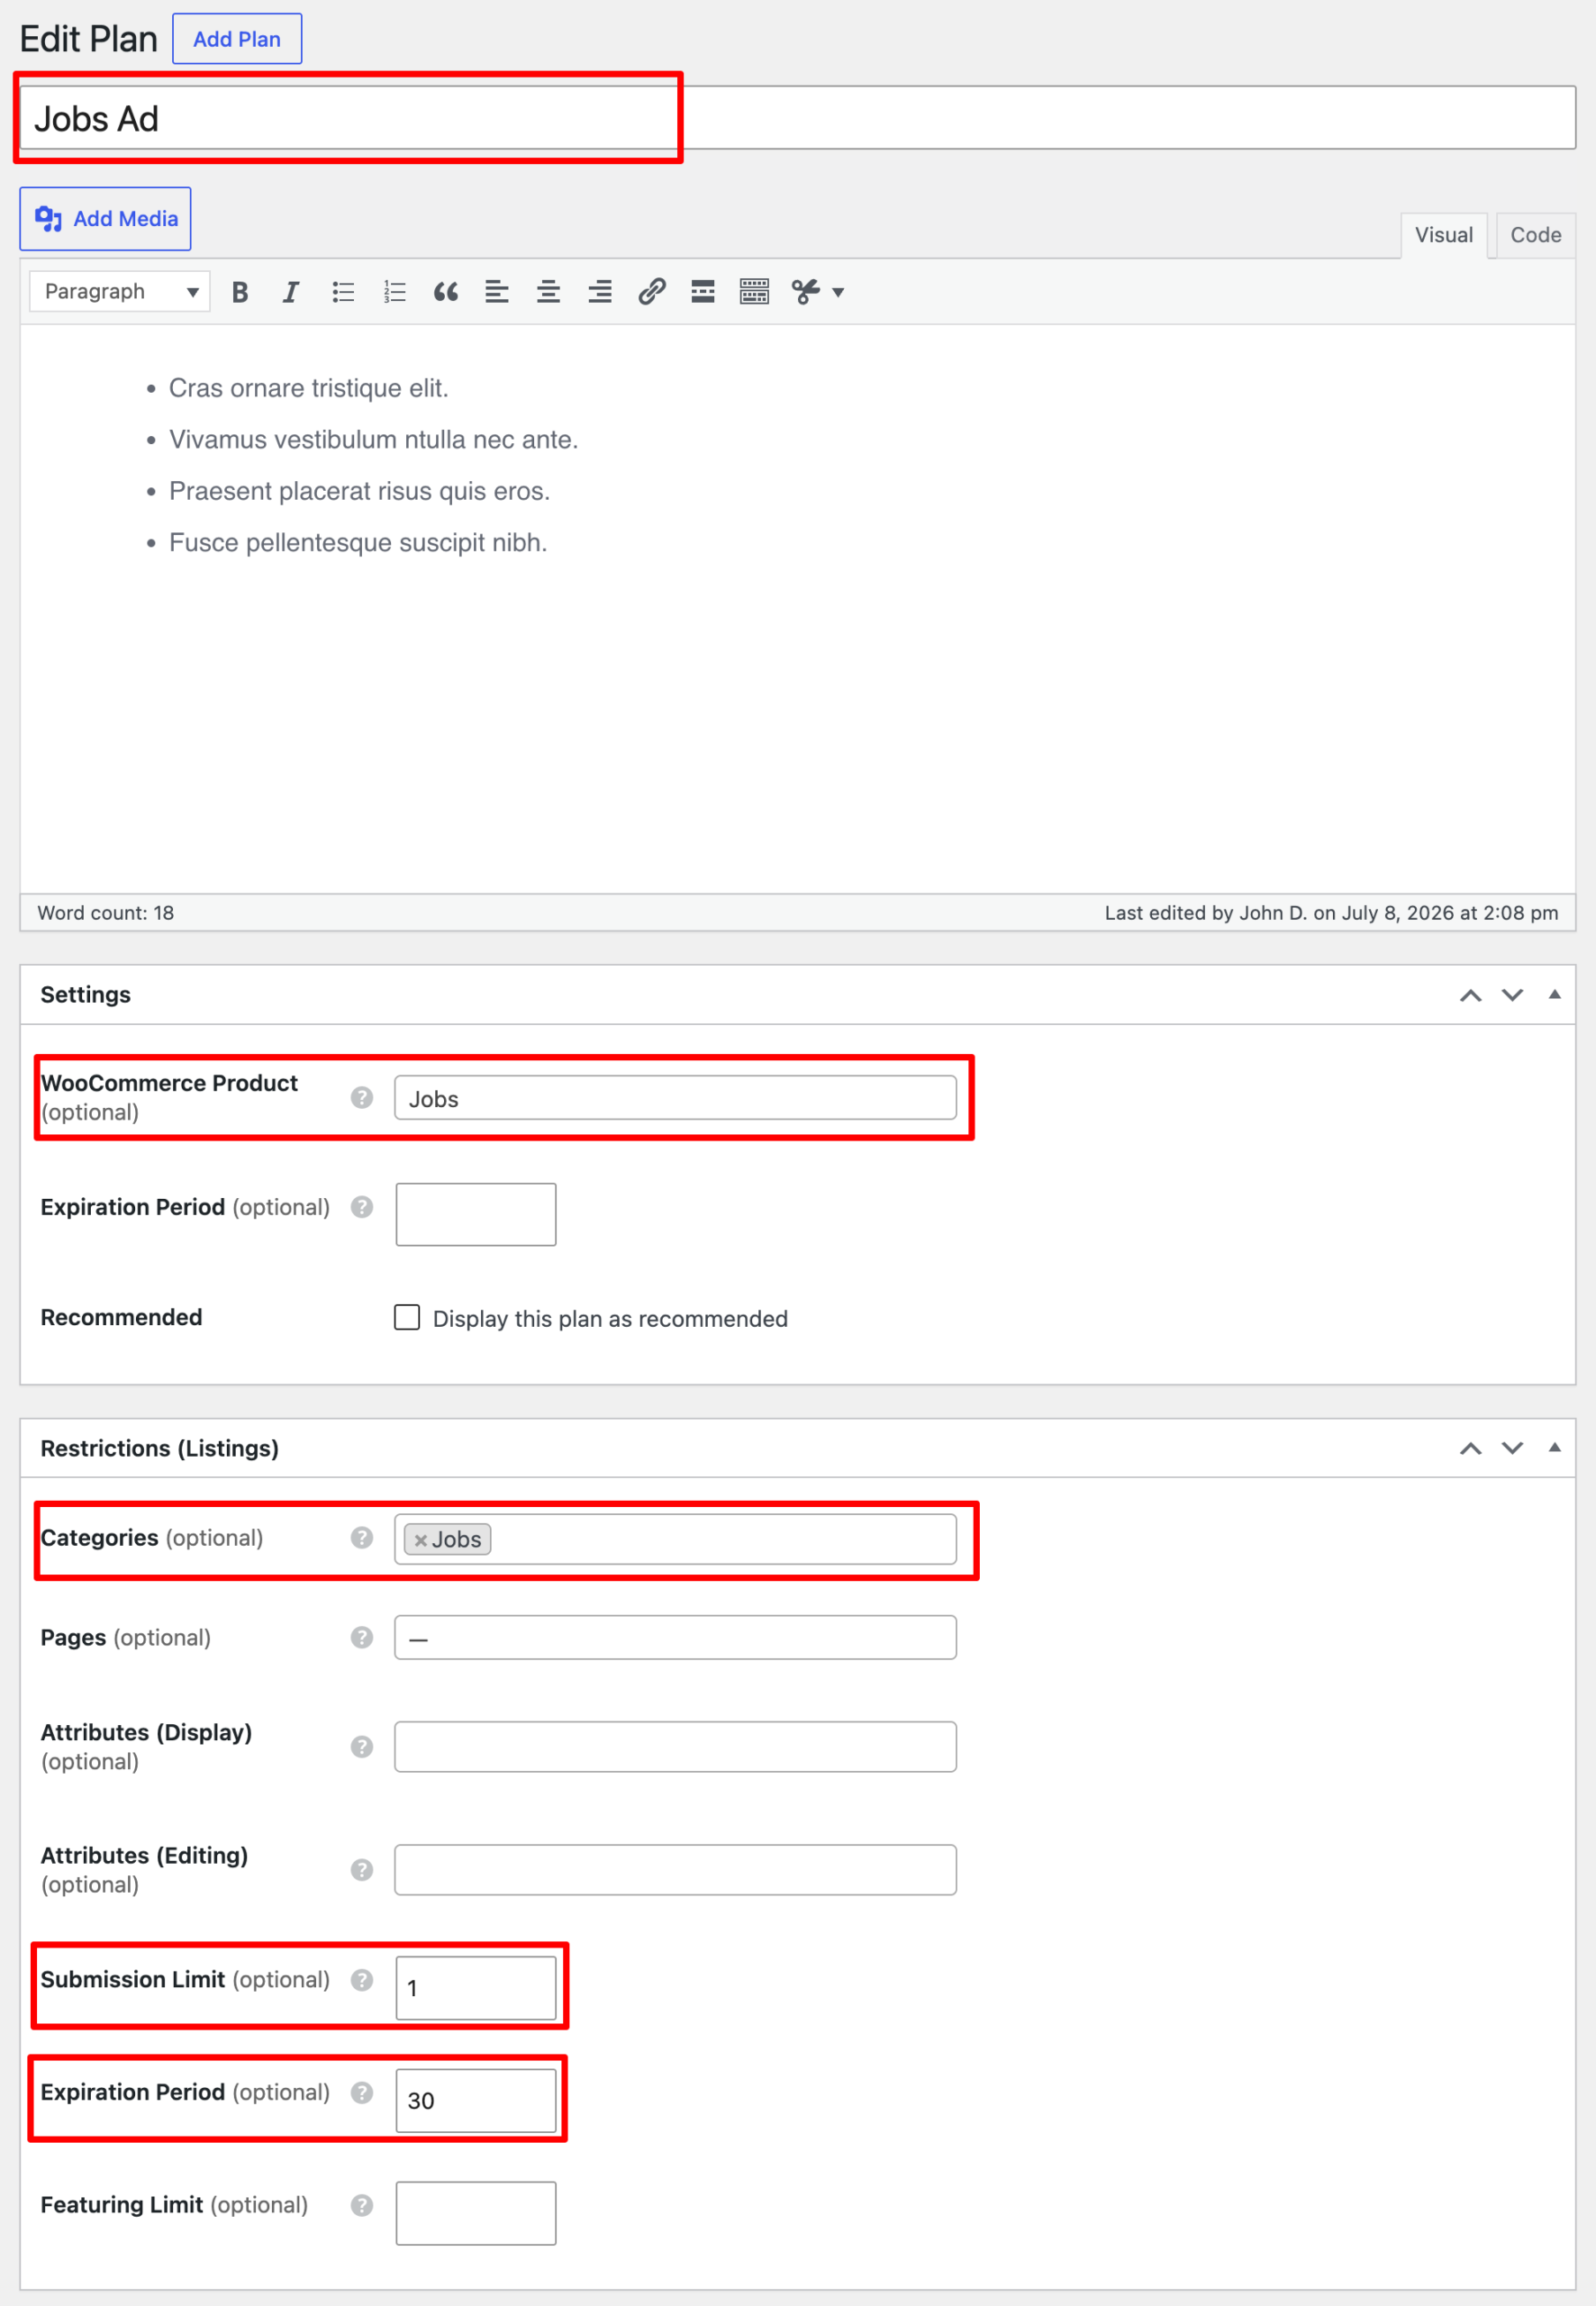
If you want to charge different prices for listings in different categories, it’s necessary to create a separate product for each category. To show it with an example, we’ll create another product for the Jobs category, following the same steps.
Once you’re done with the products, go to the Dashboard > Memberships > Plans section. Here you can create listing plans.
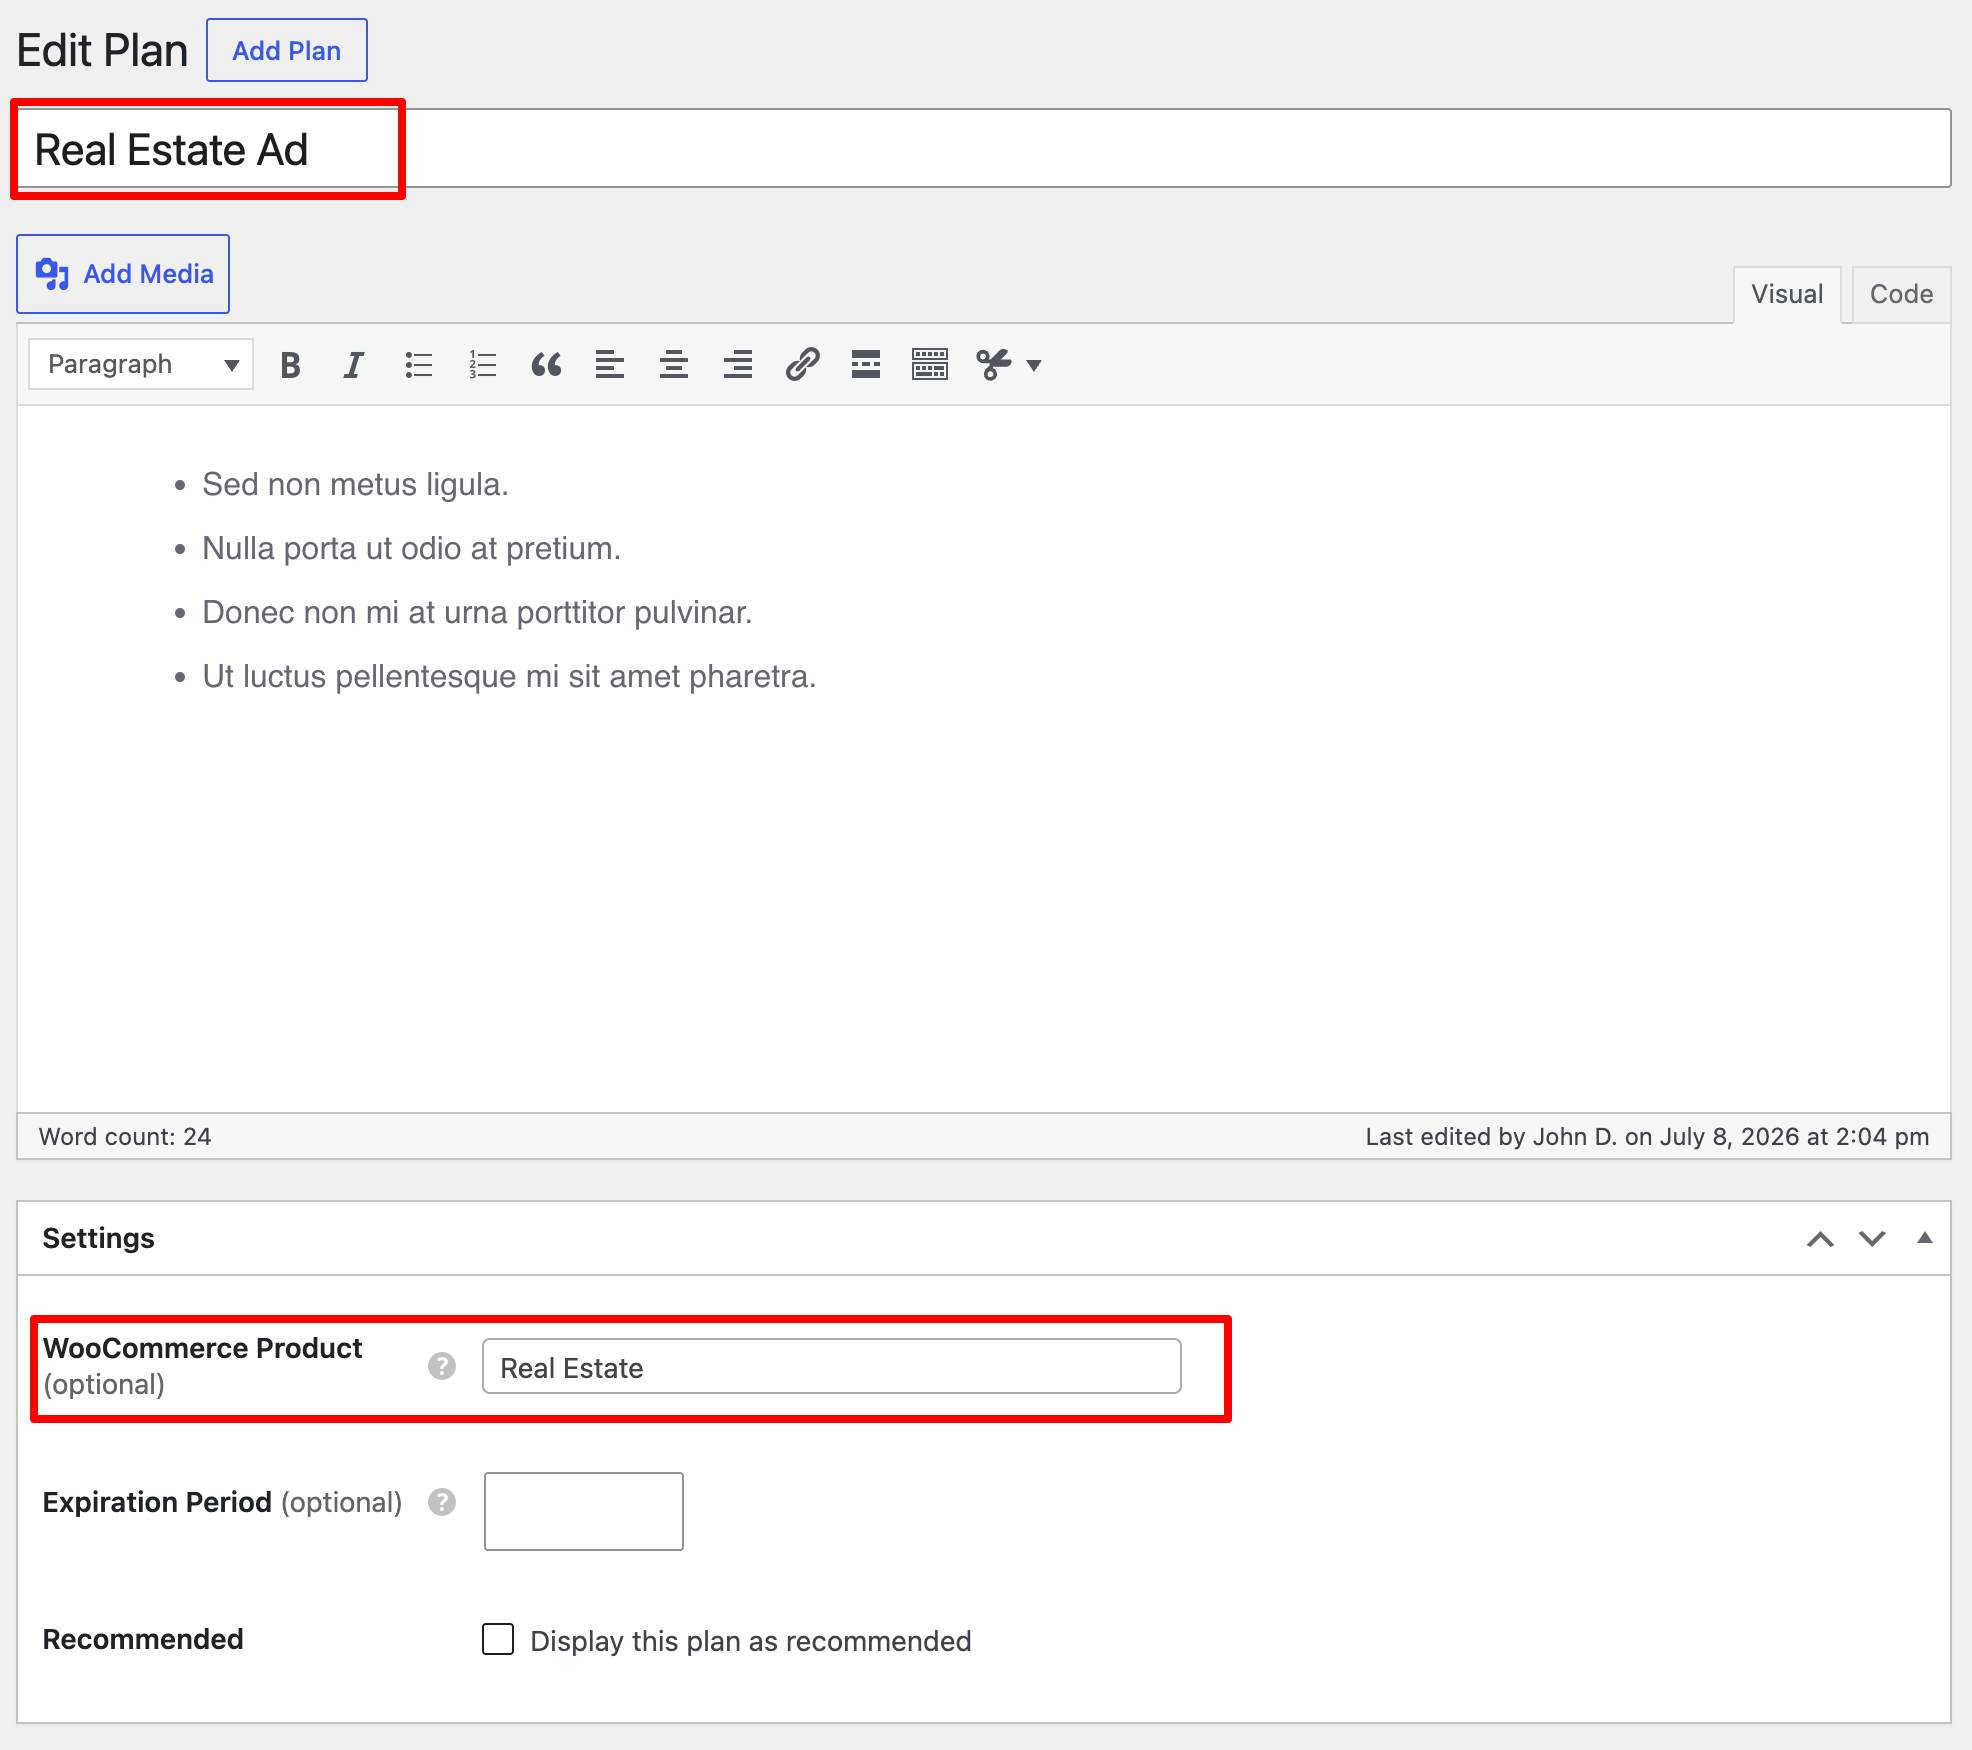
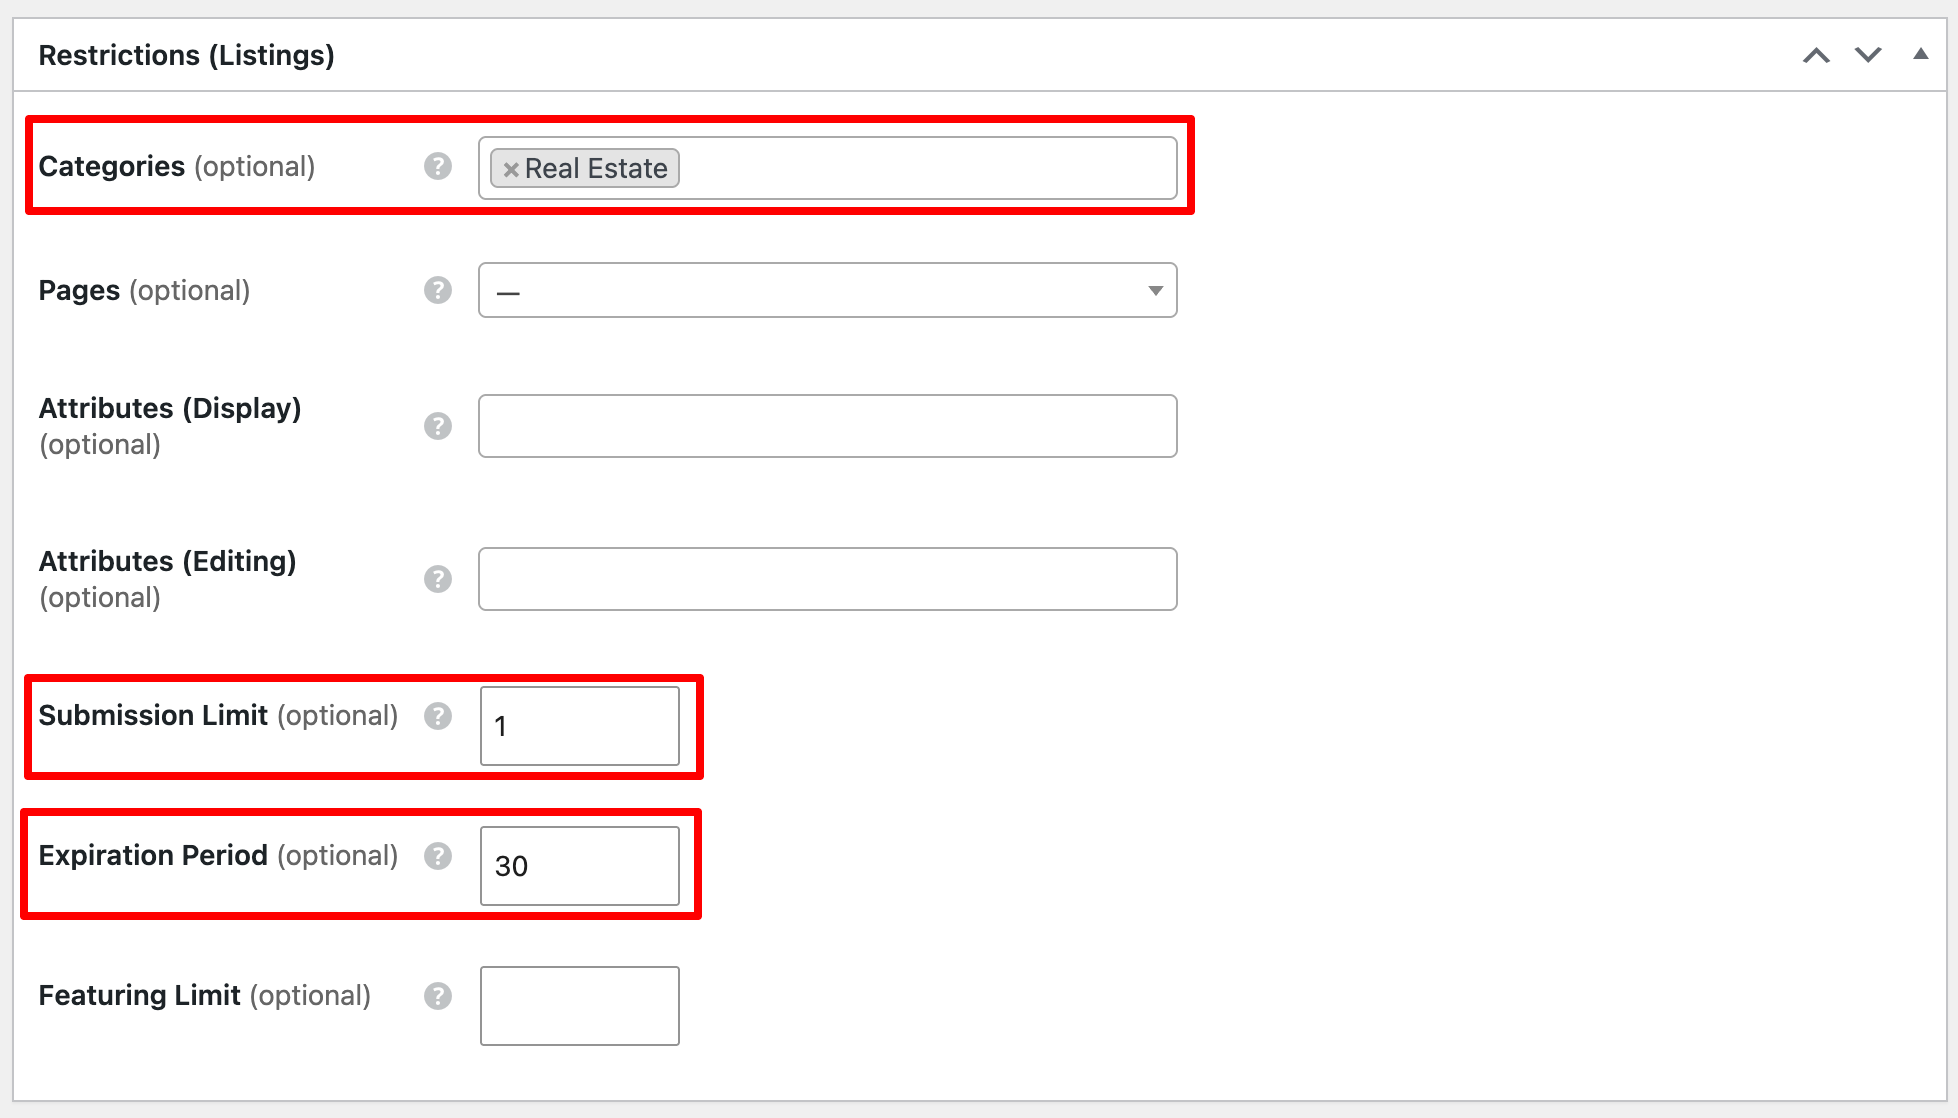
Click the Add New button, set the plan name, description, and listing limit, i.e., the number of listings included in the plan, and select the WooCommerce product. Optionally, you can also add the expiration date, in other words, the duration of a listing publication on your classified ads website, or set a featuring limit.
You can do as general plans as the category-specific ones.
As with the WooCommerce products, if you want to charge users different prices for adding to different categories, you should make a separate plan for each category. To illustrate it, we’ll create another plan for the Jobs category.
Type the plans’s title and description, proceed to Settings, link the plan to the correct Category and WooCommerce product, and choose the listing limit and expiration time. As always, end up by clicking the Publish button.
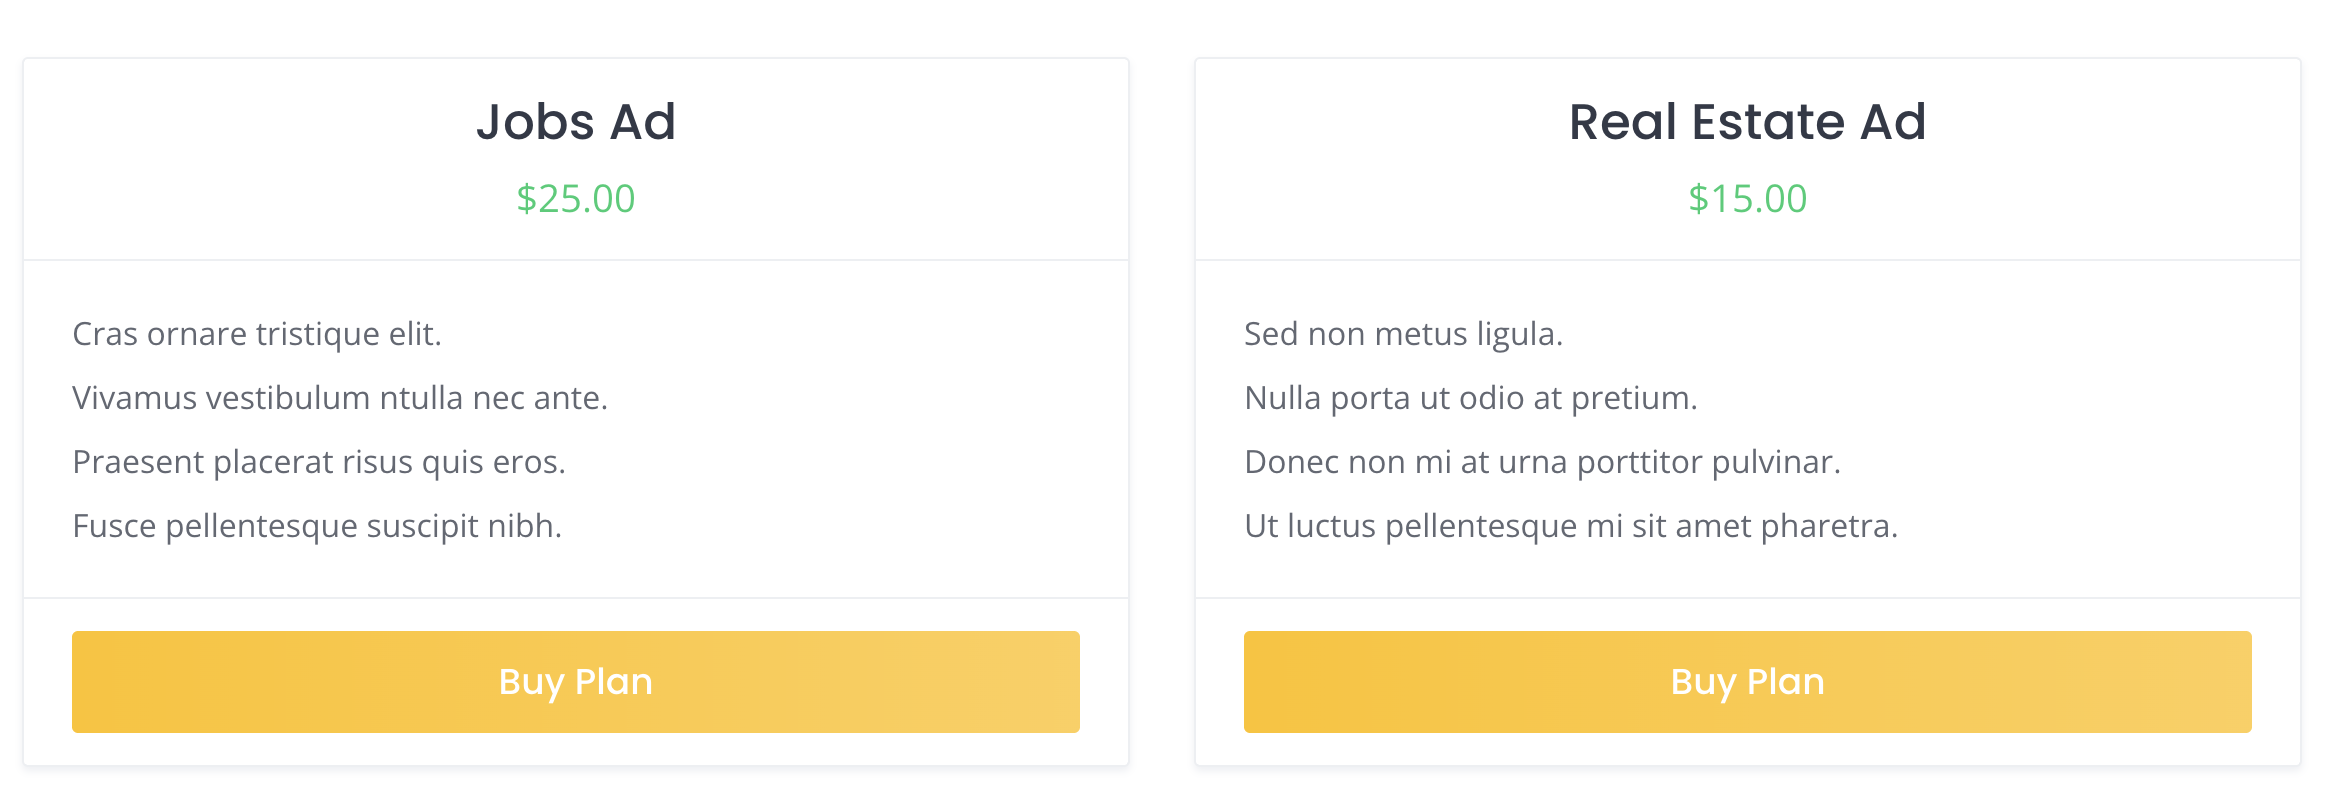
To check how everything works, you can go to your website and try adding a new listing. In the case at hand, we’ll add a new listing to the Jobs or Real Estate categories.
Once you fill in all the details in the submission form, you’ll get a notification with listing plans. As you can notice from the screenshot, you’ll have to purchase the plan to get your listing published.
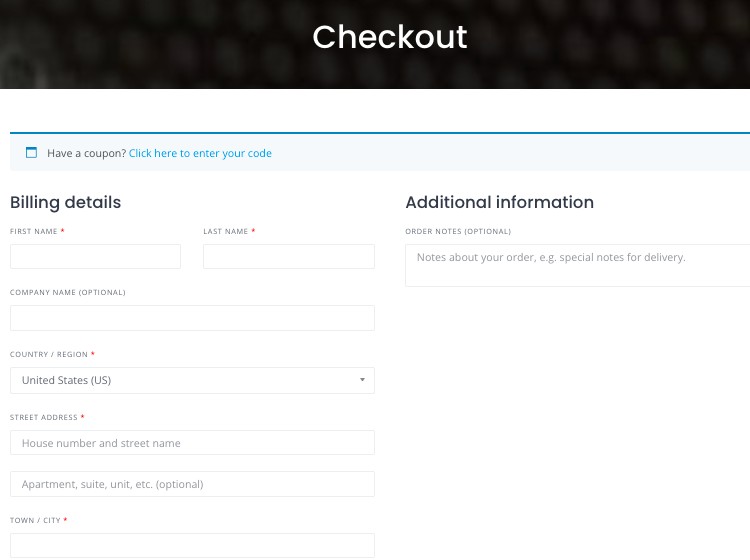
After selecting the plan, users will be redirected to the checkout page to complete the billing information and place the order.
Moreover, you can always add more than one plan to a category. For example, you can create plans with different listing limits, expiration periods, and additional features, such as restricting access to messaging or other premium functionality.
Now you know how to charge users for publications on your platform. Let’s move on and configure the second monetization model.
As you remember, a listing promotion fee is another monetization option for classified ads platforms.
If you develop a great classifieds website, it’ll attract many visitors, resulting in competition for the top places. As a consequence, some users will want to increase their visibility on your website. Thus, you may consider offering them to advance their listing in the search list.
In this section, we’ll show you how to charge users for their listings promotion.
As in the first monetization model, you should create a product that will be used for payments. Start by navigating to the Dashboard > Products > Add New section, add a preferred title, mark it as Virtual, set the price, and click the Publish button.

Here are two options you can consider: you can sell individual plans for featuring, or combine them with listing submission plans. The Memberships extension allows you to be as flexible as possible in this case. In the membership plan, add the WooCommerce product you’ve created for this plan and set the featuring limit. You can also set an expiration period, after which the listing will no longer be displayed at the top.

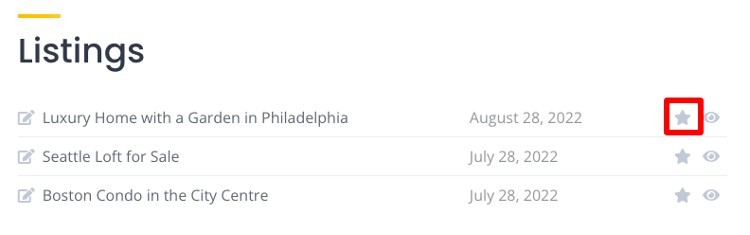
Now you can test how it works. To do so, go to your website, click the User dashboard and mark the desired listing with a star sign.
After selecting the listing, users will be redirected to the Checkout page to fill in the details. Once the payment is made, the listing will be assigned the featured status for the previously chosen period.
That’s it. We’ve set up the second monetization model. Now let’s see how to enable advertising on your website.
As we mentioned earlier, displaying ads on your classified ads website, such as banners, text, video, or image ads, is another way to monetize your platform. If you choose to adopt this model, we’d recommend you opt for Google AdSense due to its simplicity and automatic advertisement placement and optimization.
Firstly, you’ll need to create a Google AdSense account. To do so, click the link and follow the suggested steps to enable all the necessary features.
Next, install the WordPress plugin to connect your classifieds website to your AdSense account. You can add Google’s official Site Kit plugin by navigating to Dashboard > Plugins > Add New. When you install and activate the plugin, click the Start Setup button and proceed to customize your account.

Once everything’s set up, move to the SiteKit dashboard and click Connect Service. Follow the plugin’s instruction of adding the AdSense code, a snippet allowing the auto-display of ads on your classifieds website.
When your account is approved and your website’s reached the necessary level of traffic, you’ll be able to access the AdSense metrics and start earning money from advertising.
Now you know the most popular methods of how to monetize a classifieds website. Choose the one that best suits your business model, or combine all three to start making money from owning a classifieds platform.
You may also be interested in checking out:
Best revenue models for job board websites built with WordPress.

Check out 6 helpful tips on how to choose a niche for your website.

A quick guide on how to make money with your WordPress peer-to-peer marketplace.