
How to Create an Online Tutoring Website with WordPress
A short tutorial on how to create tutor booking platform with WordPress.
Create a searchable database with WordPress for free.

Imagine having a ton of data at your fingertips, but instead of wading through it, you can instantly find exactly what you need. That’s the power of a searchable database website. Such a platform allows users to search, filter, and sort data effortlessly. It transforms a chaotic sea of information into a user-friendly experience, making it easier to find the data you need.
In this tutorial, we’ll guide you through creating a fully functional, searchable database using WordPress without any coding skills.
Let’s start!
A searchable database website can be helpful to a wide range of individuals and organizations. For example:
In fact, anyone who needs to organize and provide easy access to large amounts of information can make use of a searchable database.
First of all, you’ll need some common prerequisites:
While it’s relatively easy to choose a domain name, find a hosting provider, and install WordPress, selecting the right theme and plugin can be a daunting task. To simplify this process, we recommend checking our overviews of the most popular free directory WordPress themes and the best directory WordPress plugins.
For this tutorial, we’ll use HivePress, a free and versatile directory plugin, paired with ListingHive, a lightweight and clean directory WordPress theme that seamlessly integrates with HivePress. As an example, we’re going to create a database of local professionals, such as lawyers, doctors, or real estate agents. However, the steps we provide are suitable for any other type of searchable database.
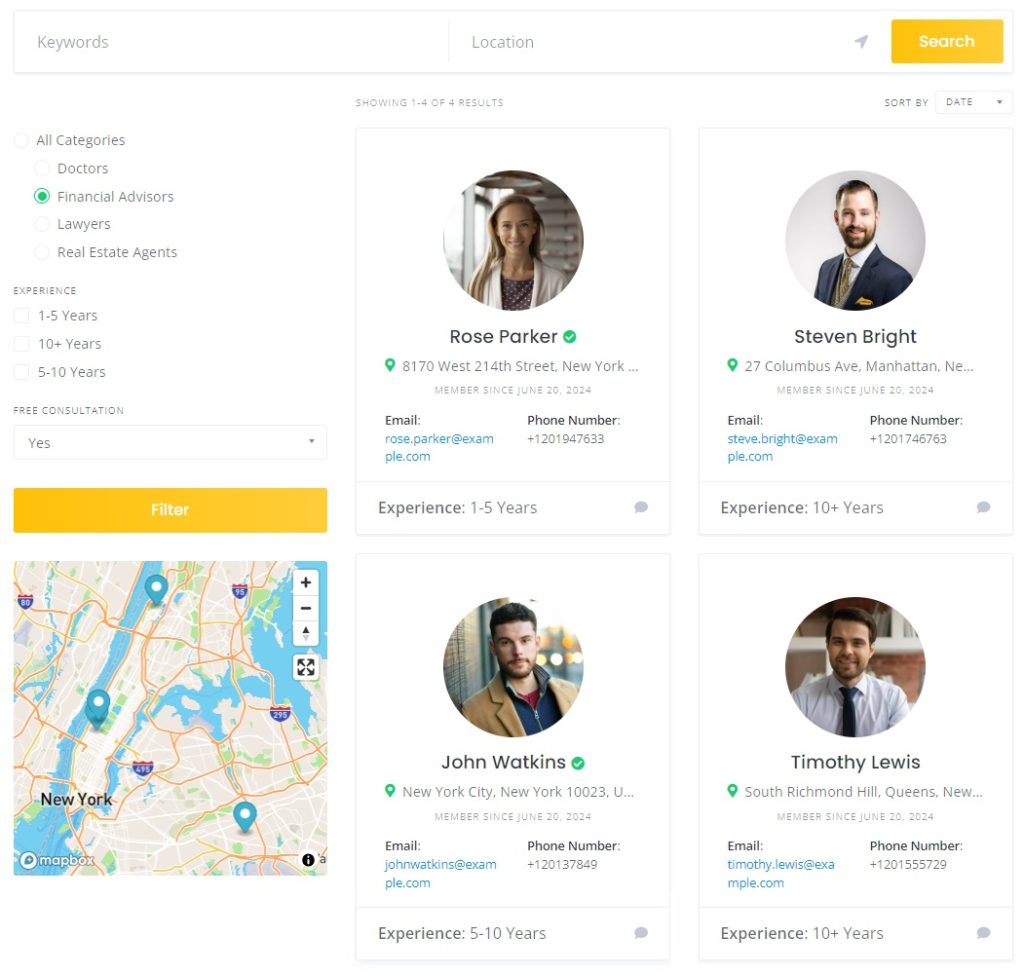
Also, before diving into the tutorial part, we’d like to show you a preview of our final result, which can give you an idea of the look you can achieve using HivePress and ListingHive.
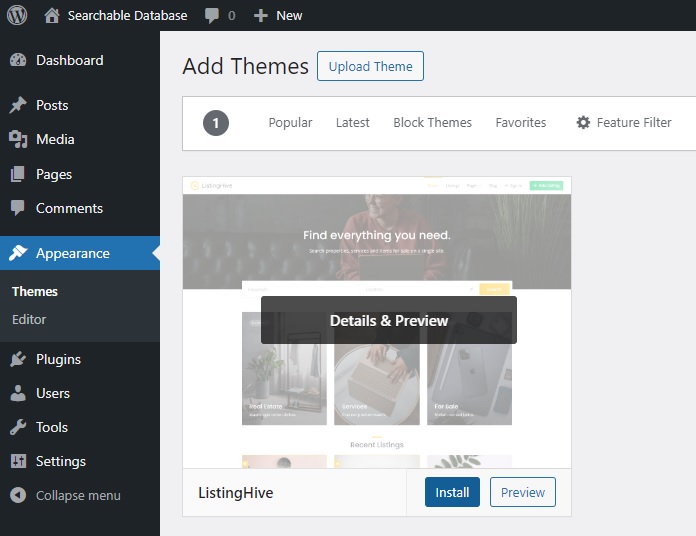
The first step is to install the tools. ListingHive is a free theme, so you can easily install it by going to the WordPress Dashboard > Appearance > Themes > Add New section. Simply find ListingHive by typing its name in the search bar and then proceed to install and activate it.
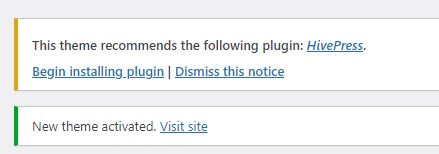
Once ListingHive is installed, you’ll see a suggestion for installing the HivePress plugin, which will power all the directory features on your website. So, click on the provided link to install and activate it as well.
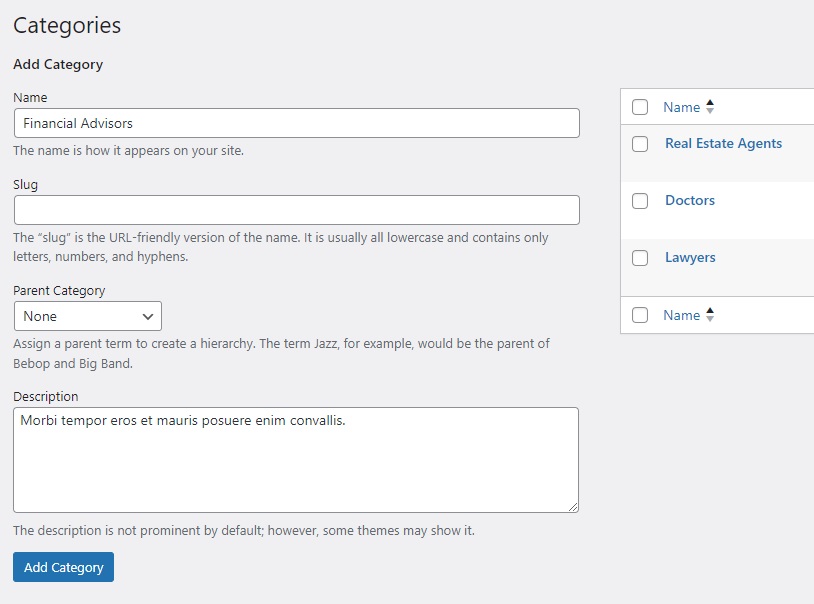
To create a comprehensive database, you must divide it into different listing or vendor categories first. Since our example concerns individual professionals, we’ll add vendor categories. To do this, go to the Dashboard > Vendors > Categories section.
Here, you can name the categories, provide a description, and create a hierarchy by selecting a parent category. Keep in mind that you can create as many categories and subcategories as you need to build an extensive database. In our case, we’ll add “Lawyers”, “Doctors”, “Real Estate Agents”, and “Financial Advisors”.
After adding categories, you should focus on adding custom fields specific to your database niche. You can create different profile fields to display specific details about a specialist, such as email, phone number, experience, and so on. For instance, let’s add an “Experience” field. To do it, go to the Vendors > Attributes > Add New section and name it.
Check the Editable option to allow front-end editing and let vendors provide their experience. Then, choose the “Select” field type so that vendors can pick their expertise period from the list of options. Finally, you can make any field required by checking the appropriate box.
In the Search section, you can turn your field into a search filter. Let’s make our field filterable so it appears in the filter form. As for the field type, we’ll pick “Checkboxes” to let users check several options at once.
Finally, the Display section lets you define where your field will be displayed on pages by choosing template areas and setting its display format. Let’s choose Block (primary), Page (primary), and set this display format: %label%: %value%
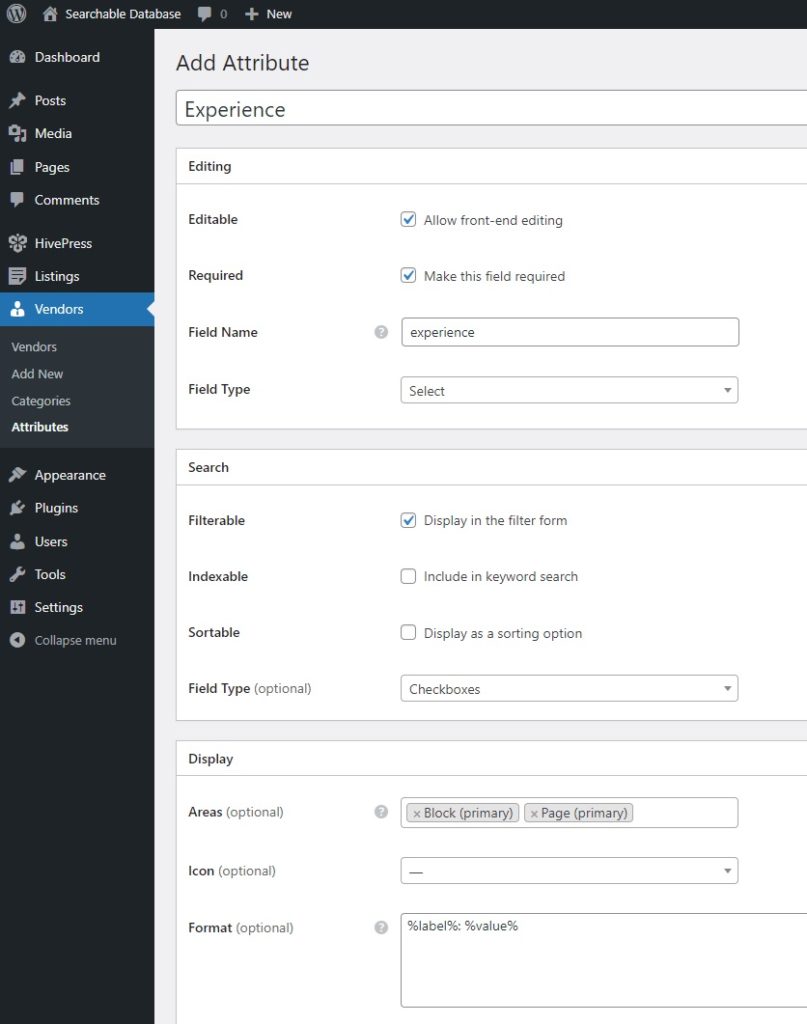
When everything’s ready, press the Publish button. After this, you’ll see the Edit Options button. Simply follow it to add different experience options. Also, don’t forget to add other vital fields, like “Email” or “Phone Number”.
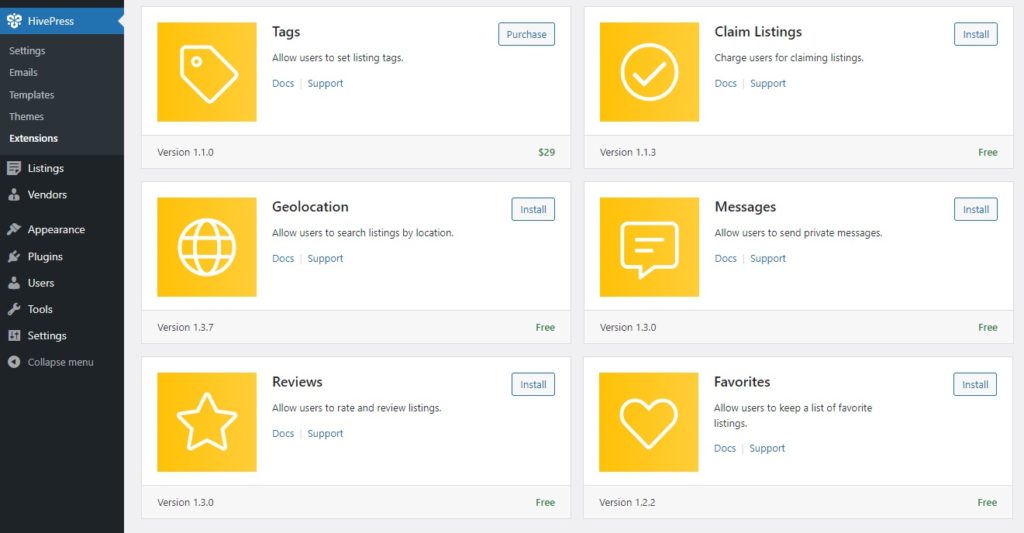
Now, let’s enhance the database with some additional features to improve the user experience. There are 15+ HivePress extensions that are fully compatible with each other. You can find them in the Dashboard > HivePress > Extensions section.
For example, you might want to install the Favorites extension to let website visitors keep a list of favorite specialists or the Messages add-on to let them contact vendors right on your site. The Reviews extension can also be helpful, allowing customers to leave reviews and rate professionals. To install any extension, just click on the Install button.
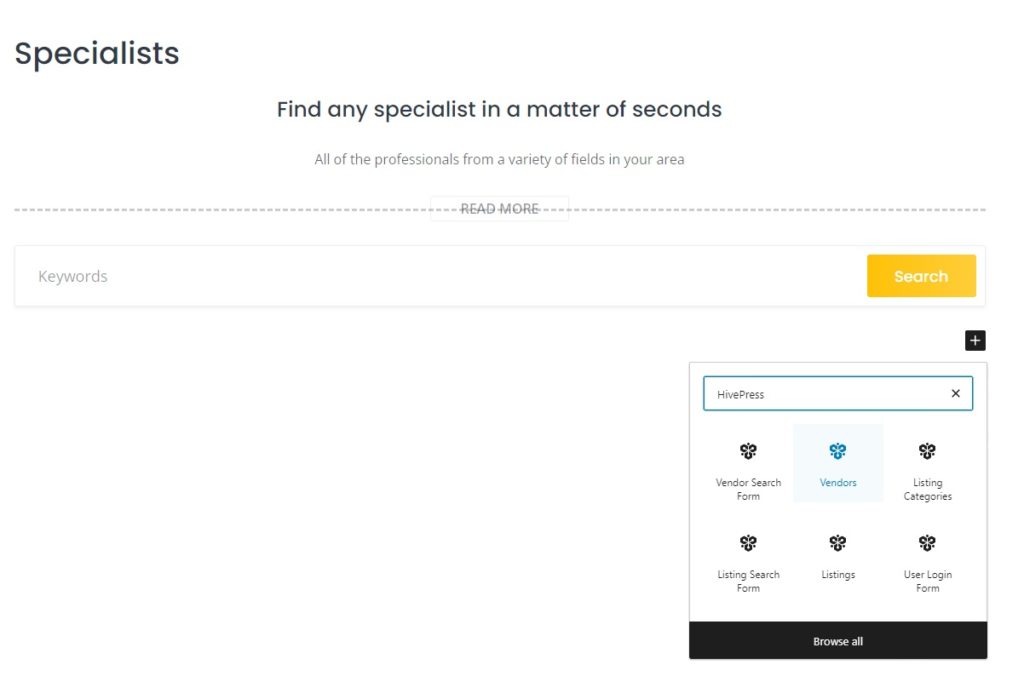
The next step is to create a page where all the experts will be displayed. Since ListingHive is integrated with WordPress native page builder, we can do it easily using blocks.
Go to Dashboard > Pages > Add New. First, write the page’s title. Then, we can start creating a layout. To do this, click on the Plus sign and type “HivePress” to see all HivePress-specific blocks. For example, let’s add a “Vendor Search Form” block and a “Vendors” one that will display all the professionals. When you’re finished, click Publish.
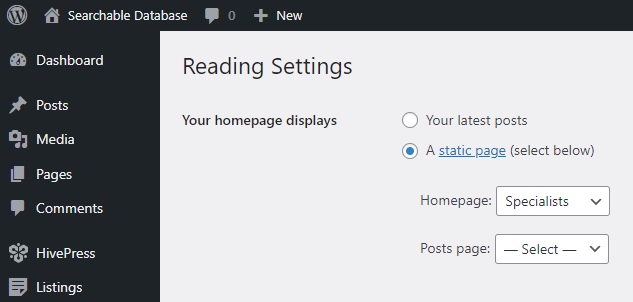
After that, head to the Dashboard > Settings > Reading section and set the newly created page as a Homepage. Finally, press the Save Changes button.
Additionally, keep in mind that you can customize the overall visual appearance of your database further. Feel free to take a look at the ListingHive customization tutorial below.
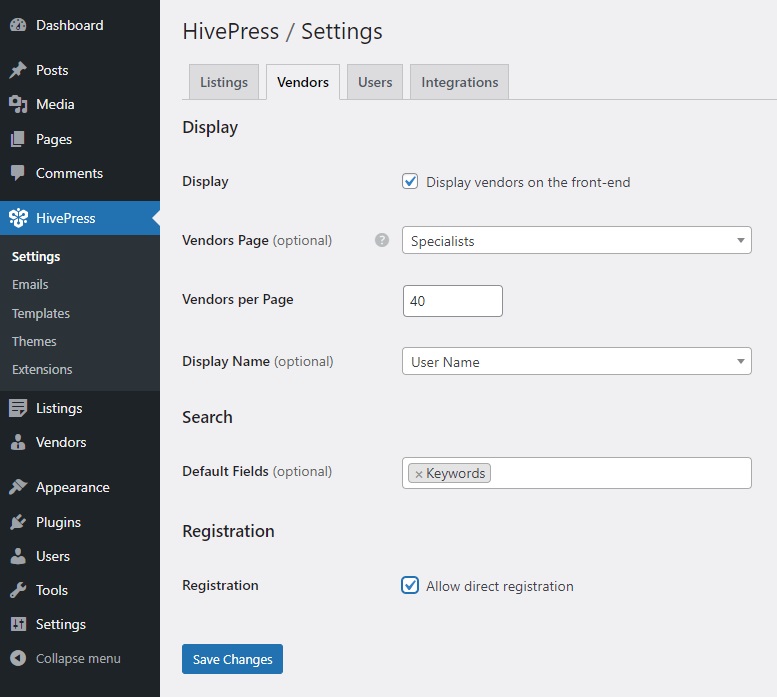
Now, we need to ensure everything will work correctly. First, navigate to Dashboard > HivePress > Settings.
In the Vendors tab, set a Vendors page where all specialists will be displayed. You can choose your homepage if you want all experts to be shown there. Additionally, enable direct vendor registration to allow professionals to list their profiles from the front-end. Don’t forget to save the changes.
After this, we must add a registration link to the front end so experts can sign up directly and list their profiles. To do it, go to Dashboard > Appearance > Menus > Manage with Live Preview. Here, click Create New Menu. Write a name, assign it to the Header, and proceed by clicking Next.Then, visit the Add items > Custom Links section and add the registration link using the following structure: your domain/register-vendor. Finally, click Publish.

That’s it! Now, there’s a registration link in the header, allowing specialists to list their profiles almost instantly.
Okay, now let’s try to list the first profile in your database. There are two ways to add a profile – via the back end and via the front end. For example, as an admin, you can add new specialists from the back end in the Vendors > Add New section. However, we’ll do it from the front-end to see how it’ll look like for users.
Just go to your site and follow the vendor registration link you added earlier. You’ll be redirected to the registration form you need to fill out, including custom fields you’ve added.
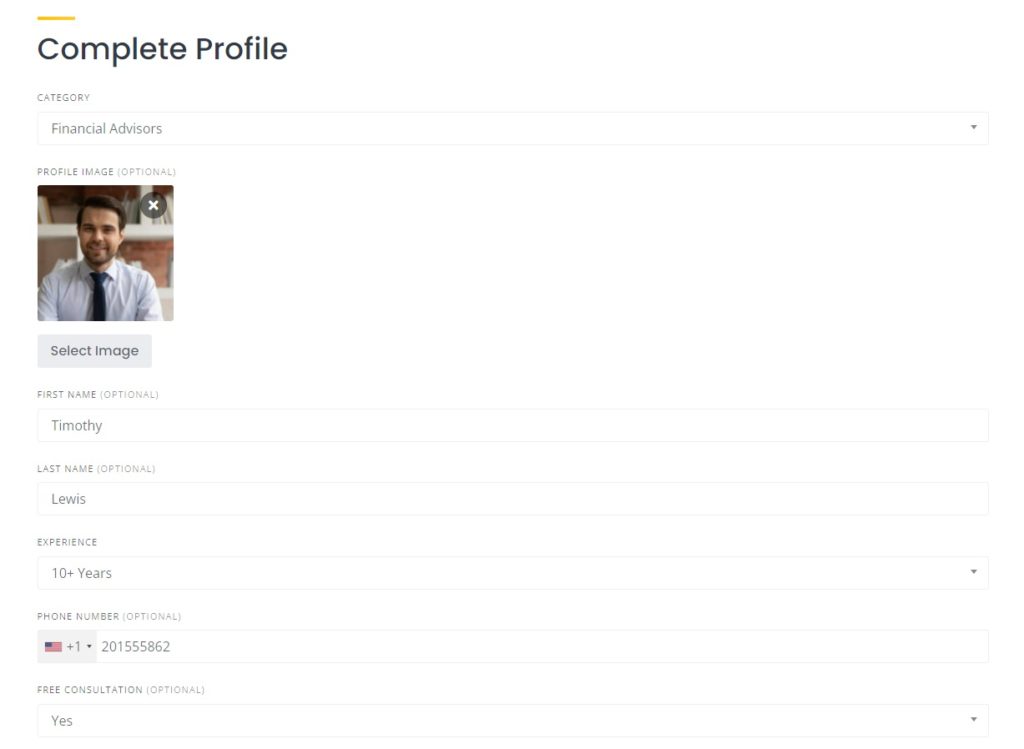
When everything’s filled out, simply hit the Save Changes button. Now, the first profile is already in your database and, you’re ready to continue developing your database on your own.

And that wraps up our guide on creating a searchable database using WordPress. We hope you found this tutorial helpful and now have a solid grasp of the process.
If you are thinking about launching a directory website, you can use HivePress with its ListingHive theme. They come with all the essential features, so you can just plug and play. Whether you’re building a searchable database or any other type of listing site, these tools will make the process a breeze.
A short tutorial on how to create tutor booking platform with WordPress.

Create your own directory website with WordPress in a few simple steps.

A quick tutorial on how to create sports directory website.