
How to Create a Service Marketplace with WordPress
A walkthrough on how to create a peer-to-peer service marketplace similar to Thumbtack or TaskRabbit.
A quick guide on how to launch an employee directory website.

Let’s face it, organization matters. Moreover, sometimes good organization is a key element that guarantees the successful functioning of a company and fruitful cooperation between its members.
In this tutorial, we’ll guide you step by step through all the stages of building a staff directory with WordPress.
Let’s get started!
The staff directory, also known as the employee directory, it’s an online database of all people working for a company. It usually consists of names, job titles, and contact information but may also include additional fields, e.g., photos, birthdays, locations, levels of expertise, etc.
Staff directories are widely used by state and private companies, medical and educational institutions, galleries, and many more. To put it briefly, any establishment and association with a lot of workers may need this organizational chart for a variety of reasons:
To start up a staff directory website, you’ll need the following prerequisites:
To make the whole process of searching for a plugin and a theme easier for you, we recommend checking out our overview of the most popular free directory WordPress themes and a list of the best directory WordPress plugins. Both lists have a detailed comparison of the best themes and plugins on the market. Additionally, you can check our article about the most common mistakes that people make when starting a directory website and how to avoid them.
For the sake of this tutorial, we’ll use ListingHive, a free WordPress theme for building any type of directory and listing websites. Also, we’ll use HivePress, a free business directory and classified ads WordPress plugin.
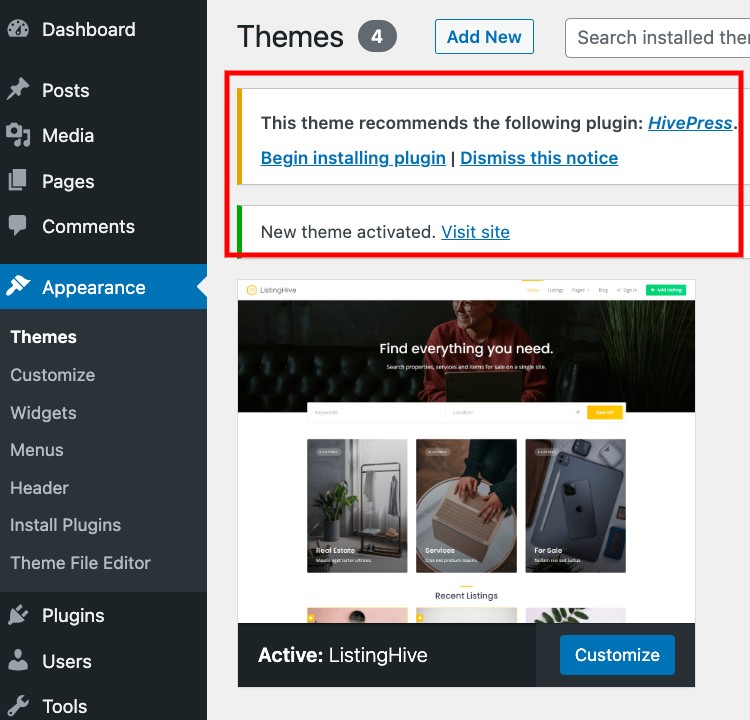
Since ListingHive is a free theme, you can get it installed in a few simple steps. Go to Appearance > Themes > Add New and type “ListingHive” in the search bar. Click the Install button and Activate the theme.
Once you have ListingHive activated, you’ll see a suggestion to install the HivePress plugin. It will power all the directory features on your website. Therefore, click on the available link to Install and Activate the plugin.
To create a clear and comprehensive staff directory, start by defining the company’s hierarchy. You can divide employees into categories according to specific characteristics, e.g., indicating their belonging to a particular department.
Let’s examine it on the example of a staff directory for an advertising agency. Suppose there’re the following departments:
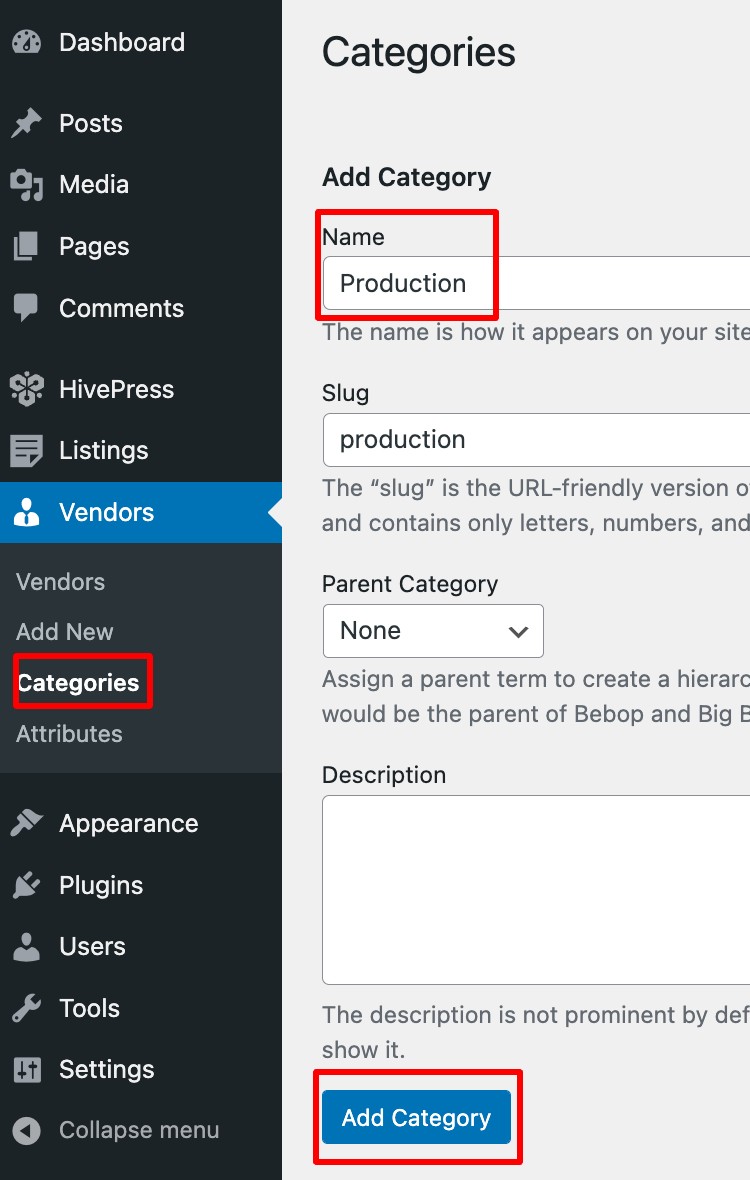
To assign employees to various departments, you should add different categories in the Dashboard > Vendors > Categories section. Fill in the Name and optionally Description fields, then click on the Add Category button.
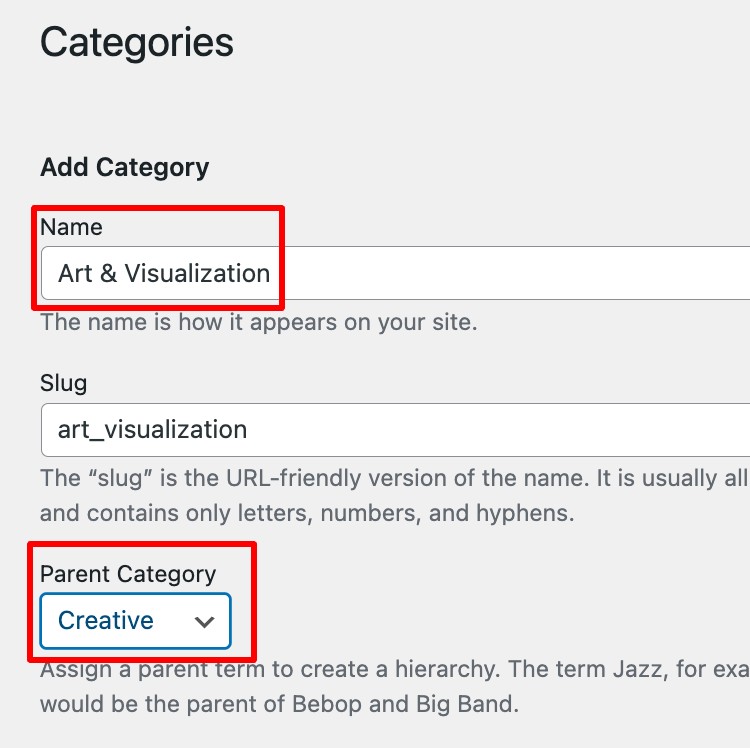
Depending on the company’s organization, you may need to add subcategories, such as Copy and Art & Visualization divisions within the Creative department. To do so, simply assign a subcategory to a parent category (take a look at the example in the screenshot).
You can create as many categories and subcategories as you need to build an extensive staff directory website.
Having finished with categories, move to the next step of setting up employee profile fields. You can create various profile fields, to show different details about an employee, e.g., Name, Email, Phone number, and so on.
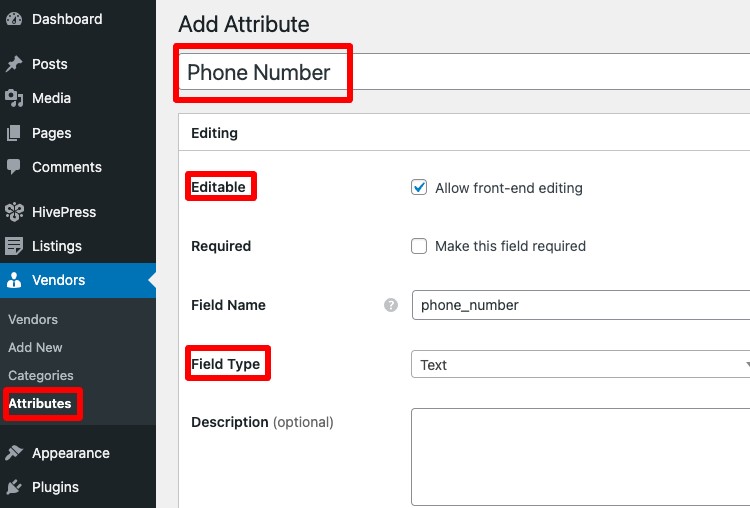
For example, let’s create a Phone number field for employees’ profiles.
Go to the Vendors > Attributes > Add New section. Start with choosing the field’s title, check the Editable option to allow the employees to fill in their contact information, and select “Text” in the Field type.
You can leave the Search section empty, as the Phone number field won’t be used as a search filter. Instead, proceed to the Display section and configure the following features:
%label%: %value%Always finish by clicking the Publish button.
Next, let’s add the Role field. It’s a little different from the Phone number one as users should be able to select the answer from the proposed in the list. To create it, go again to the Vendors > Attributes > Add New section and type a title.
Allow front-end editing, and make this field obligatory by ticking the Required box. In the Field Type, go for a “Select” option.
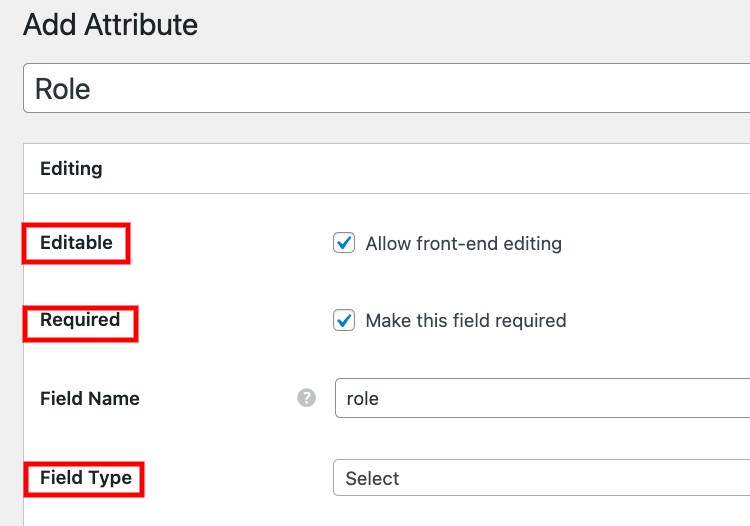
Next, proceed to the Search section. By marking this field as Filterable, you make possible the search for employees by their Roles. In the Search Field Type, choose “Select”.

After that, move to the Display section. As in the previous example, set up Areas (Page (primary), Block (primary)), and Format %label%: %value%
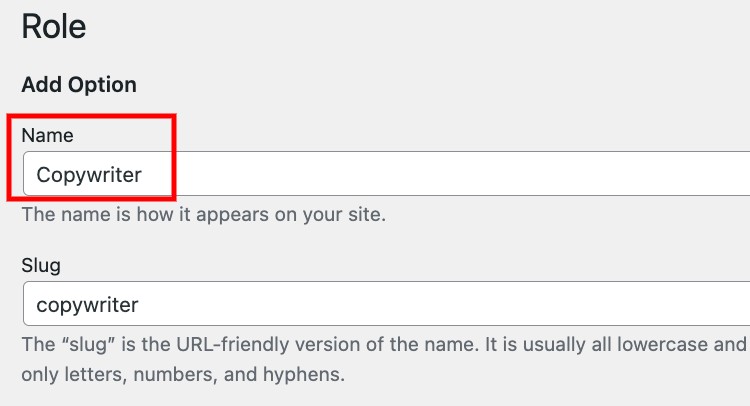
As soon as you Publish, the Edit Options button will appear in the Editing section. Click on it to add Role options to the list.
Following the example of the previously reviewed case of a staff directory for an advertising agency, you may need the next Role options:
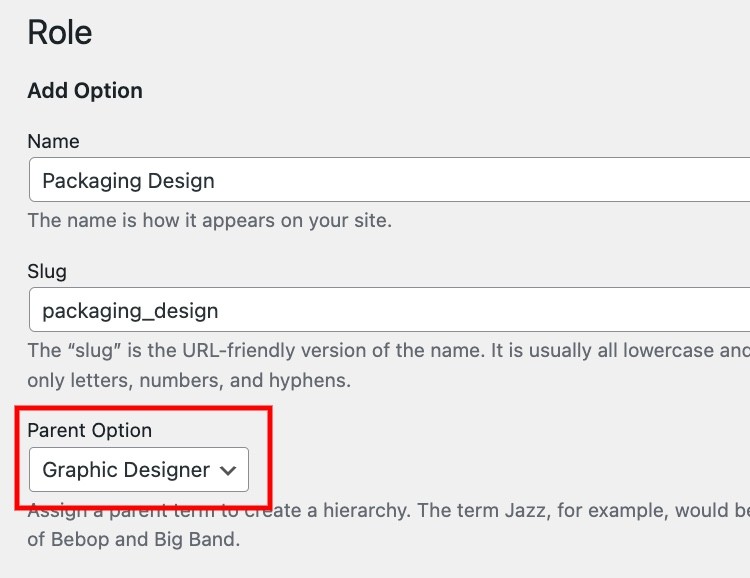
Also, you can create option hierarchies to allow users to specify their qualifications. For example, the Graphic Designer role can have several suboptions, such as Packaging Design, Logo Design, and Animation Design.
Moreover, you can create category-specific fields. For example, you can make Production department employees choose between the Seniority options.
Add a new field in Vendors > Attributes > Add New. Set a title, make the field Editable and Required, set a “Select” Field Type, check the Filterable option, and mark the Search Field Type as “Select”.
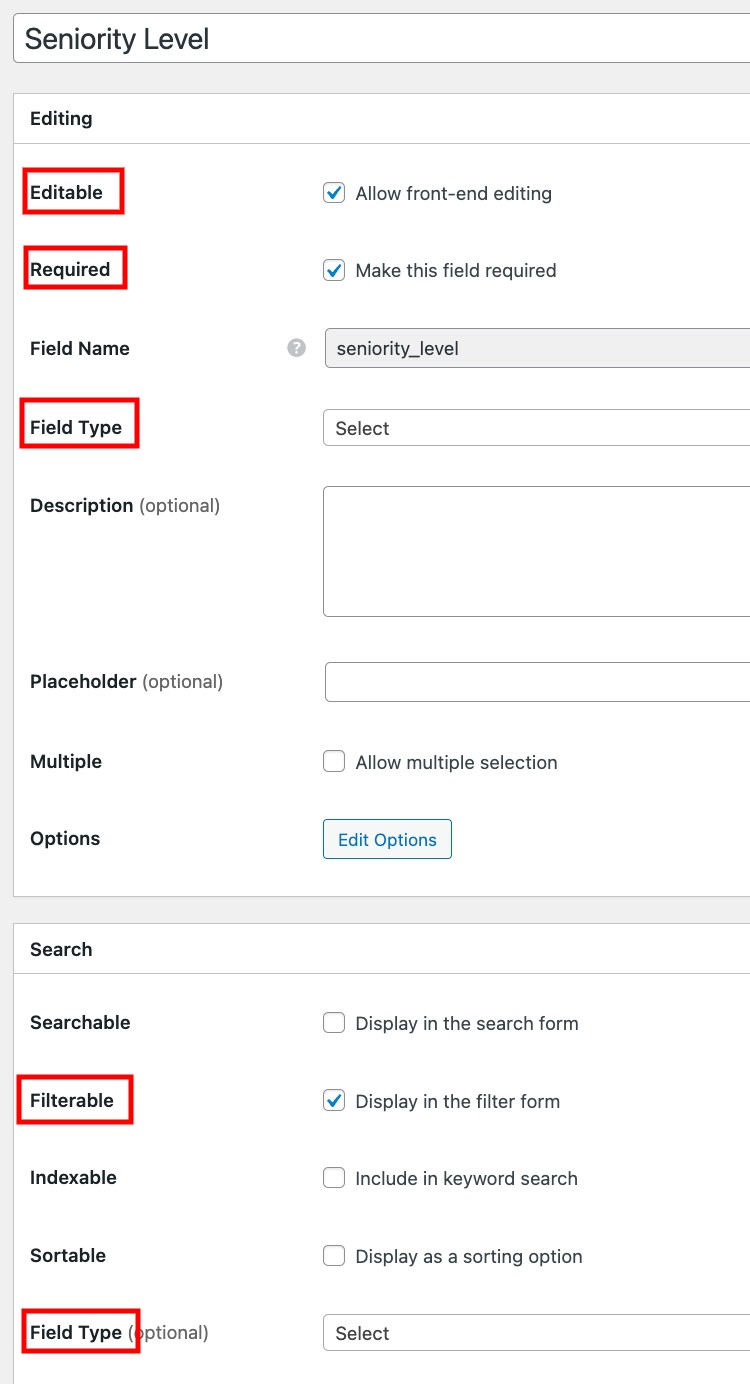
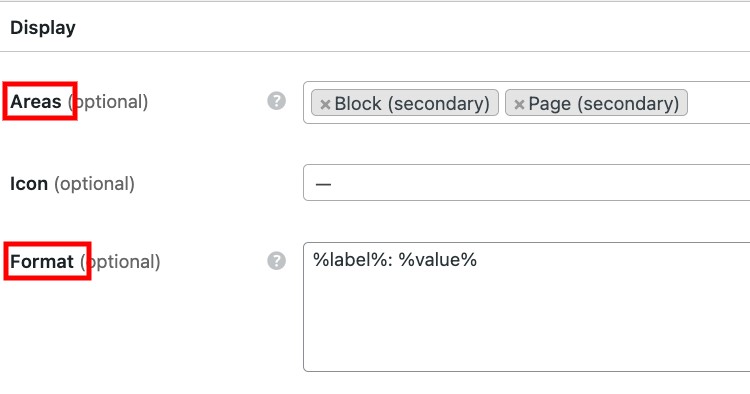
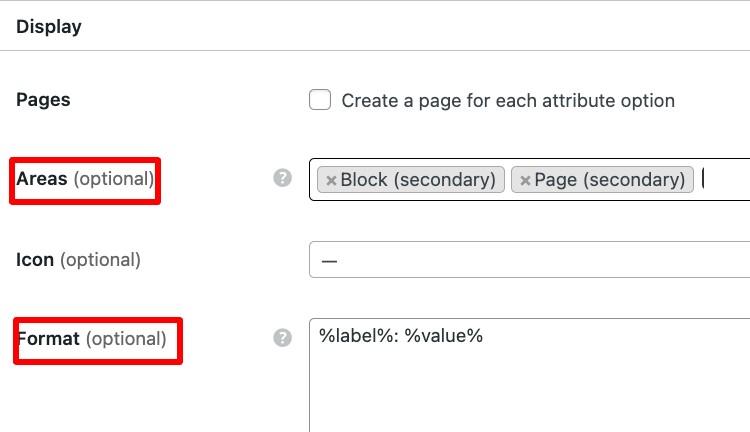
Then choose Display Areas (e.g., Block (secondary), Page (secondary)), and Format %label%: %value%
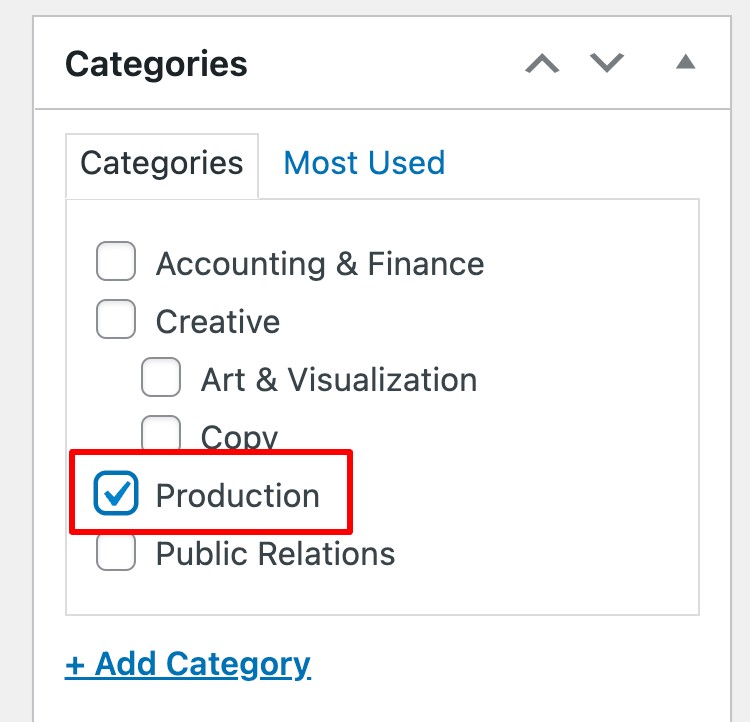
The next step will be to assign this field to the Production category in the section on the right.
After Publishing, proceed to Edit Options and add a few. For example, you can add Junior, Middle and Senior options.
Now the employees using your staff directory will be able to add all the necessary data to their profiles.
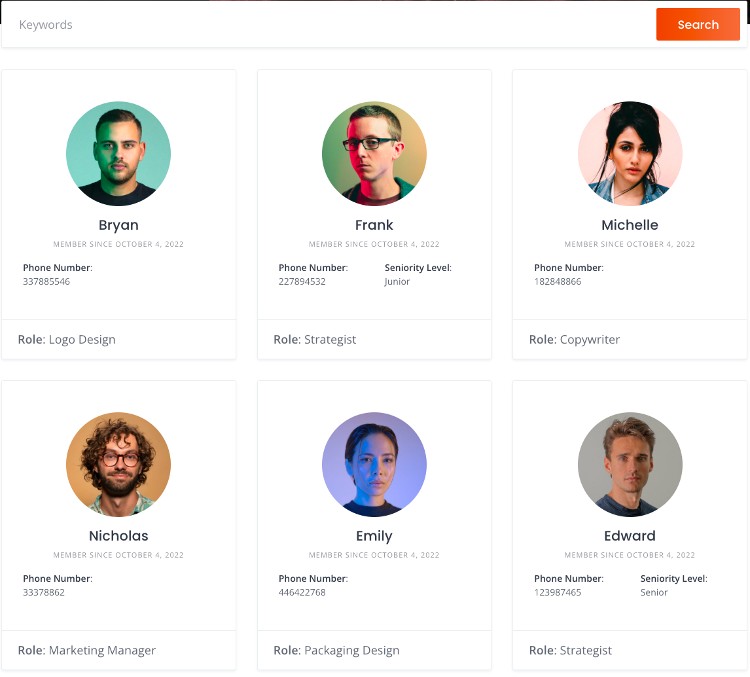
Let’s move on and create a page where all employees’ profiles will be displayed.
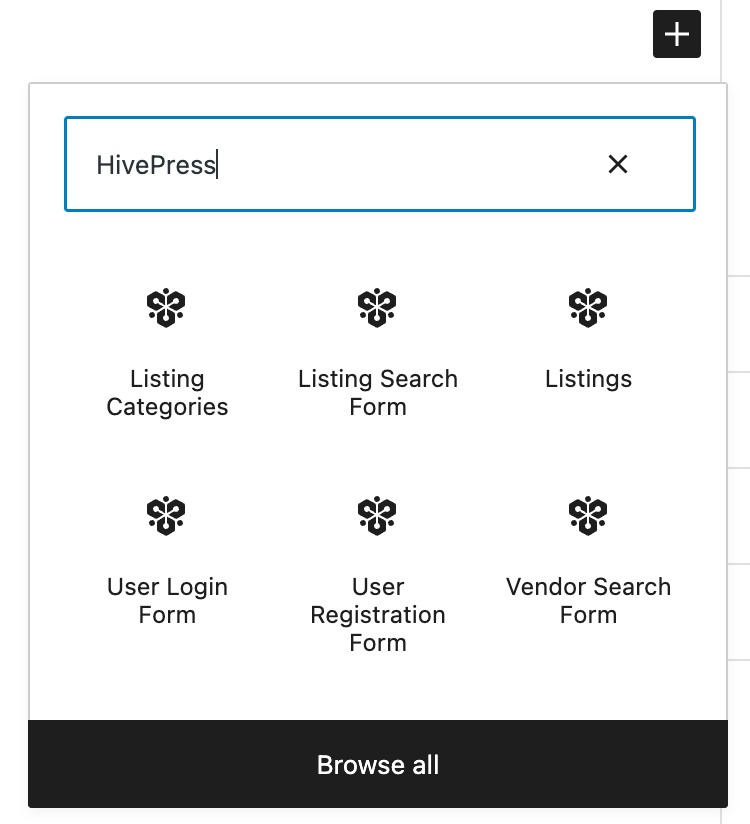
Go to the Dashboard > Pages > Add New section. Write the page Title and click on the ➕ sign to add some layout blocks. For example, let’s add a “Vendor Search Form” block and a “Vendors” one that will display all the directory members. Don’t forget to Publish the page.
After that, navigate to the Dashboard > Settings > Reading section, and set the just added page as a Homepage. Finish by clicking the Save Changes button.

Now let’s proceed to the next step.
Within this step, we’ll go through the HivePress settings to make sure that everything works in the proper way. Firstly, go to the HivePress > Settings > Listings tab and disable the Listing Submission feature since, in most cases, it’s not necessary for a staff directory website for users to add listings.
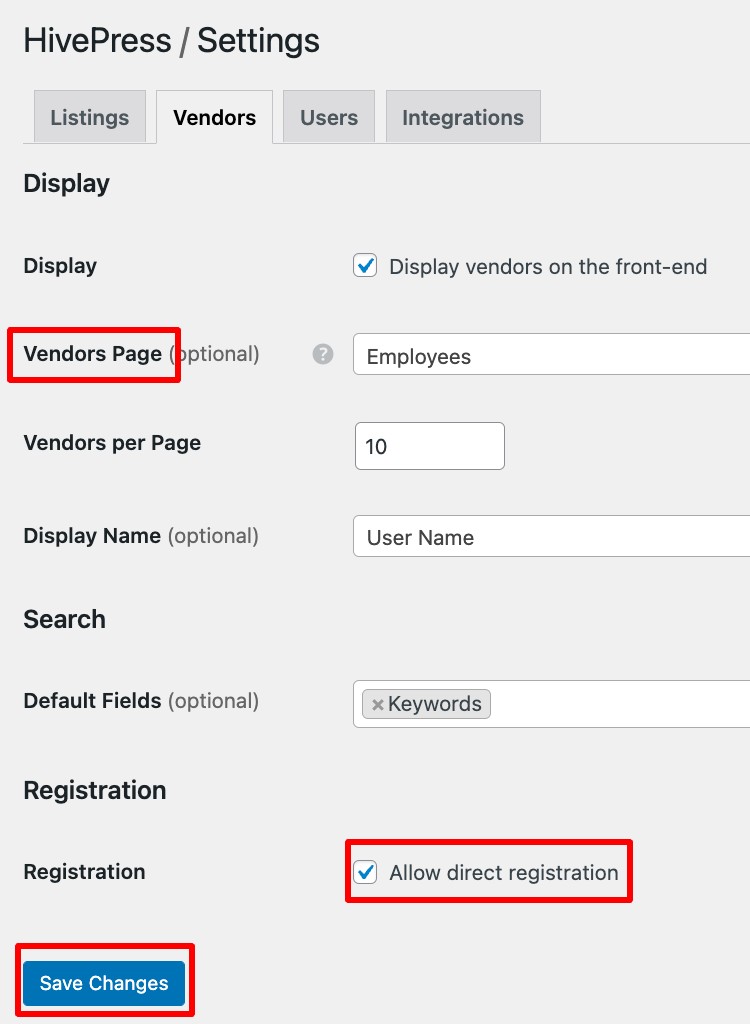
Next, go to the Vendors tab and set a Vendors page (i.e., a page where all the directory members will be displayed) in the HivePress > Settings > Vendors section. You can set your homepage here if you want to display all the employees on the front page.
In addition, here, you have to allow direct registration, it will allow employees to list their profiles on their own, from the front end. As always, as you finish, Save Changes.
Next,
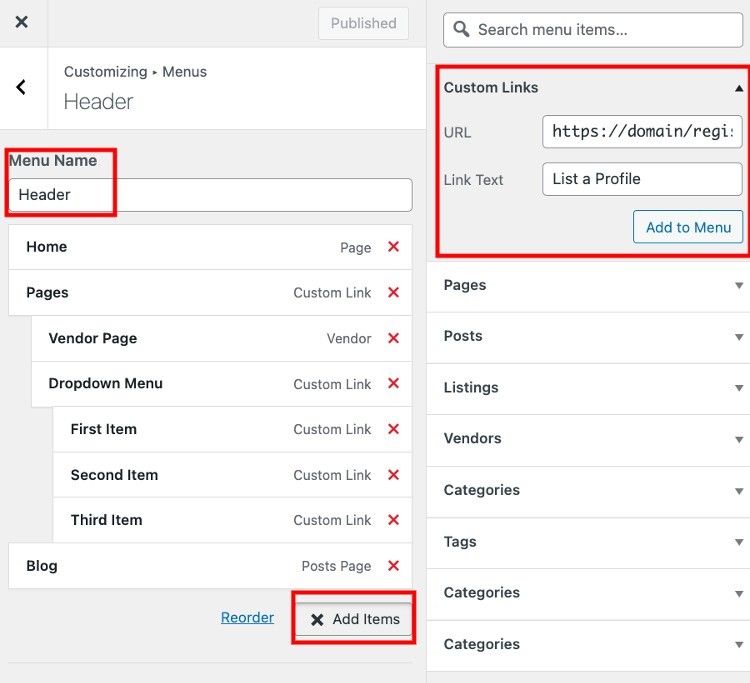
Then, proceed to the Dashboard > Appearance > Menus > Manage with Live Preview section. You’ll need a registration link on your website so employees can follow it to list their profiles. To add it, go to Header > Add items > Custom Links and fill in the field using the following link structureyour domain/register-vendor
Type a Link Text, then click Add to Menu and Publish.
That’s it! Now there’s a registration link in the header of your website, and employees can add their profiles using it.
ListingHive allows you two different options on how to add new profiles:
Based on your requirements, you can choose whichever way better suits your needs.
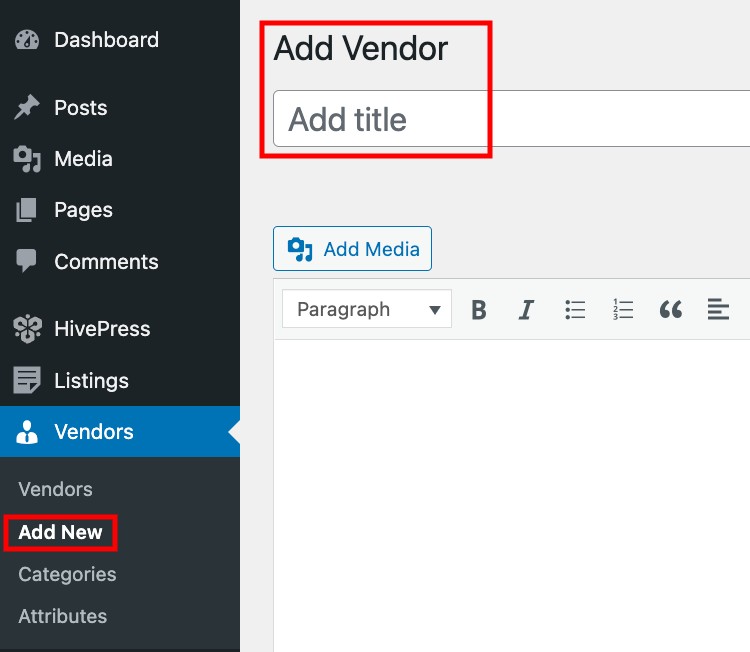
For example, as an admin, you can add new members from the back end in the Vendors > Add New section.
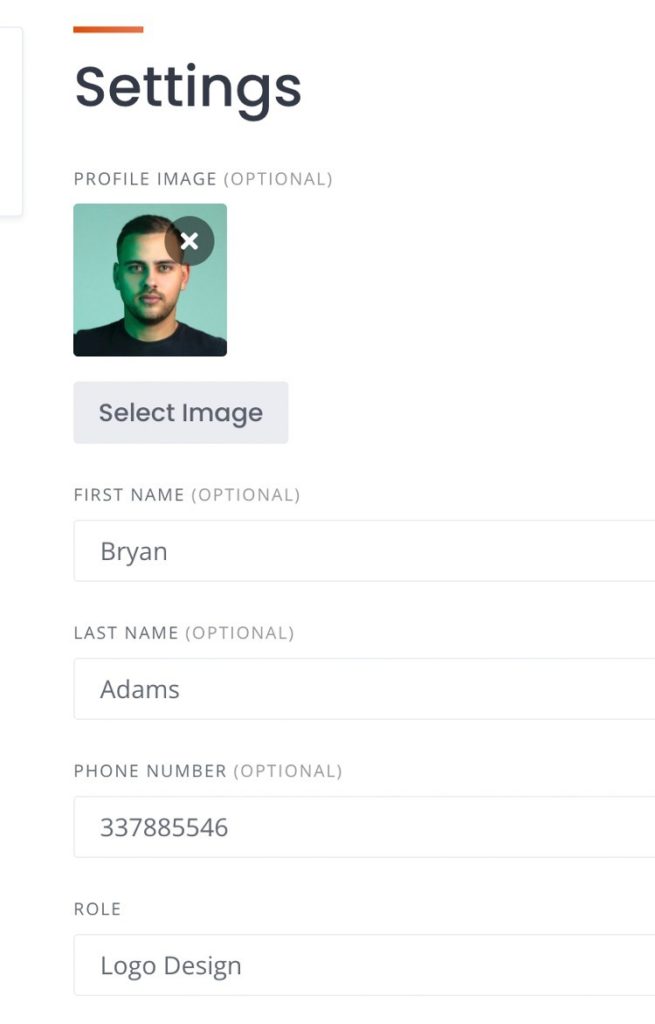
Otherwise, let’s also check how it works for employees. Users can add their profiles by clicking the List a Profile link (a link, we’ve just added in the previous step). After that, they’ll be invited to fill in the form with the custom fields we’ve just set up (e.g., Phone Number, Role, etc.) and submit it by clicking the Save Changes button.
The ListingHive theme is fully compatible with WordPress Customizer, which allows you to personalize the look and feel of your website. You can change the website logo, primary & secondary colors, and fonts by going to your platform’s page and clicking on the Customize button (check the screencast below).
With some basic customization and setup, you can easily build the same website as you see in the screenshot.
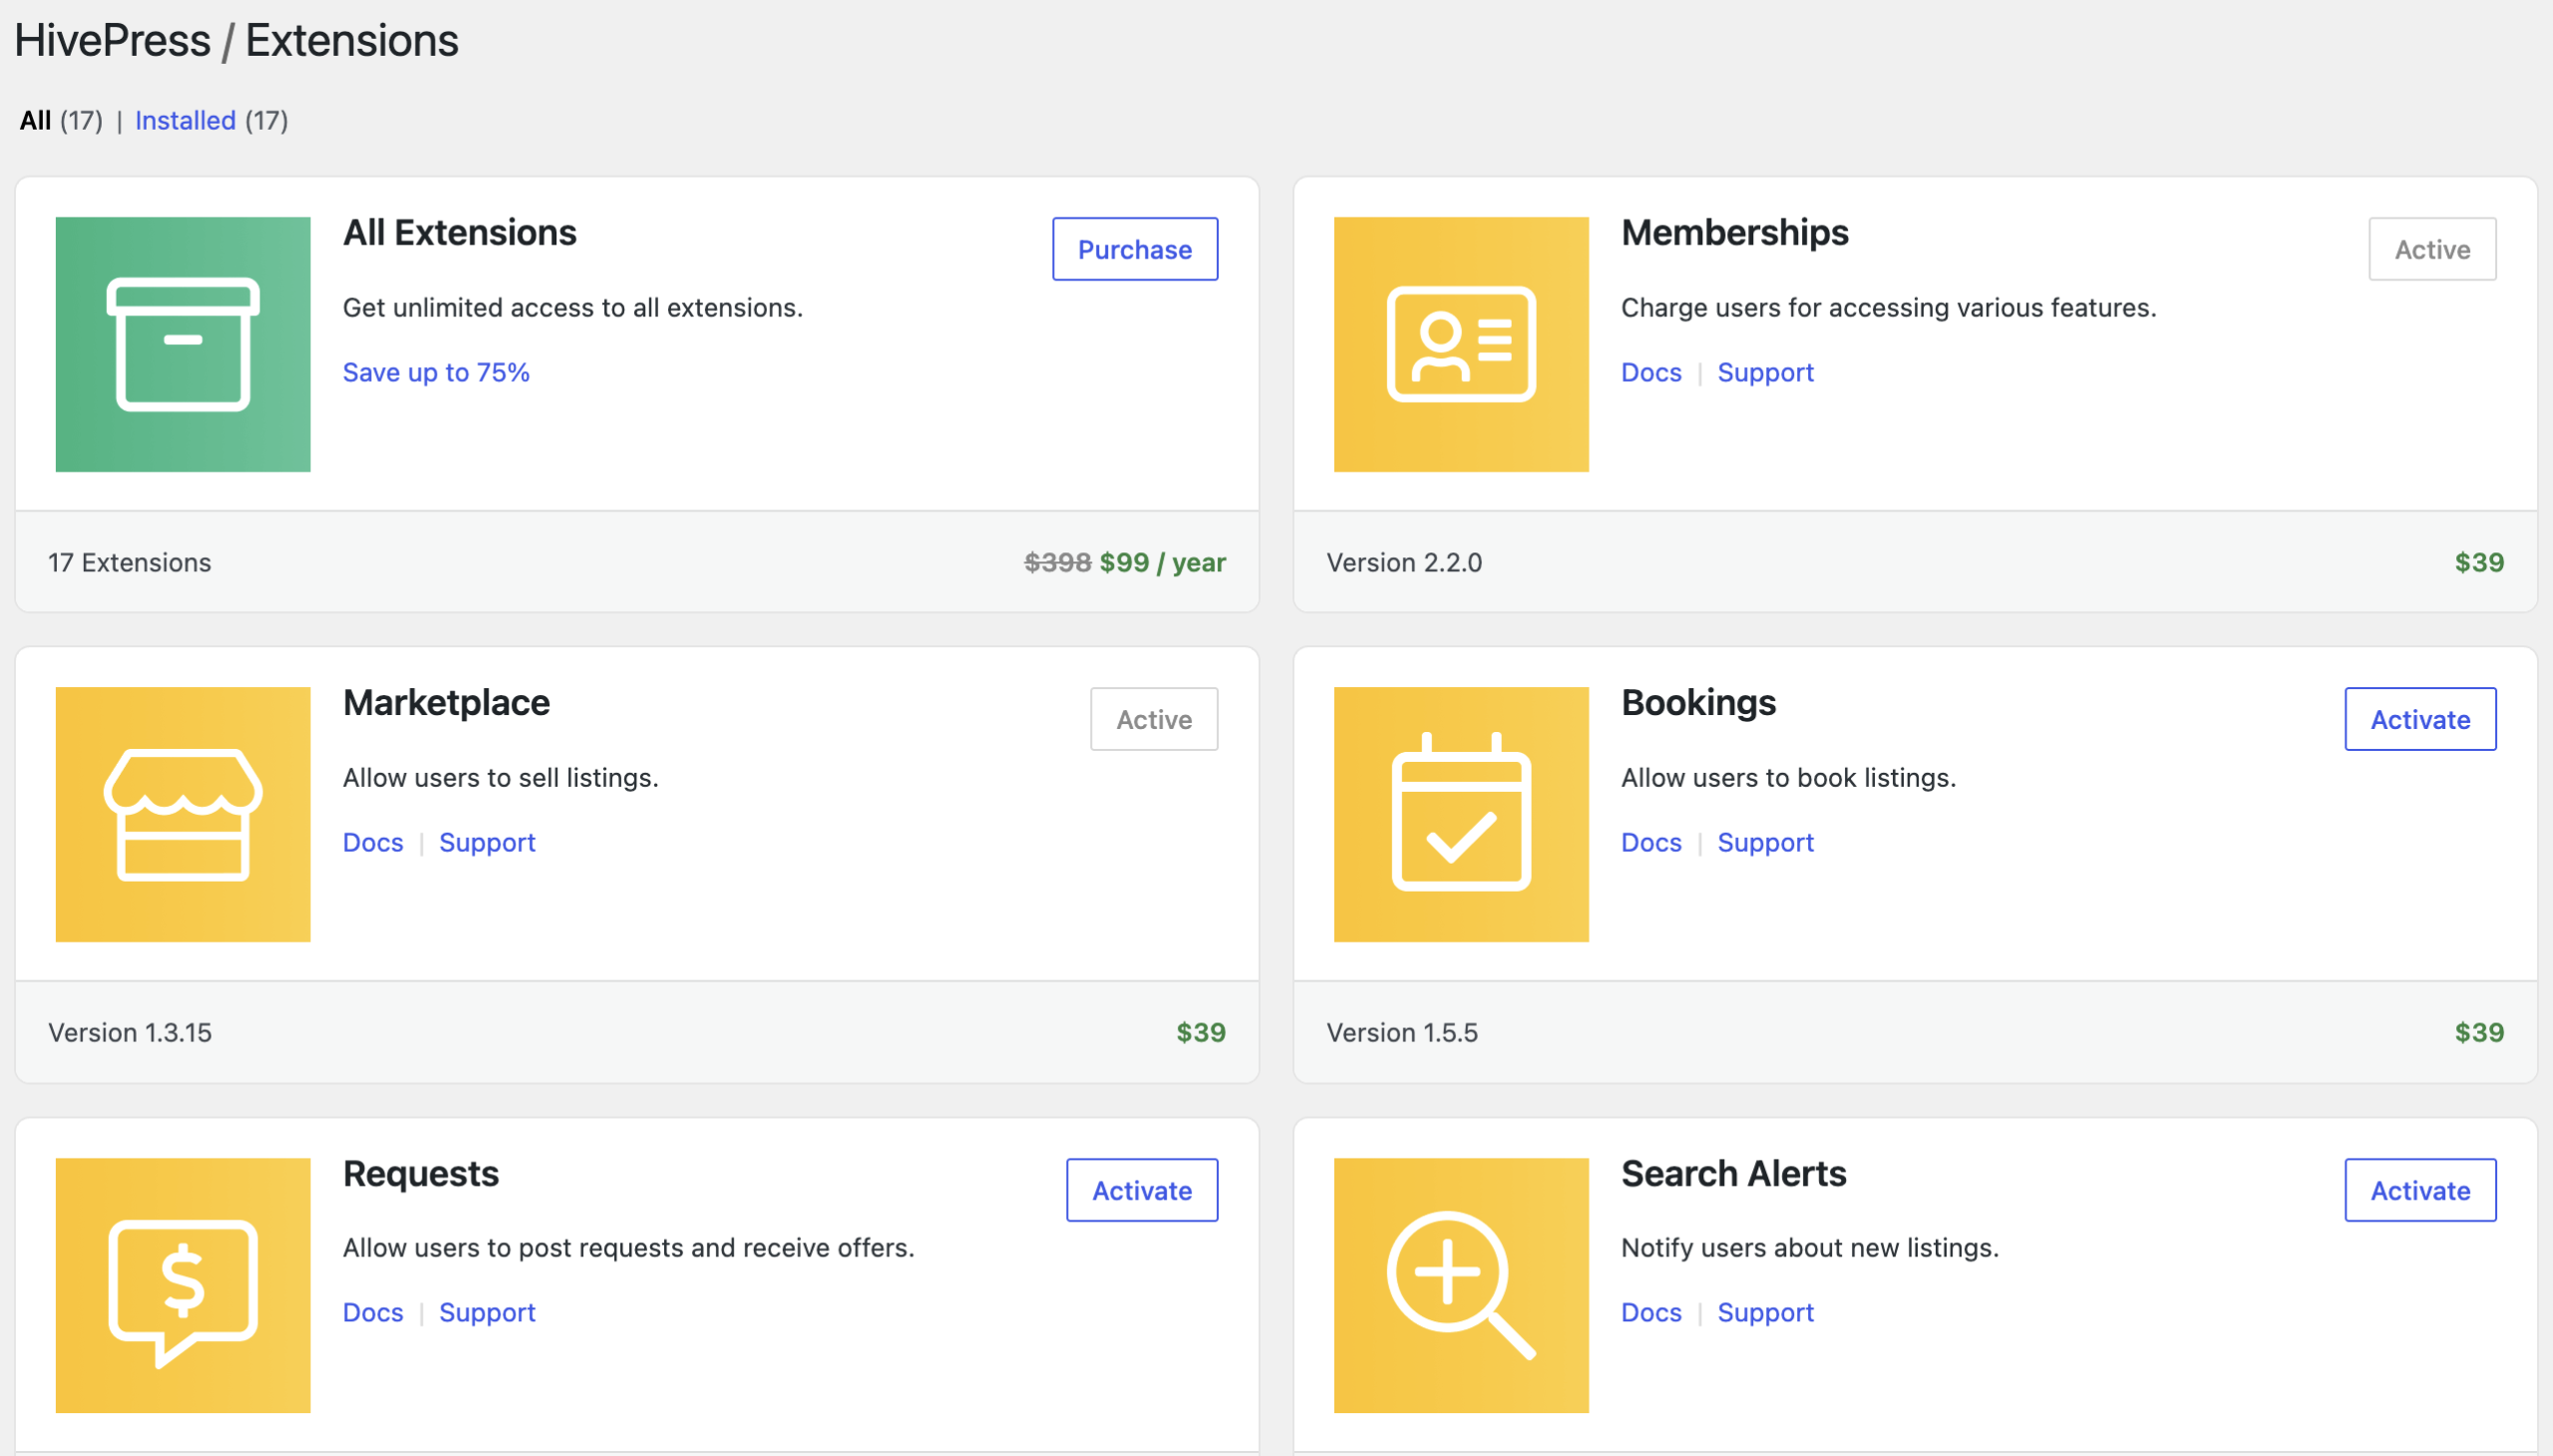
Finally, you can enhance your website with various additional features. HivePress has more than 15 extensions that you can use to extend the functionality of your staff directory. For example, you can install:
You can find all available add-ons in the Dashboard > HivePress > Extensions section.
Congratulations on building your staff website! We hope you’ve found this article useful and are now ready to delight your company’s employees with a great platform!
If you’re interested in learning more about how to create a directory website using WordPress, we have a comprehensive guide that covers all the essential steps and considerations. Feel free to check it!
A walkthrough on how to create a peer-to-peer service marketplace similar to Thumbtack or TaskRabbit.

A quick guide on how to create a marketplace for coaches with WordPress.

Launch your own сar listing website in a few simple steps.