
How to Create a Classifieds Website with WordPress for Free
Build your own classified ads website without a single line of code.
Launch a product catalog website for your business in 6 steps.

Some businesses with a brick-and-mortar location don’t sell products via the Internet for different reasons and prefer to take orders by phone or in person. If you are running such a business, you can increase your offline sales by creating a product catalog website to showcase the range of your products.
In this walkthrough, we’ll show you how to create a product catalog with WordPress. We’ll show you step by step how to set everything up and make your website up and running in no time.
Let’s get started!
An online product catalog is a website that lists different products with detailed descriptions that may include features, dimensions, weight, color, customer reviews and more. The main idea behind such websites is to showcase products, provide buyers with all the necessary information and help them make a purchase decision.
Product catalogs are especially useful to manufacturers that don’t sell their products directly or stores with in-person sales that still want to use the Internet as a marketing channel to attract new customers.
An online catalog is also handy for sales representatives, store clerks, and managers since they have the product range with all the details at their fingertips.
Before going any further, let’s take a look at some of the benefits of creating a product catalog website:
These are only a few advantages of creating a product catalog for your business, but there may be many others, depending on your niche.
First of all, to create a product catalog website with WordPress, you need some common prerequisites like a domain name, a hosting provider and, of course, installed WordPress. But, it’s also necessary to choose a reliable plugin that will power all the website features and a clean WordPress theme to give your site a unique look and feel.
While it’s pretty easy to come up with a domain name and select a hosting provider, it may be challenging to pick the right plugin & theme for your website out of dozens of available options.
To choose a proper plugin and theme, you should understand that any product catalog is basically a listing website. That’s why you have to look for a good directory plugin and a lightweight directory WordPress theme and to make it easier for you, we prepared two articles for you:
For both articles, we hand-picked the best themes & plugins available in the WordPress repository, so feel free to use any of them.
For the sake of this tutorial, we’ll use HivePress, a free multipurpose plugin that allows you to create a directory website of any type. Also, we’ll use ListingHive, a lightweight and clean listing WordPress theme, which works hand in hand with HivePress.
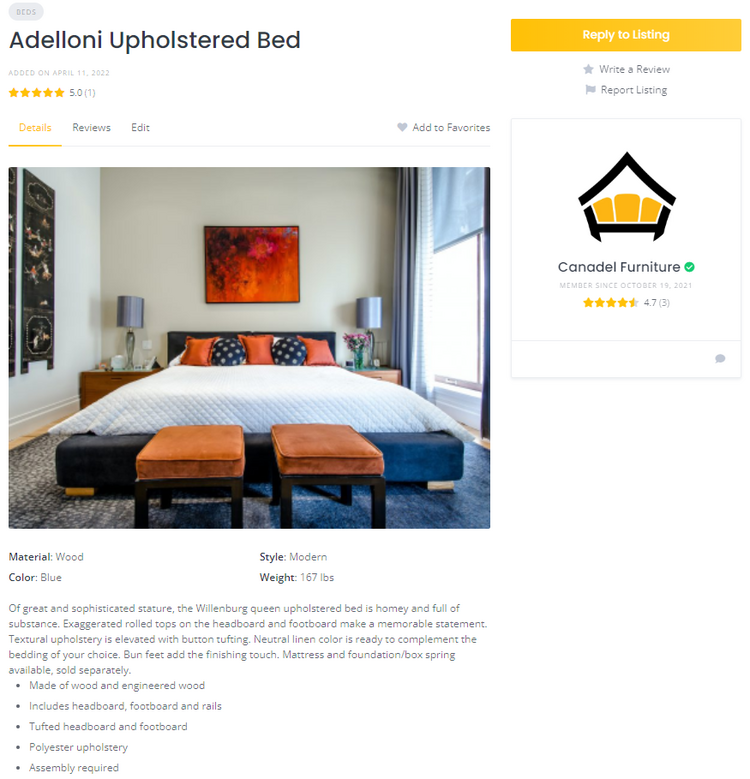
Before moving to the tutorial part of this article, let’s take a sneak peek at a product catalog website that we are going to create (we used a furniture manufacturing niche as an example):
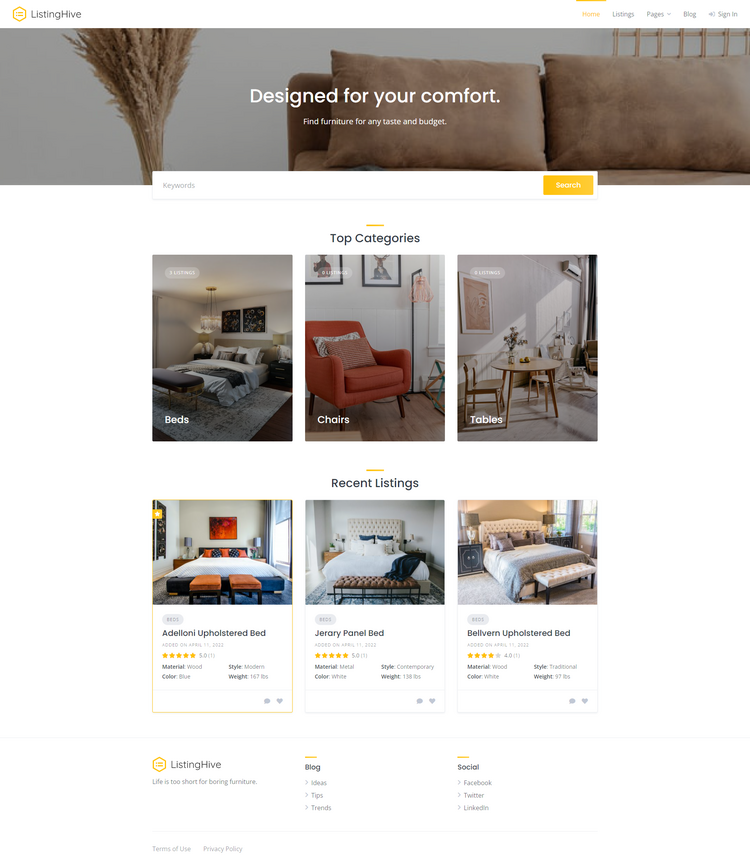
Now we’ll show you 6 simple steps that allow you to create a product catalog website without a single line of code. So, let’s move to the theme installation without any further ado!
The first step is to install ListingHive. It’s a free theme, so you can easily install it by going to the WP Dashboard > Appearance > Themes > Add New section. Then, use the search box to find ListingHive and proceed by installing and activating it.
Once you install ListingHive, you’ll get a recommendation to install the HivePress plugin.
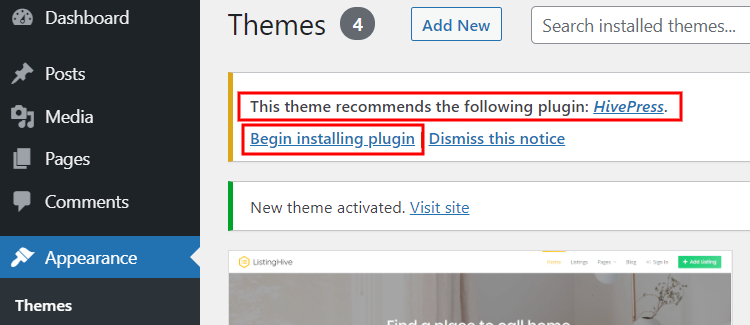
It’s crucial to install HivePress since it will power most of your product catalog website features, so click on the recommended plugin’s link to install and activate it.
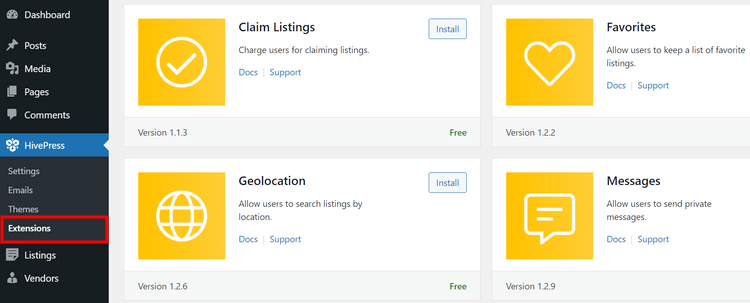
The next step is to enhance your product catalog website with some handy features that will improve the user experience on your site. There are 15+ HivePress extensions that allow you to extend your website functionality without compromising speed and performance.
For example, you may install the Favorites extension to allow website visitors to keep a list of favorite listings or the Messages add-on to let them contact you if they have any questions. Also, it’s useful to install the Reviews extension, so customers can leave reviews and rate your products.
To install any extension, go to the WP Dashboard > HivePress > Extensions section, find the necessary add-on and click on the Install button.
Now, it’s time to split your product catalog website into categories to make it easier for users to navigate it. For example, let’s imagine that you want to create a product catalog website for a furniture workshop. So you may need the “Beds”, “Chairs” and “Tables” listing categories.
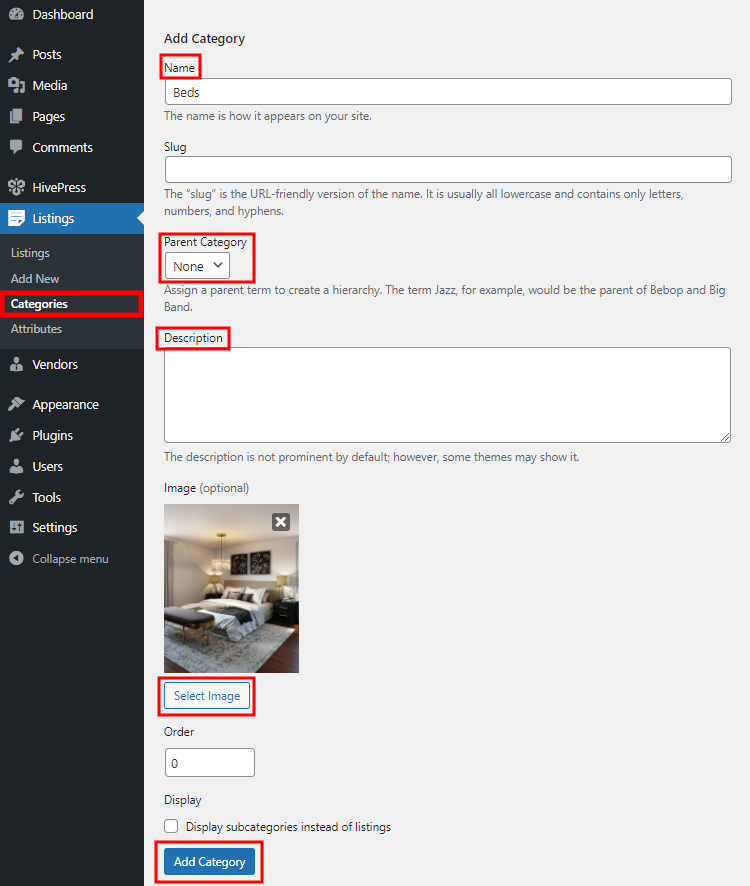
Navigate to the WP Dashboard > Listings > Categories section to add a new listing category.
Within this section, you can name your category, describe it and upload a category image. Also, you can create a hierarchy by adding sub-categories (using a “Parent Category” option). For example, for the “Beds” category, you can add sub-categories like “Twin Beds”, “King Beds”, “Bunk Beds” and so on.
Once you finish setting up your category, click on the Add Category button.
You can add as many listing categories as required for your product catalog website by following the same steps.
After setting up listing categories, you need to add different listing fields specific to your website niche. For example, if you want to create a product catalog for a furniture manufacturing company, you may need fields like color, material, style, etc.
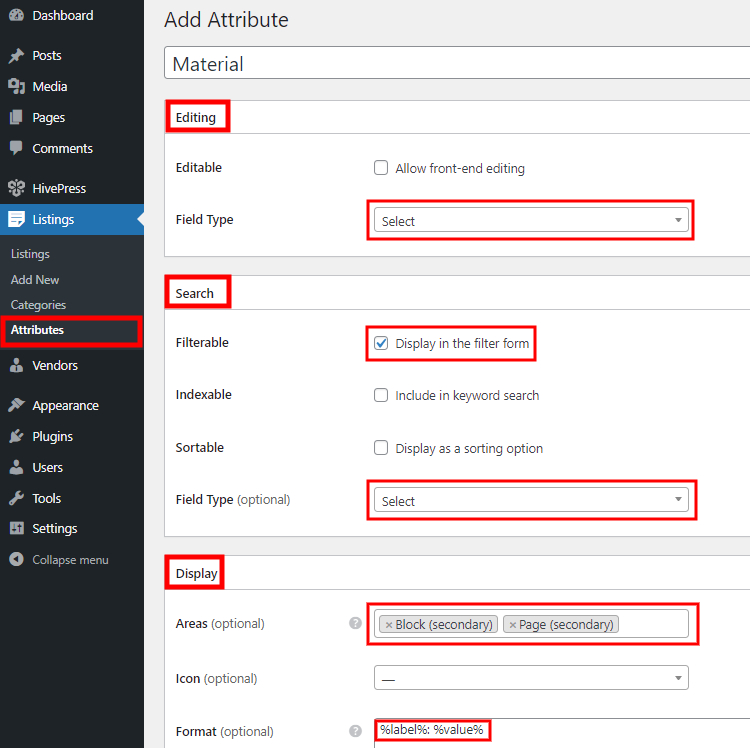
You can create custom listing fields in the WP Dashboard > Listings > Attributes > Add New section. As an example, let’s add a “Material” field so you can indicate what the product is made of.
Keep in mind, that when adding a new listing field, you can customize it in three different contexts. To get a better understanding of how everything works, let’s set them up for the “Material” field:
%label%: %value%).Once you finished customizing your listing field, click on the Publish button.
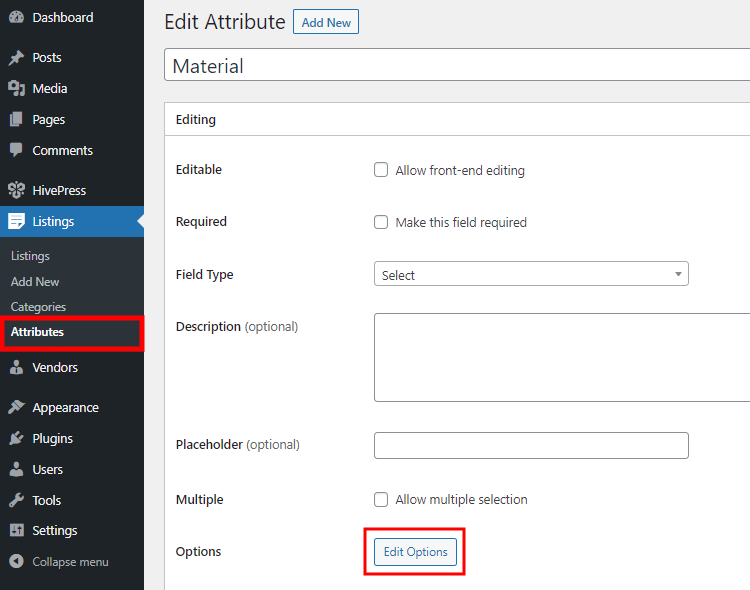
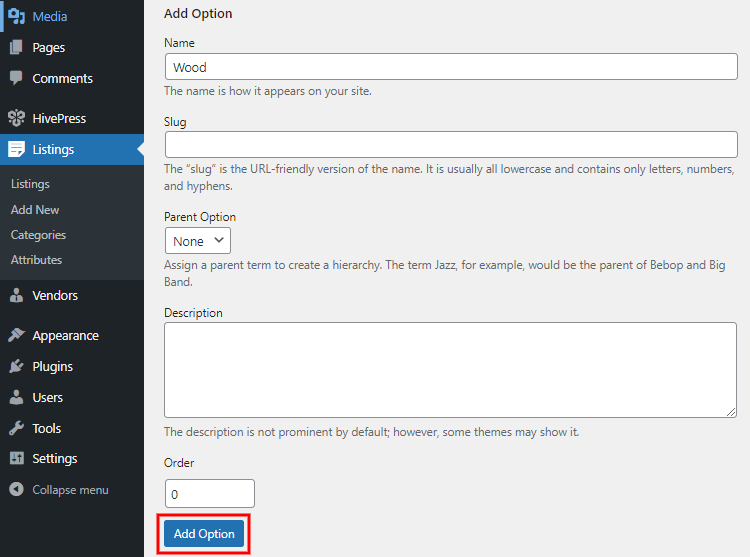
Your next step is to add the attribute options. Click on the Edit options button and add options you want to make available for selection.
In the case at hand, we’ll add “Wood”, “Metal” and “Plastic” options.
That’s it! You have just created the first custom listing field for your product catalog website. Similarly, you can add as many fields and search filters as you need for your catalog (e.g., shape, dimensions, weight).
Also, keep in mind that you may create category-specific fields. It may be really useful for your product catalog since you may need to indicate different details for products within different categories.
Alright, now let’s try to add the first product listing. To do that, go to the WP Dashboard > Listings > Add New section.
When adding a new product listing, you can name it, add a description and upload images if necessary. Also, in this section, you’ll have to fill in the custom fields you’ve created in previous steps.
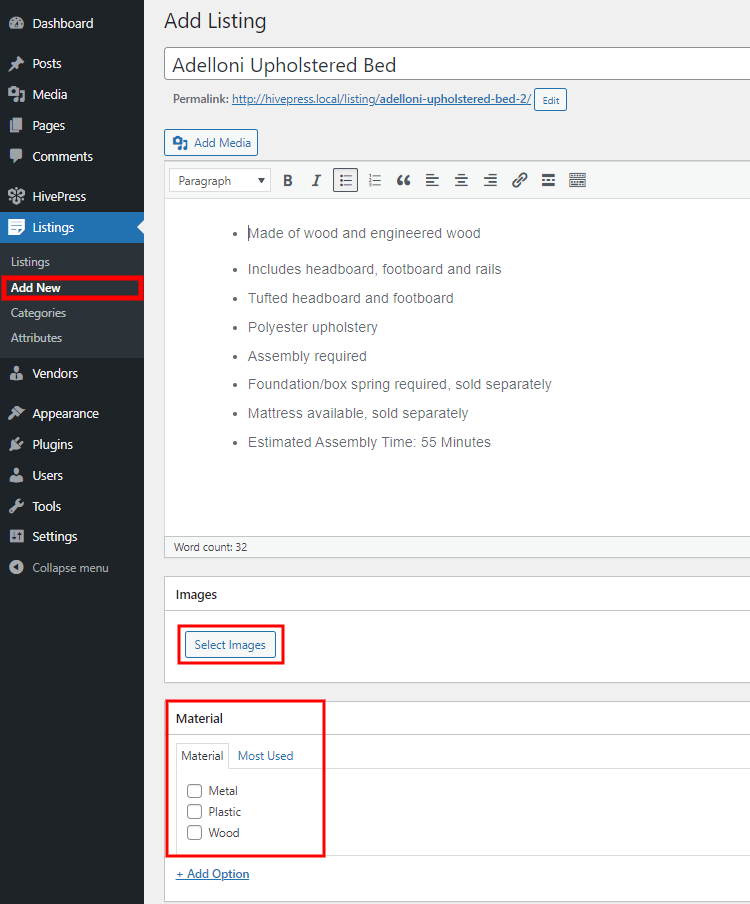
Before publishing this listing, don’t forget to select the listing category. Then, once published, you can check how your listing looks on the front end.
The last step is to customize the look and feel of your product catalog website. It’s as easy as pie to create stunning layouts using the WordPress block editor, which is integrated with HivePress.
Also, you can easily change your website’s colors, fonts, and backgrounds since ListingHive is fully compatible with WordPress Customizer. Simply navigate to the WP Dashboard > Appearance > Customize section and play around a bit to customize your website in the way you like.

Finally, the HivePress Templates feature allows you to customize any HivePress page layout without writing a single line of code.
Please check the screencast below to get a better idea of how the Templates feature works.
That wraps up our tutorial on how to create a product catalog with WordPress. We hope this article was useful to you, and now you have a better understanding of how to build a product catalog website for your business.
Keep in mind that you can use the HivePress plugin and the ListingHive theme whenever you need to create a directory or listing website of any type. They are both free, easy to use and include all the necessary features out of the box.
Build your own classified ads website without a single line of code.

A short explanation on how to set up the HivePress Messages extension.

A short guide on launching a scheduling platform with WordPress.