
How to Create a Searchable Database with WordPress
Create a searchable database with WordPress for free.
A quick guide on how to create a marketplace for coaches with WordPress.

Finding the right coach can be the gateway to personal transformation, opening doors that have never been opened before. With the assistance of a professional, anyone can reach new heights in many areas, whether it’s specific skills development or overall well-being.
Today, we’ll show you how to create your own coach booking website with WordPress simply and intuitively without any coding knowledge.
Let’s go!
A coach booking website is an online platform that simplifies scheduling appointments with professional coaches. These sites can be categorized into two types:
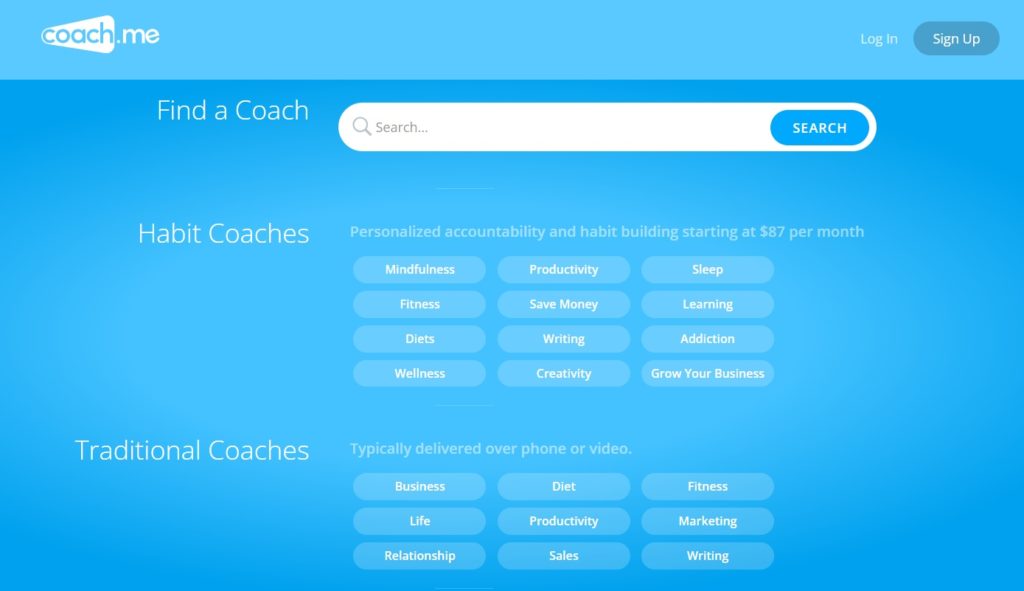
In this tutorial, we’ll be creating a multi-vendor website. A good example of a multi-vendor coach marketplace is Coach.me, where users can find coaches for various goals, from personal development to professional growth.
Before you dive into building the platform, make sure you have these essentials ready:
Okay, now let’s move on to the tutorial part!
We’ll be using MeetingHive, an appointment booking WordPress theme, and HivePress, a multi-purpose WordPress directory plugin that will power all the marketplace and booking features.
Our first step is to install the theme. To do it, head to the WordPress Dashboard > Appearance > Themes > Add New Theme page and click on the Upload Theme button. Select the MeetingHive ZIP file, then install and activate the theme.
Once MeetingHive is activated, you’ll see a link to install recommended plugins, including HivePress. These are essential for enabling all the necessary features, so follow the link to install and activate them.

Additionally, you can import MeetingHive demo content to see how everything works behind the scenes. This screencast will guide you through quickly importing the pre-made content:
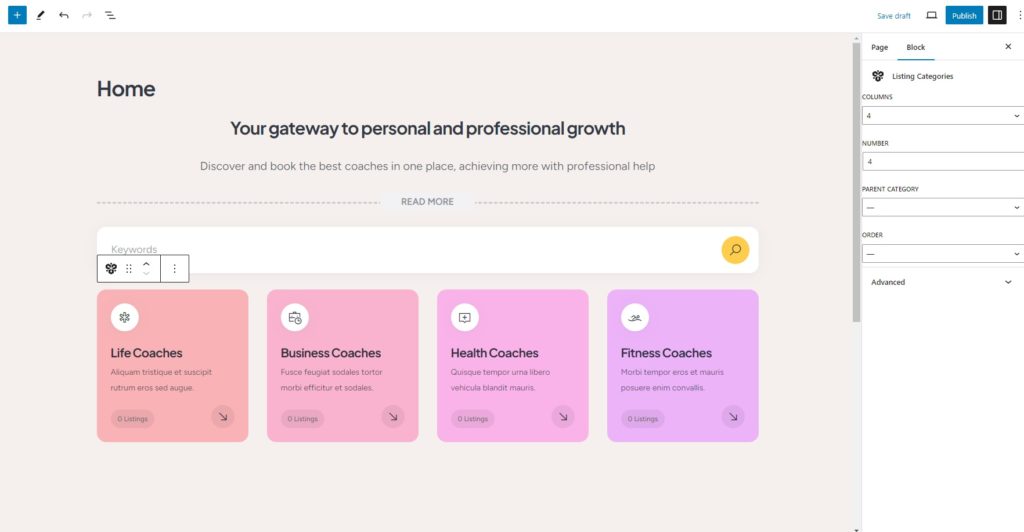
Okay, the tools are present. The second step is to add different listing categories to your coach booking platform to help users easily browse and find the right trainer. For example, we’ll create categories such as Life Coaches, Business Coaches, Health Coaches, and Fitness Coaches.
To add a new category, navigate to the Dashboard > Listings > Categories section. Here, you can name your category, enter a description, and select a suitable category icon. You can also create a hierarchy by selecting a parent category.
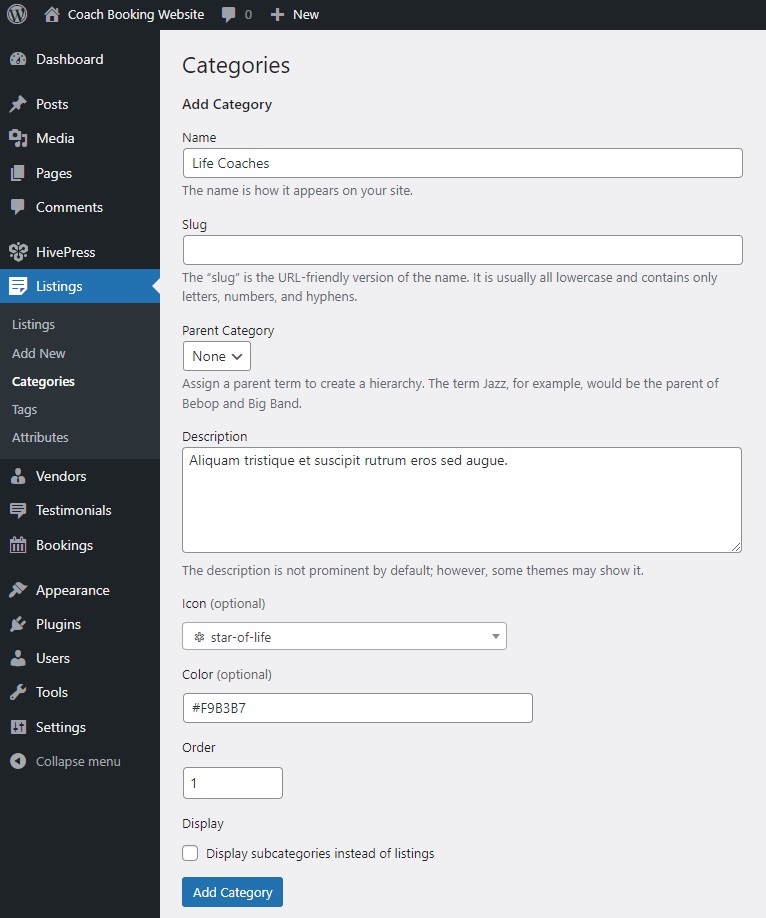
Once you’ve configured everything, click the Add Category button. You can repeat these steps to add as many categories as you need.
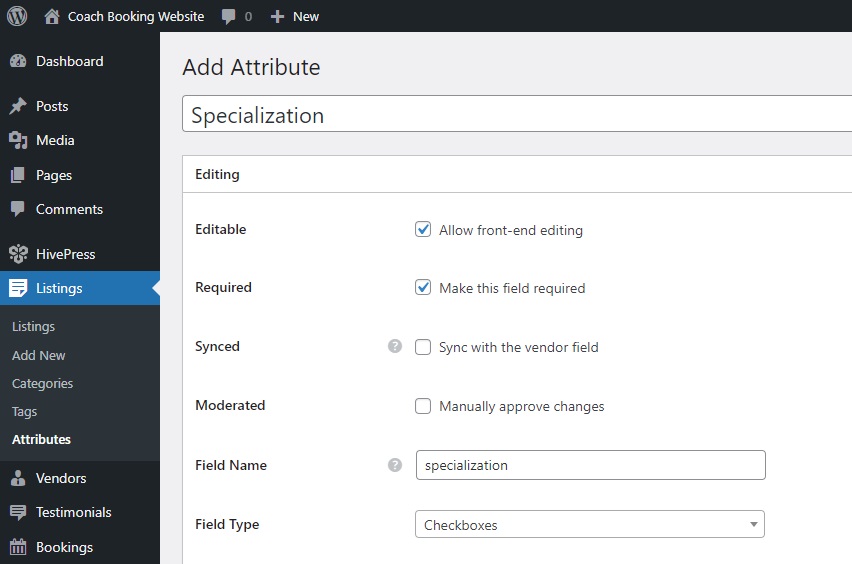
Now, we need to create custom fields to let coaches provide specific information about themselves and their services, making it easier for users to connect with the right trainer quickly.
For instance, you can add listing fields like “Hourly Rate,” “Contact Info,” “Specialization”, etc. Let’s create a “Specialization” field so coaches can indicate their specific areas of expertise. To create a new listing field, navigate to Dashboard > Listings > Attributes and click Add New.
First, write its name. In the Editing section, mark your field as editable to allow coaches to fill it out when they list their service. Then, choose the field type. For this particular field, we’ll pick “Checkboxes” to add different options later. Finally, decide if it should be a required field and set your moderation preferences.
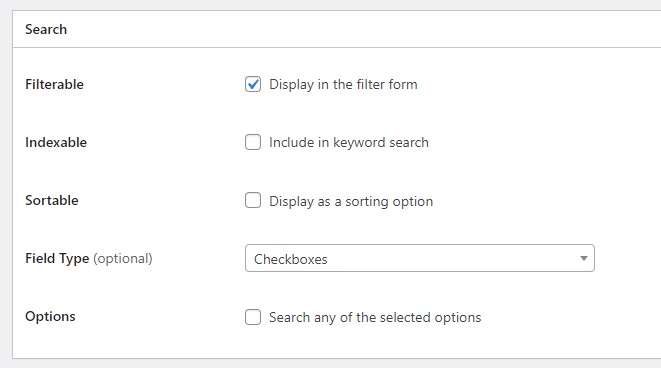
In the Search section, we’ll turn this field into a search filter to allow users to filter listings. To do this, mark it as filterable so that it appears in the listing filter form. The field type would be “Checkboxes” as in the previous section.
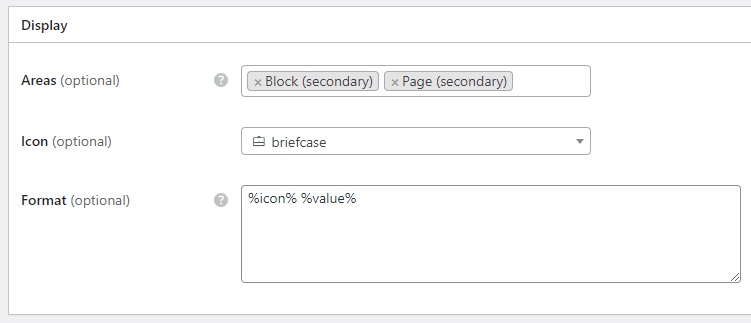
Lastly, the Display section lets you select the template areas where this attribute will be displayed. You can also set its display format using the available tokens and choose an appropriate icon for it (to learn how to set up attributes, refer to this doc). For example, let’s select Block (secondary) and Page (secondary) as display areas and set this display format: %icon% %value%
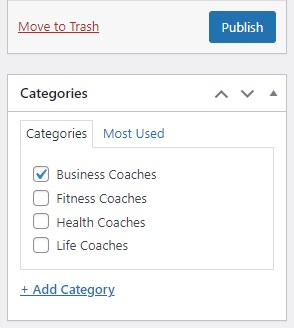
Note that you can make attributes category-specific, and that’s what we’re going to do with the “Specialization” field. For example, let’s assign it to the Business Coaches category and then press the Publish button.
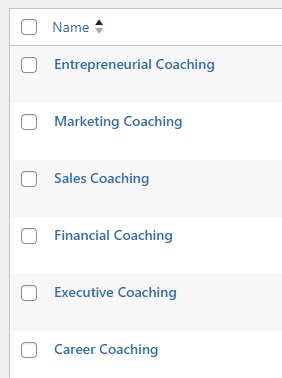
After this, the new Edit Options button will appear in the Editing section. We need to follow it and add different business specializations for coaches to choose from. We’ll add something like this:
And that’s it! Use this example as a starting point for your own listing fields, and keep in mind that there is no limit to the number of fields you can add.
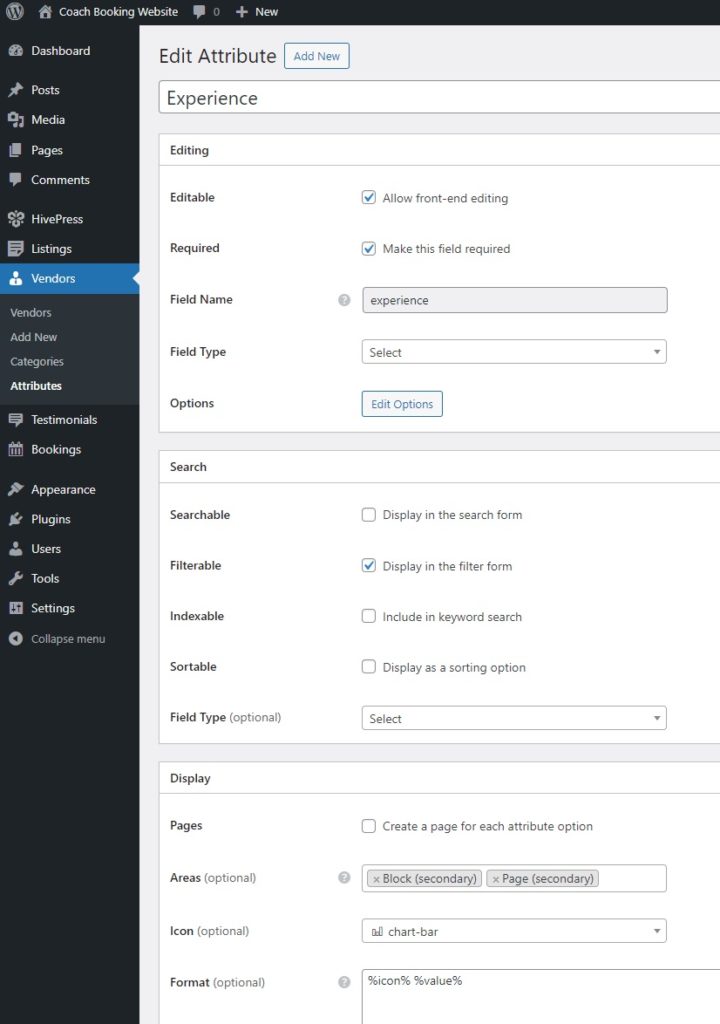
Additionally, consider adding coach profile fields to let users see more information about each trainer. For example, to show how many years of experience a particular coach has, we’ll add an “Experience” profile field. To do this, go to Dashboard > Vendors > Attributes > Add New.
It’s no different than setting up the listing fields, so we won’t cover it in detail. Just a heads up: for this field, it’s better to set the “Select” field type so that only one option can be chosen.
Let’s move on to the next step. At this point, you need to create a homepage for your coach booking appointment platform. To get started, go to Dashboard > Pages > Add New Page and name the created page.
Now, you can start building the page’s layout. First, write a headline that will welcome website users. Then click the Plus icon and type “HivePress” in the search bar to find all available HivePress blocks. For instance, let’s add “Listing Search Form” and “Listing Categories” blocks. You can also customize HivePress blocks using the settings column on the right. Click Publish once you’re done.
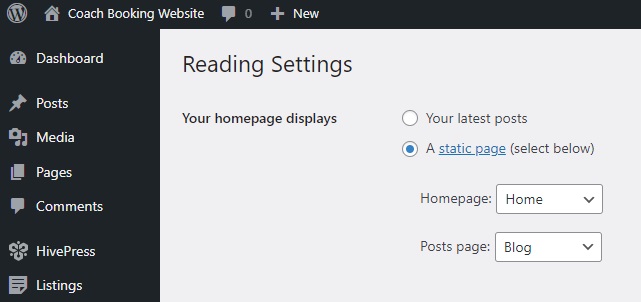
Next, go to Dashboard > Settings > Reading and select this page as your homepage from the dropdown list. You should also do this for your blog page once you create it.
You can make further changes to the look and feel of your platform by visiting the Dashboard > Appearance > Customize section. Check out this video for instructions on customizing MeetingHive:
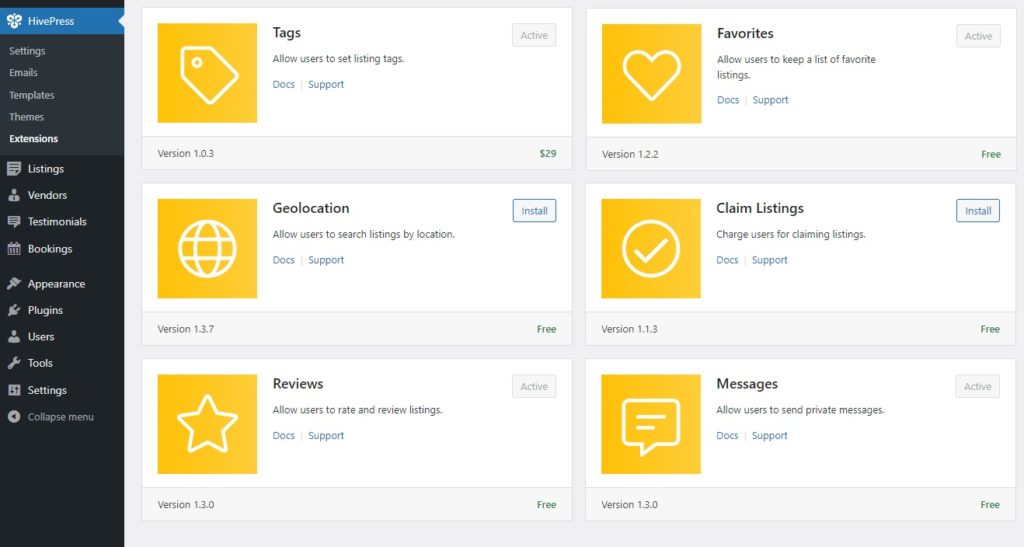
There are more than 15 HivePress add-ons that you can use to enhance your coach booking website.
All of the available HivePress extensions can be found in the Dashboard > HivePress > Extensions section.
For example, the Geolocation extension allows users to find coaches based on their location, while the Social Login add-on enables them to log in through third-party platforms. Additionally, the Social Links extension allows coaches to add their social media profiles to their listings. To install any of the extensions, simply click the Install button.
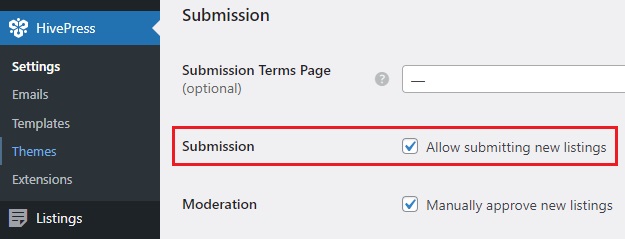
To get your coach booking platform running smoothly and working the way you expect it to, you’ll need to adjust the settings in the Dashboard > HivePress > Settings section.
For example, if you’re planning to launch a single-vendor platform, the first thing you’d want to do is go to the Listings tab and turn off front-end listing submission. This way, only the admin will be able to list services.
Vice versa, for a multi-vendor platform, be sure to enable direct vendor registration in the Vendors tab to simplify the registration process for coaches (by default, HivePress requires you to add at least one listing to become a vendor). You’ll also need to add a link on your site for trainers to sign up – check this doc on how to do it.
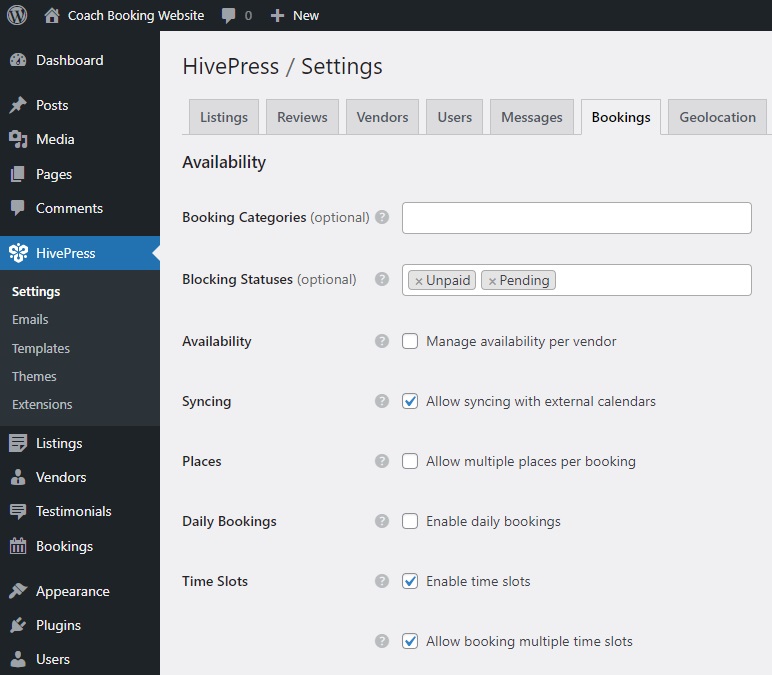
Then, you should take a moment to set up the booking functionality in the Bookings tab. For example, you can enable time-based bookings instead of daily ones, allowing coaches to specify their availability in precise time slots. Besides that, you can set up calendar synchronization with services like Google Calendar. To learn more about setting up booking functionality, check these docs.
Finally, let’s try registering a new profile and adding a new listing to see how it works.
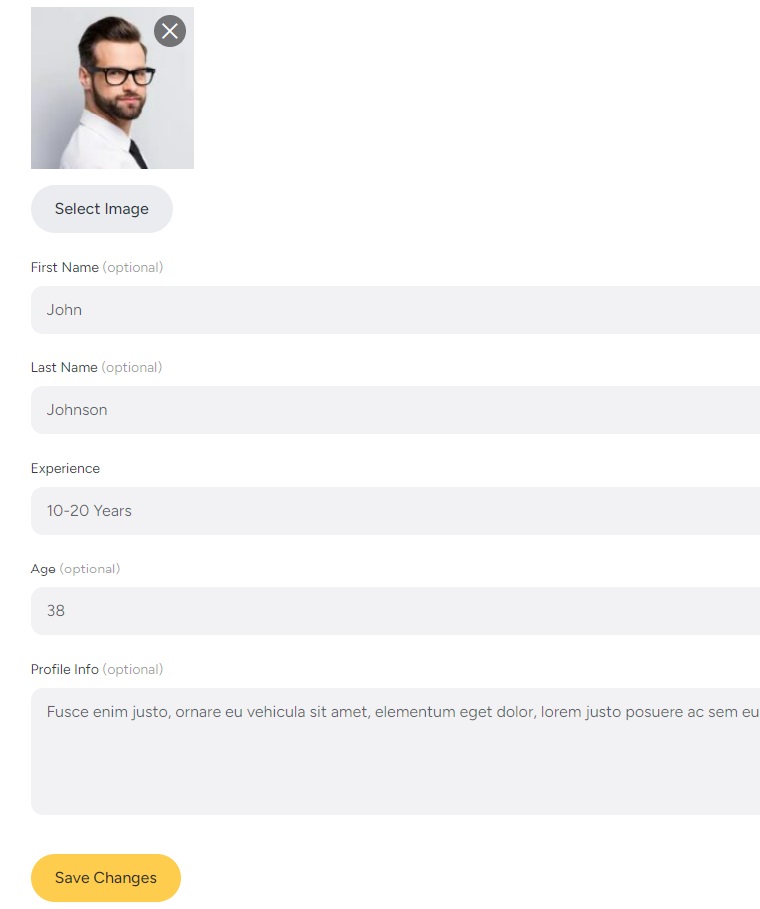
To sign up as a coach, visit your site from the front-end and simply click on the vendor registration link you created earlier (if not, refer to this doc). Then, fill out all the fields, including the custom ones, and press Save Changes.
Great! The profile is ready, so let’s proceed to add the first listing.
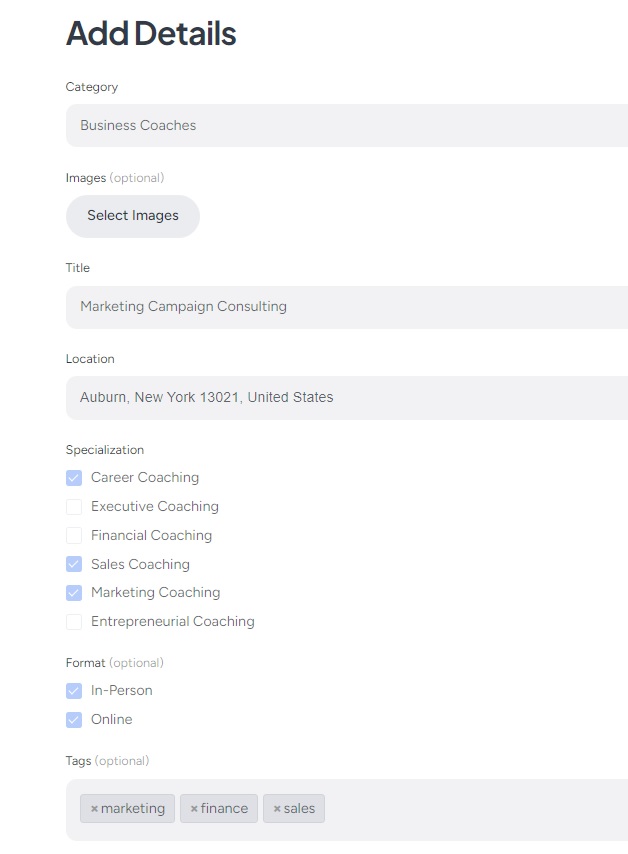
Click the List a Service button to open the submission page, where you’ll see default fields like title and description, as well as custom fields you’ve created and those added by different HivePress extensions. Start filling out the fields and when you’re done, click Submit Listing.
The listing will now be submitted for review and can be approved by an admin in the Dashboard > Listings section. However, you can always disable manual listing moderation in HivePress > Settings > Listings. Once approved, the listing will be visible on your platform.
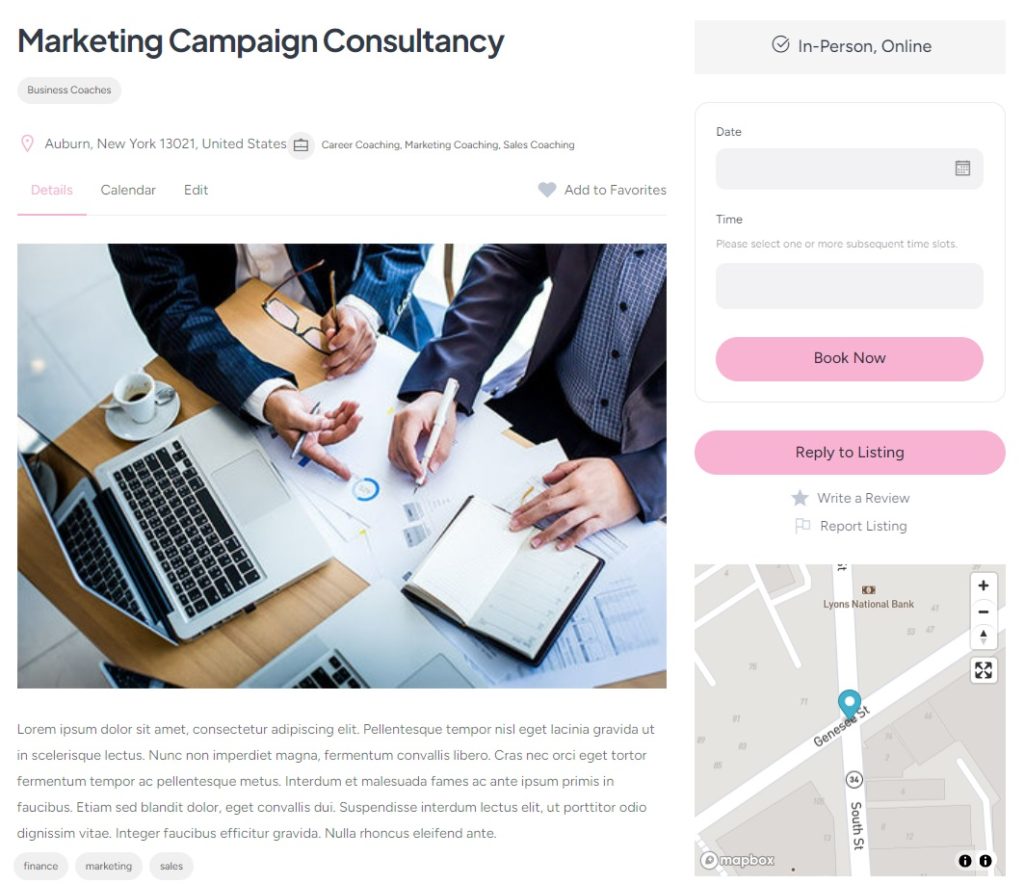
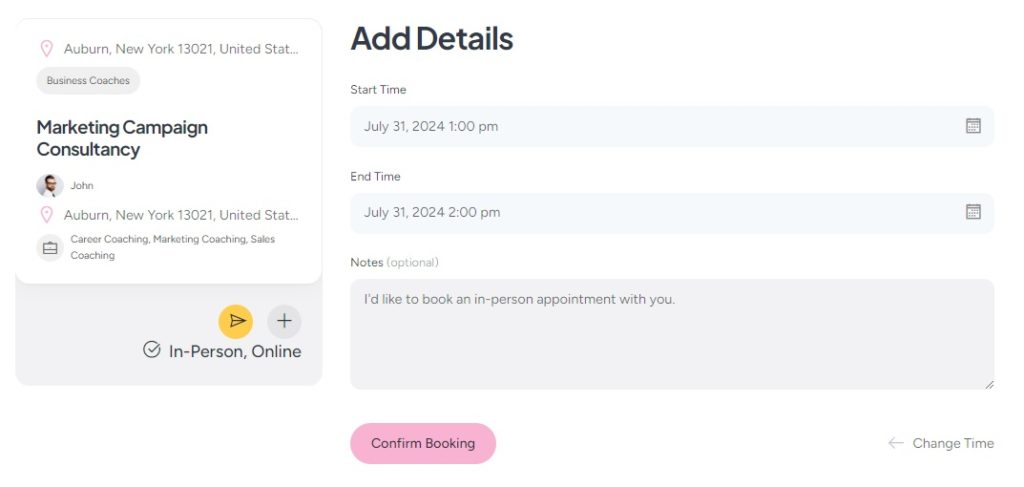
From now on, users will be able to book an appointment with this coach in a few clicks. All they have to do is select the available date and time and click Book Now. They will then be redirected to the confirmation page, which is the last step remaining before the appointment is scheduled. Simple as that!
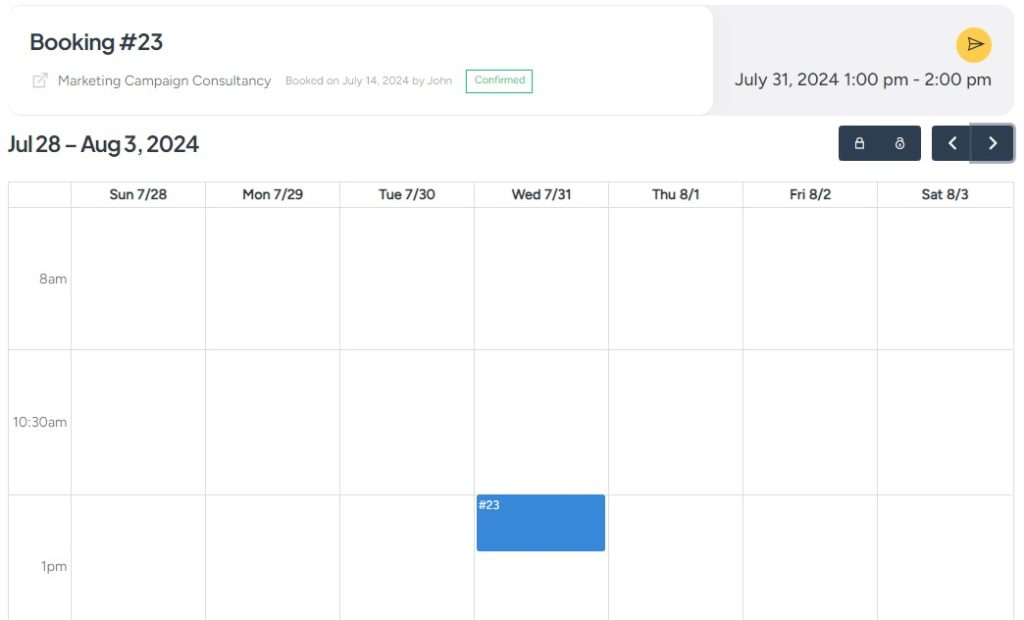
The coach will see the booking in their dashboard, with the option to accept or decline it. In addition, each trainer will have the ability to manage a personalized calendar that will show them each successful reservation as well as the available dates.
Congrats, your website is already in action. So, lastly, let’s quickly discuss how you can make money from it. First of all, you need to install WooCommerce to be able to accept payments.
Then, there are two primary monetization methods that are popular among booking websites.
The simplest way to earn is by taking a commission from each successful booking. Commissions can be applied to coaches, clients, or both. For this to work, you’ll need to install the HivePress Marketplace extension that comes with the MeetingHive theme.
Download the Marketplace extension from your MeetingHive purchase email and install it in the Dashboard > Plugins > Add New > Upload Plugin section. Next, navigate to Dashboard > HivePress > Settings > Vendors section to set your commission rates, which can be either a percentage, a flat fee, or both. To set up commissions for customers, visit the Users tab, where the exact settings are available.

For a visual guide, you can also watch our video tutorial on setting up commissions:
Now let’s talk about the second monetization model for a coach booking website. Using the free HivePress Paid Listings extension, you can create different listing packages with varied prices. Simply saying, you might offer a basic free package for adding a single listing, while premium packages could allow for multiple listings and other features.

Additionally, the Paid Listings extension lets you charge vendors for advertising. For a certain fee, they can make their listings show up at the top of the search results.
For a detailed walkthrough on setting up listing packages, watch the video below:
And that concludes our tutorial on creating a coach booking website with WordPress. We hope you found it helpful and now have a better idea of how to launch an appointment booking platform for coaches.
If you’re still unsure which theme to choose, consider trying MeetingHive. It’s a feature-rich appointment booking WordPress theme that comes with all the necessary features right out of the box.
Additionally, feel free to check our articles on how to:
Create a searchable database with WordPress for free.

Launch your own appointment booking platform using WordPress.

Launch your own Amazon or AliExpress affiliate marketing website and start making money on commissions.