
Create a Vacation Rental Website with WordPress [8 Steps]
A complete walkthrough on launching a property rental website like Vrbo.
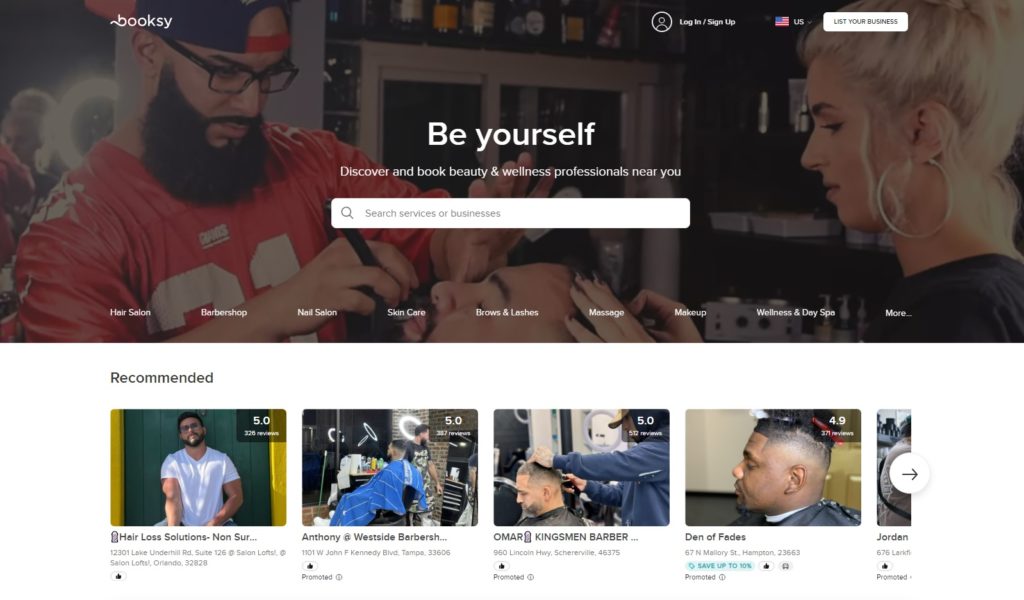
Create a website like Booksy with WordPress hassle-free.

Today’s beauty business is all about customer convenience, and booking websites like Booksy have revolutionized the way we access beauty services. Imagine needing a last-minute haircut, manicure, or massage before a big event – these platforms make it effortless to find and book appointments with skilled professionals in your area. No more calling around, dealing with busy lines, or working around salon hours. Instead, you browse, compare, and book online at any time that suits you.
In this tutorial, we’ll show you how to create a website for beauty services like Booksy using WordPress. Whether you’re a beauty professional looking to expand your reach or an entrepreneur with the idea of creating a multi-vendor marketplace, this guide will provide you with the knowledge you need to get started.
Let’s dive in!
Such websites are online platforms where clients can find and book beauty services like hairdressing, manicures, spas, and massages. They typically fall into two categories:
Before diving into the creation of your website for booking beauty services, ensure you have the following essentials:
We recommend using MeetingHive, a modern appointment booking WordPress theme, alongside HivePress, a multi-purpose WordPress plugin that will power your booking and marketplace features.
Now, let’s move on to the tutorial part!
The starting point is to install the necessary tools. First, let’s install the MeetingHive theme.
Navigate to WP Dashboard > Appearance > Themes. Click the Upload Theme button and select the MeetingHive ZIP file. Once uploaded, proceed to install and activate the theme.
After installing MeetingHive, you’ll see a prompt to install recommended plugins, including HivePress. These plugins are essential for your website’s functionality, so simply click on the link to install and activate them all.

For a visual guide, check out the video below, which demonstrates how to install MeetingHive and the necessary plugins.
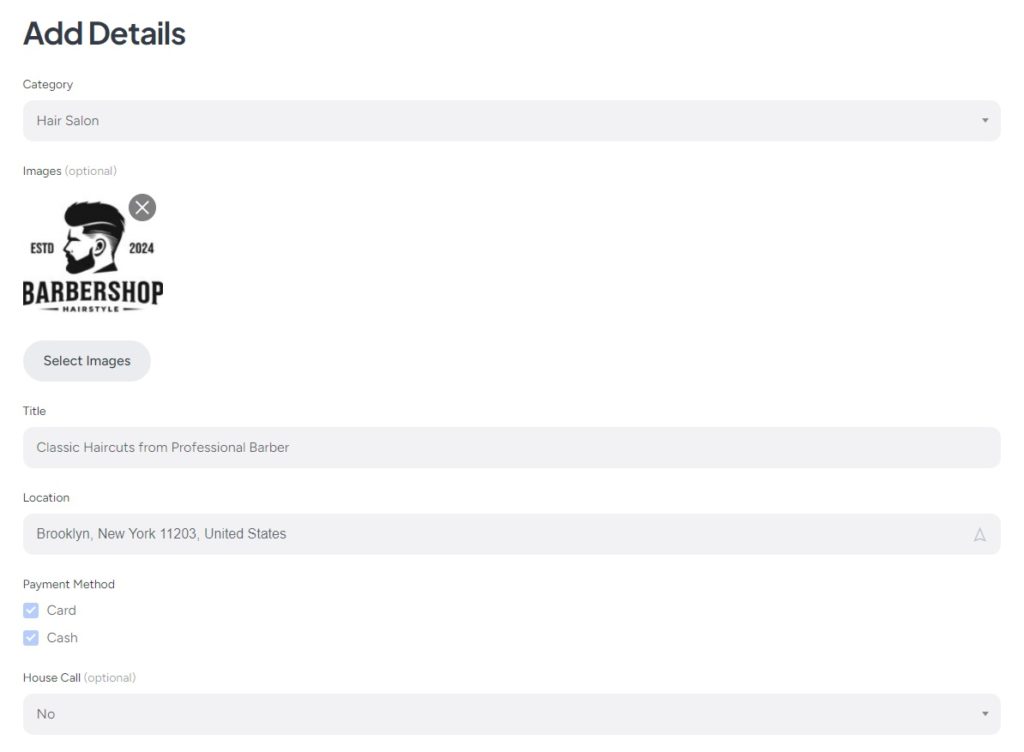
To make your beauty services website organized and user-friendly, it’s important to create different categories for different beauty services. For this tutorial, we’ll add categories such as “Hair Salon,” “Nail Salon,” “Skin Care,” and “Massage”.
Navigate to the Dashboard > Listings > Categories section. Here you can name your category, enter a description, choose an appropriate icon, and set a color. You can also create a category hierarchy by selecting a parent one. When you’re done, click Add Category.
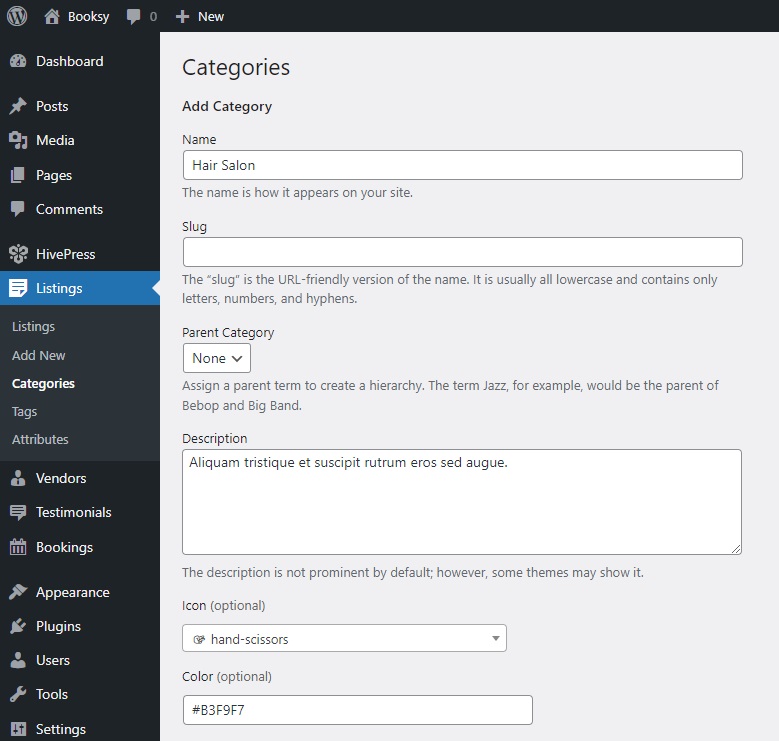
Remember, you can add as many categories as you need by following the same steps.
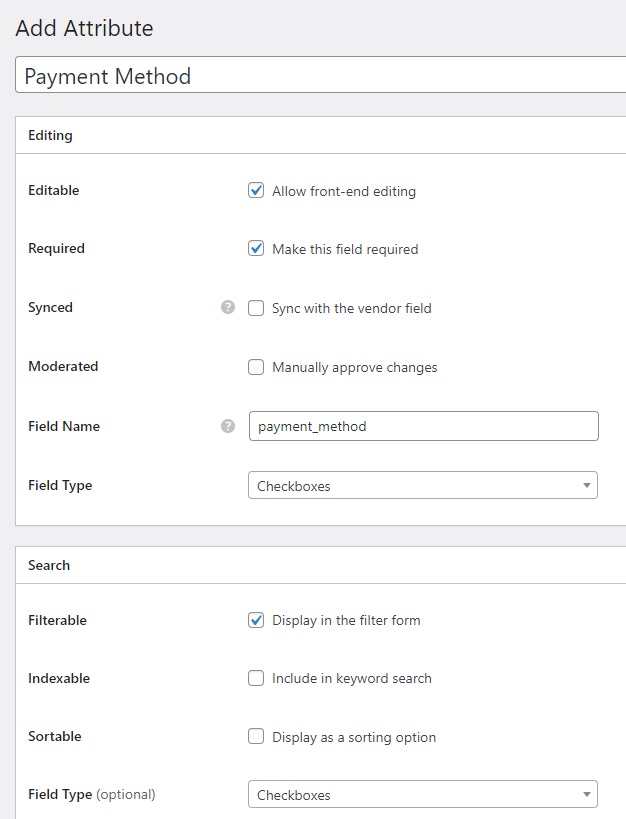
Next, you should add some custom fields to let beauty professionals provide detailed information about their services. With MeetingHive, you can add unlimited custom fields and search filters. For example, let’s create a “Payment Method” field to let professionals indicate whether they accept payments in cash, via credit card, or both.
To create a new custom field, go to Dashboard > Listings > Attributes > Add New, and start by naming a field. In the Editing section, mark your field as editable so professionals can fill it in when listing their service. Then, you need to set a field type. In the case at hand, we’ll pick the “Checkboxes” field type to allow selecting multiple options. Lastly, decide if this field should be required. In the Search section, turn the field into a search filter so clients can use it to filter listings by marking it as filterable. Then, use the “Checkboxes” field type again.
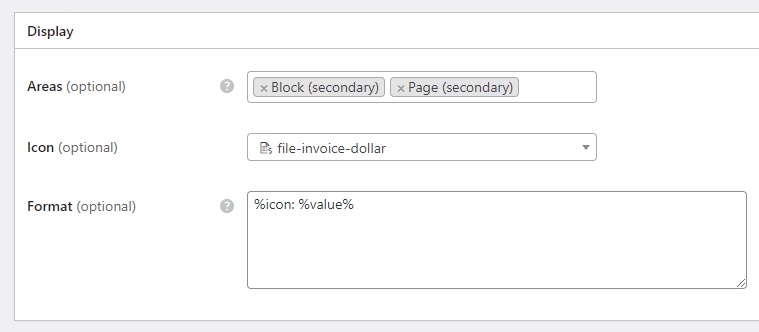
Finally, in the Display section, you can choose which template areas to show this field in and set the display format using available tokens. Also, you can select a suitable icon to display alongside the field. For instance, we’ll set Block (secondary) and Page (secondary) as display areas and use %icon% %value% as the display format. If you prefer not to show the icon, use %label%: %value% instead.
When you’re finished, press the Publish button. After this, a new Edit Options button will appear in the Editing section. We’ll follow it to add two options: “Cash” and “Card,” and vendors will be able to choose one method or both.
That’s it! This field will now appear in the listing submission form. Remember to add other vital fields, like “Contact Number” or “House Call.”
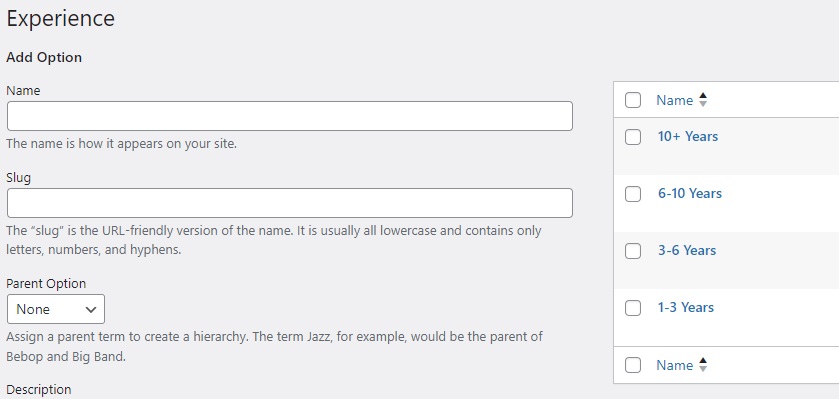
Clients will want more details about beauty professionals before booking an appointment. That’s why you should also add vendor profile fields in the Dashboard > Vendors > Attributes > Add New section. You can do this the same way we added listing fields.
For example, let’s add the “Experience” field to let specialists provide information about their experience period. However, this time, using the “Select” field type is better since vendors can pick only one option. Also, it’s not necessary to make a vendor field searchable unless you’re going to allow search for vendors alongside listings. Finally, don’t forget to visit the Edit Options button and add experience period options, such as “1-5 Years”, “5-10 Years”, and so on.
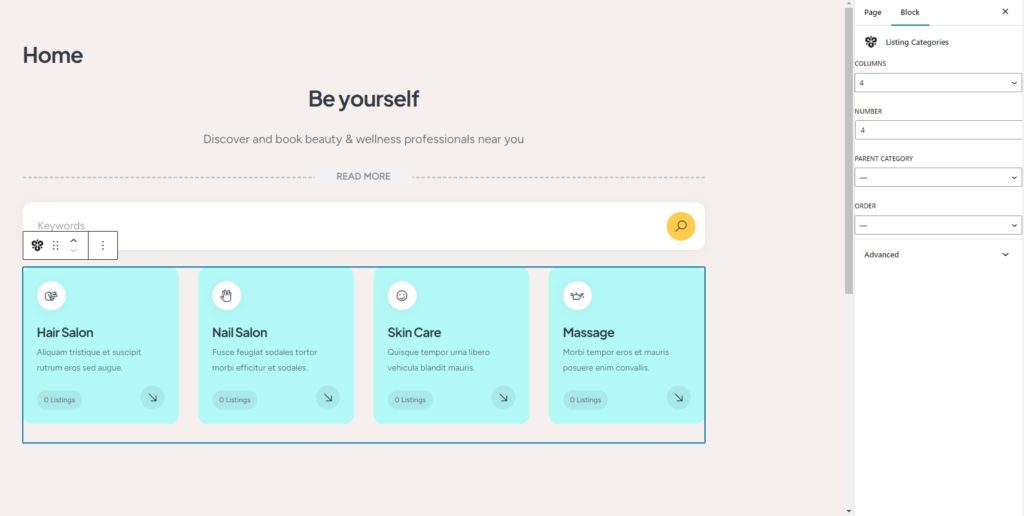
It’s time to create a homepage for your beauty services website. We’ll be using WordPress native page builder, Gutenberg, since MeetingHive and HivePress are seamlessly integrated with it. To create a new page, go to Dashboard > Pages > Add New Page and name it, for example, “Home”.
Begin by adding a catchy header text to draw users in. Then, you can start adding different HivePress blocks by clicking the plus icon and searching for “HivePress”. For instance, let’s place the “Listing Search Form” and “Listing Categories” blocks below the header. Also, you can customize them using the settings column on the right. When you’re happy with the result, click Publish.
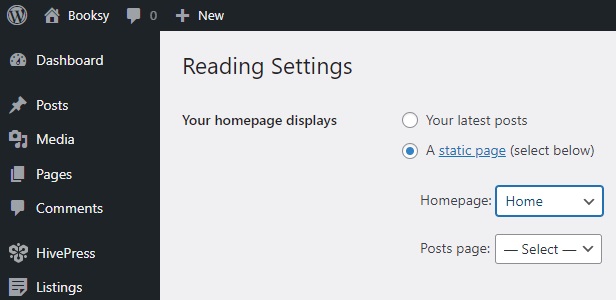
To set this page as your homepage, go to the Dashboard > Settings > Reading section and select it from the dropdown list. Note that your future blog page can also be assigned here.
Keep in mind that you can customize the look and feel of your site at any time. For tips on customizing the MeetingHive theme, watch this video.
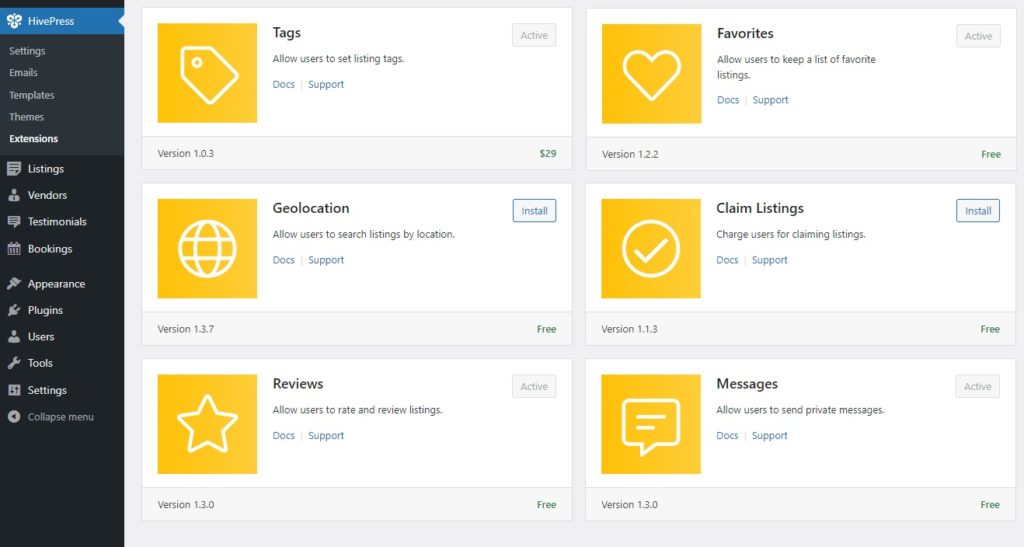
By the way, you can always install additional HivePress add-ons to further enhance the functionality of your beauty appointment platform. Even though MeetingHive comes with six of them out of the box, there’s still room for development. Overall, HivePress offers over 15 extensions that are fully compatible with each other. You can find them in the Dashboard > HivePress > Extensions section.
For instance, you might want to install the Geolocation extension to allow users to find beauty professionals based on their location. Besides that, the Opening Hours add-on can add working hours to listings. Additionally, the Social Links extension can allow beauty professionals to add their social media links to their listings and profiles. To install an extension, simply click the Install button.
Next, it’s important to fine-tune the settings so that everything works just the way you intended. First of all, if you plan to launch a single-vendor platform (meaning that only the admin will be able to post listings), you should turn off the front-end listing submission option in the Listings tab. Otherwise, keep this option checked. Additionally, you can disable manual listing moderation here.
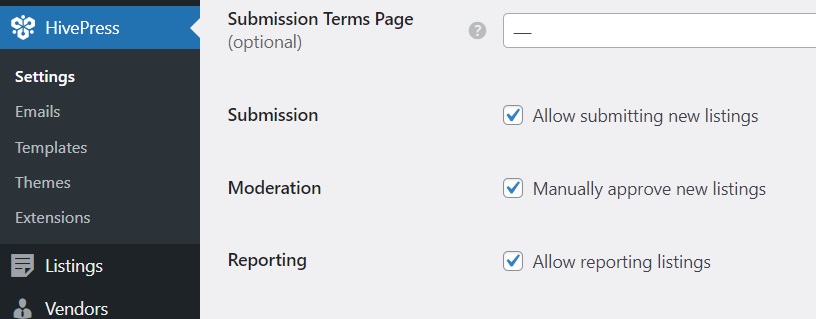
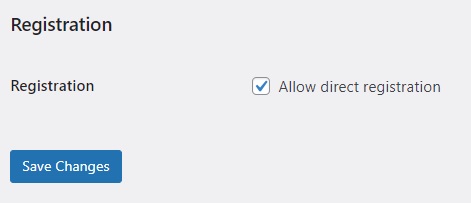
In the Vendors tab, you can enable direct vendor registration. This feature is essential for a multi-vendor beauty service booking platform as it allows beauty professionals to sign up as vendors instantly. By default, HivePress requires a user to add at least one listing to become a vendor, but direct registration simplifies this process.
Please note that if you decide to enable direct vendor registration, you’ll also need to add a vendor registration form to your platform – you can learn how to do it in this doc.
The Bookings tab is one of the most important settings for an appointment booking platform because it determines how appointments are managed and scheduled on your website for booking beauty services. For example, you can enable time-based bookings, allowing beauty professionals to specify their availability in precise time slots. You can also set up calendar synchronization with external services such as Google Calendar. For tips on setting up bookings, please refer to these docs.
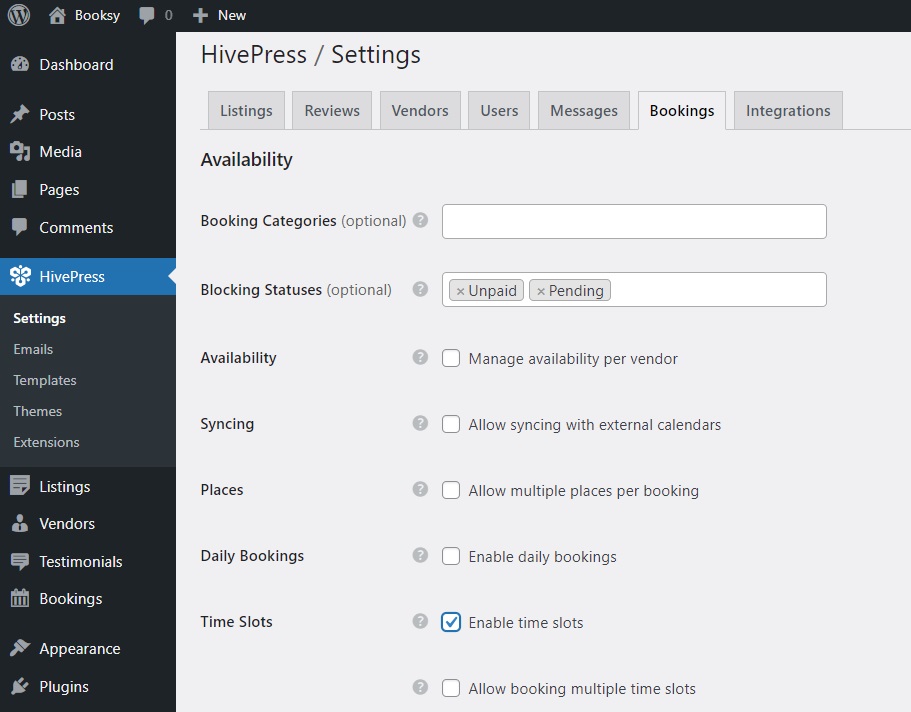
Note that the number of settings increases as you install more extensions. It’s really important to review all of the tabs and configure settings according to your specific needs to ensure that your platform runs how you want.
At this point, everything should work properly, so let’s go ahead and test the functionality.
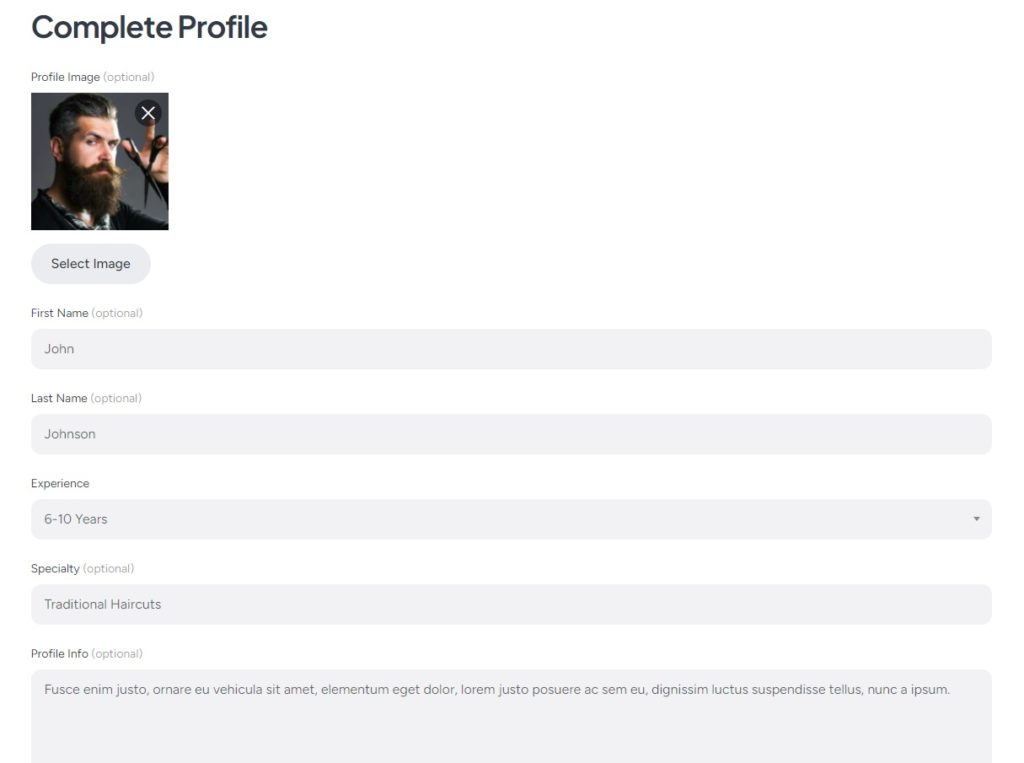
First, ensure that you’ve added a vendor registration link to your platform. Then, simply follow it. You’ll be redirected to the registration form, which includes all the previously created custom vendor fields. Fill them in and proceed by clicking Save Changes.
Now that the profile is completed, the next step is to add the first beauty service listing. To do it, click the List a Service button in the right corner. You’ll see the submission page, where you’ll find default fields like title and description, along with the custom fields you added earlier. Other fields, like booking options, are added by different HivePress add-ons. Also, don’t forget that you can always customize this form as you need.
Fill out all the required fields and click Submit Listing. The listing will now be submitted for review and can be approved by an admin in the Dashboard > Listings section. As we said, to disable manual approval, you can uncheck the manual moderation option in Dashboard > HivePress > Settings > Listings. Once approved, the listing will appear on the front end.
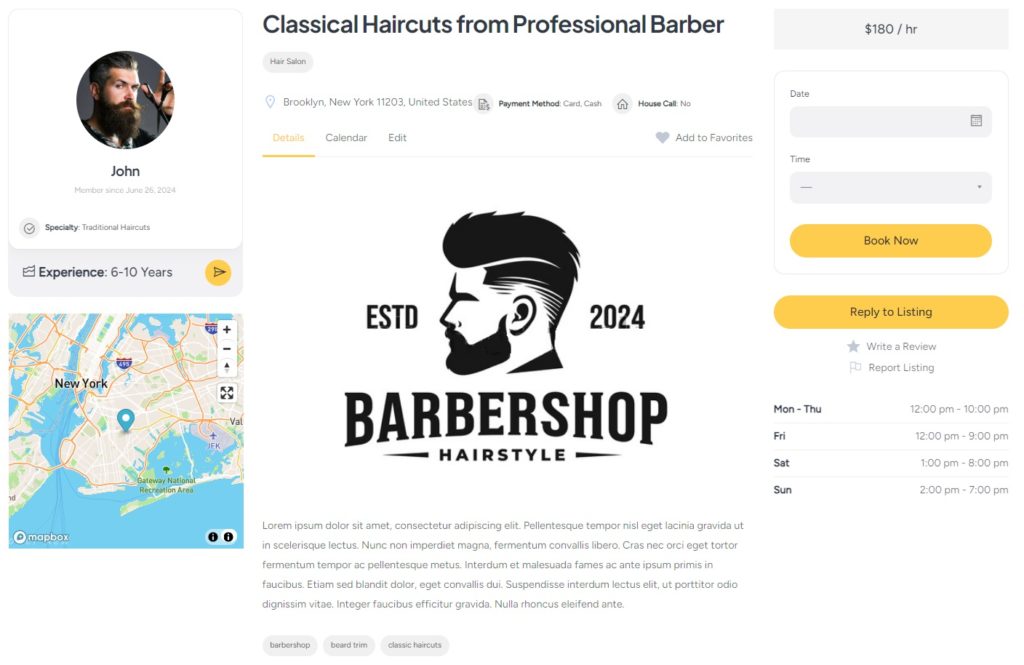
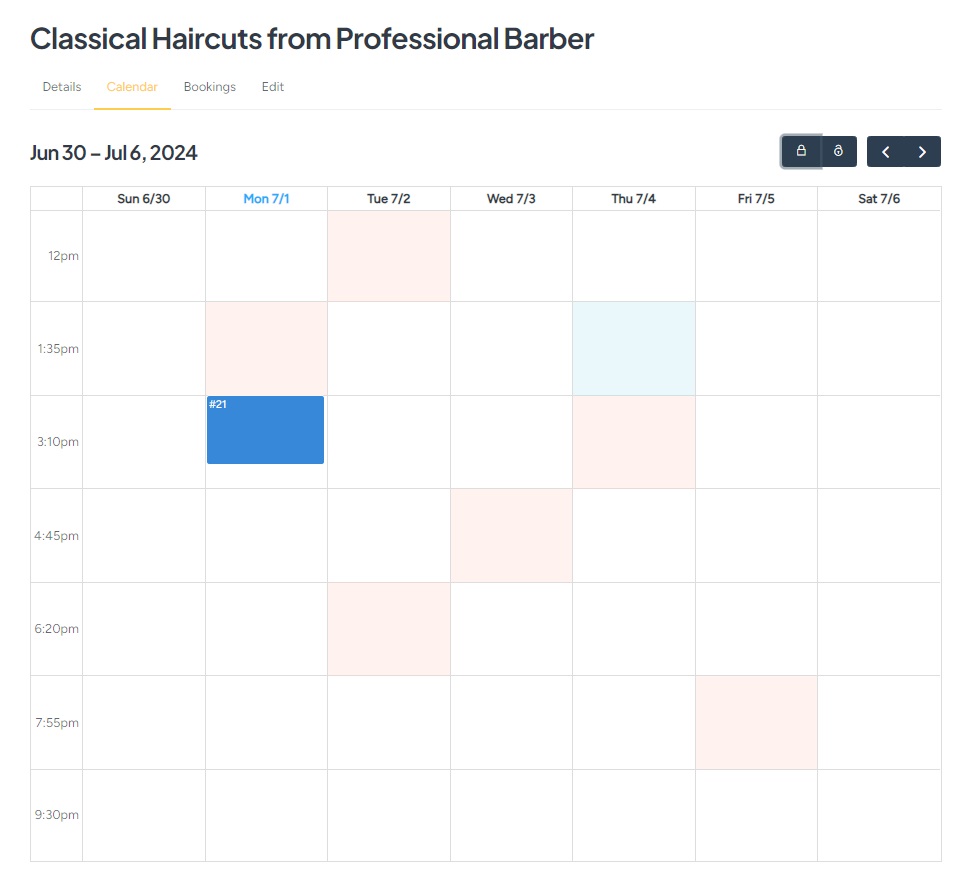
Finally, let’s test the booking functionality and schedule an appointment. To do this, simply select the desired date and time, then press Book Now.
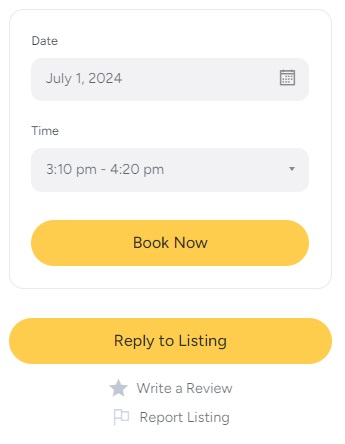
You’ll be taken to the confirmation page, where you may preview your reservation and leave any comments you may have. If everything seems to be in order, all you have to do is click the Confirm Booking button.
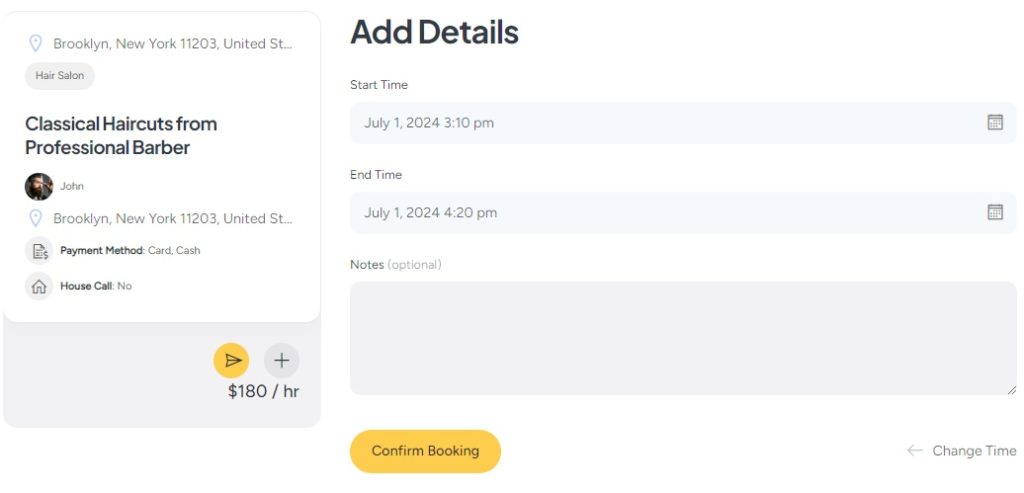
That’s it! As soon as the client clicks the button, a beauty professional is notified of the new booking. In addition, specialists have access to a built-in calendar feature to keep track of their appointments. They can block or unblock certain dates and times to let clients know of their schedule availability. This helps ensure smooth scheduling and prevents booking conflicts.
Last but not least, let’s talk about how you can make money from your beauty platform. Please note that in order to enable payments on your website, you’ll need to install WooCommerce and some of the HivePress extensions. Also, for more detailed guidance on this topic, check out our article on monetizing a service marketplace.
We’ll briefly cover two main ways to generate revenue from your beauty services booking website:
One of the simplest ways to earn from your platform is to take a cut from each successful booking. You can apply commissions to specialists, clients, and even both.
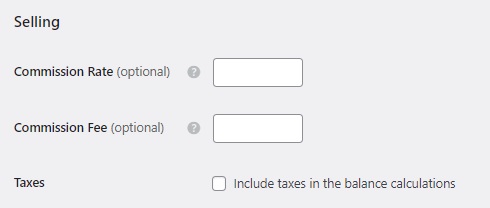
First, you’ll need to download the HivePress Marketplace extension from your MeetingHive purchase email and install it through Dashboard > Plugins > Add New > Upload Plugin. After that, go to the Dashboard > HivePress > Settings > Vendors section, where you can define your commission rates, whether they’re a percentage or a flat fee. It can also be both a percentage and a flat fee at the same time.
To set up commissions on the customers’ side, visit the Users tab, where you’ll see the exact same settings. Additionally, you can watch a video tutorial on setting up commissions.
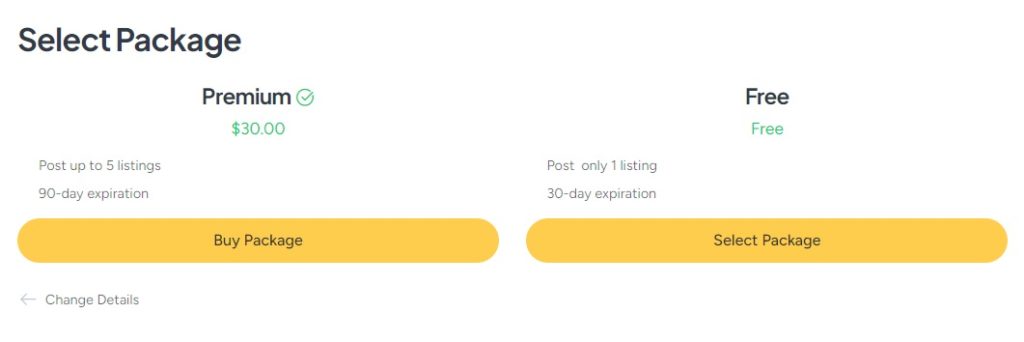
Another monetization model is about offering paid listing packages, which can be done using the free HivePress Paid Listings extension. For example, you can create a free package that lets beauty specialists post only one listing and premium packages for more listings. This allows you to charge professionals for listing their services on your platform.
Additionally, with the Paid Listings extension, you can allow beauty professionals to advertise their services for a certain fee. Featured listings appear at the top of search results, increasing their chances of being noticed by potential customers. At the same time, you’ll be earning money from offering a featured status for a fixed price.
For detailed instructions on creating listing packages and setting up featured status in MeetingHive, feel free to watch our video tutorial.
And that wraps it up! We hope this tutorial on how to create an appointment booking website for beauty services with WordPress was helpful to you and that your Booksy analog will be able to reach a top position in the future.
If you’re uncertain about which theme to choose, we strongly suggest MeetingHive. It comes with all the essential features right out of the box, so you can start building your beauty platform the day you decide to.
Additionally, you can check our article on how to create an appointment booking website with WordPress.
A complete walkthrough on launching a property rental website like Vrbo.

Build your own business directory website with WordPress in a blink of an eye.

Create your own micro-jobs marketplace using WordPress.