
How to Create a Business Directory Website for Free
Build your own business directory website with WordPress in a blink of an eye.
A short tutorial on how to create a booking website without any coding skills.
Booking services online has never been easier, whether it’s for vacation rentals, appointments, or event tickets. A well-designed booking website can save time, automate reservations, and make your business run smoothly.
Today, we’ll show you how to create a booking website on your own without any coding skills or prior experience.
For the sake of this tutorial, we’ll use WordPress, the most popular content management system that allows you to build various types of websites, including booking ones.
Let’s get started!
Before you jump into building a booking website, let’s figure out what type you actually need. Booking websites come in different forms, depending on what you’re offering. Here are the three main types:
If you offer appointments, consultations, or services, this type is for you. It’s perfect for businesses like:
These websites usually come with features like calendar integrations, time slot selection, and automated reminders to reduce no-shows (here’s a tutorial on how to create an appointment booking website).
If you rent out spaces, equipment, or properties, this is your go-to option. Examples include:
A rental-based booking system typically includes availability calendars, pricing per day/hour, and payment processing for hassle-free transactions (a detailed tutorial on launching a vacation rentals website).
If you’re handling tickets, event registrations, or group bookings, an event-based system is the way to go. Common use cases:
Event booking platforms often come with seat selection, countdown timers, and bulk booking options to make the process smooth for users (check out our walkthrough on starting a tour booking website).
Now that you know the type of booking website you need, it’s time to build it. The best part? You don’t need to hire a developer or learn how to code. With WordPress, you can set up a fully functional booking website in no time.
WordPress is the go-to platform for website building. It’s flexible, beginner-friendly, and has thousands of plugins to help you add booking functionality, payments, and custom features without any hassle.
In this article, we’ll show you how to build a booking website using WordPress, but before that, let’s check the list of prerequisites you’ll need to get started.
Your domain name is your website’s address (e.g., mybookingwebsite.com). Hosting is where your website lives online. Without these, you won’t have a website at all.
Most hosting providers offer one-click WordPress installation, so you can get your site up and running in just a few clicks. After choosing your hosting provider, they will send you a tutorial on how to install WordPress, so we won’t stop on this step here and move on.
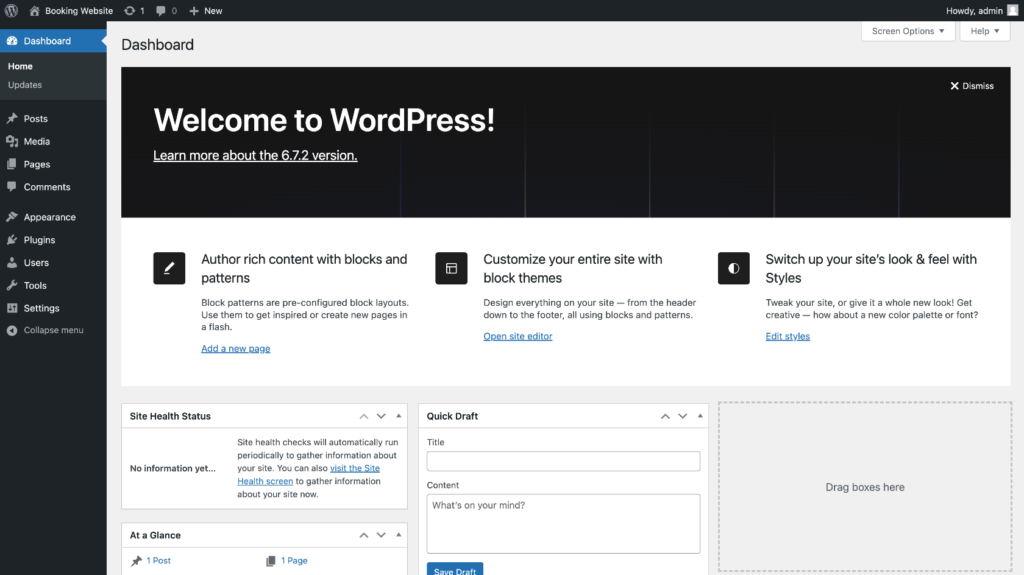
Once you install WordPress (with the help of your hosting provider), you’ll get access to your WordPress dashboard. Here, you’ll be able to manage everything, starting from pages and posts to plugins and themes.
WordPress doesn’t come with built-in booking features, so you’ll need a booking plugin. Such a plugin adds scheduling, calendars, payments, and other must-have tools for your booking website.
Here are some of the best booking plugins out there:
To get a better idea of which plugin to choose, you can check our overview of the best booking WordPress plugins.
Also, you need a WordPress theme for your website. While the plugins are responsible for the features on your site, the theme is responsible for its appearance. So it’s necessary to choose a theme that will allow you to create a booking website. To choose a proper theme, you can check our overview of the best WP booking themes.
For the sake of this tutorial, we’ll use HivePress along with its Bookings extension and the RentalHive, as they are all fully compatible with each other and allow you to create any type of booking and rental website.
Okay, now let’s dive into creating your booking website using WordPress.
At this point, you should already have a clean WordPress installation and can start installing the plugins and a theme for your booking platform.
Without any further ado, let’s move to the first step!
First things first – you need to install RentalHive, a theme that we mentioned before, and the required plugins so your booking website has all the necessary features.
Here’s how to do it:
Once the theme is activated, you’ll be suggested to install a few plugins, including HivePress, a directory plugin that will power all the booking features on your website.
Just follow the suggested link and install all the recommended plugins.

To speed things up, we recommend importing the demo content. A demo content is a pre-made design of a booking website that comes with the theme, and you can import it if you don’t want to start from scratch.
Importing the RentalHive demo is a huge time-saver. Instead of starting with a blank page, you’ll get a ready-made layout that you can customize to fit your needs and save tons of time.
To import the demo content, simply follow the screencast below.
Great! Once you’ve imported the demo content, it’s time to make it your own. You can set everything up in the way you like, according to your needs and requirements. Whether you are building a website like Airbnb or a rental platform for kayaks – RentalHive has got you covered.
First of all, let’s add new categories to your booking website.
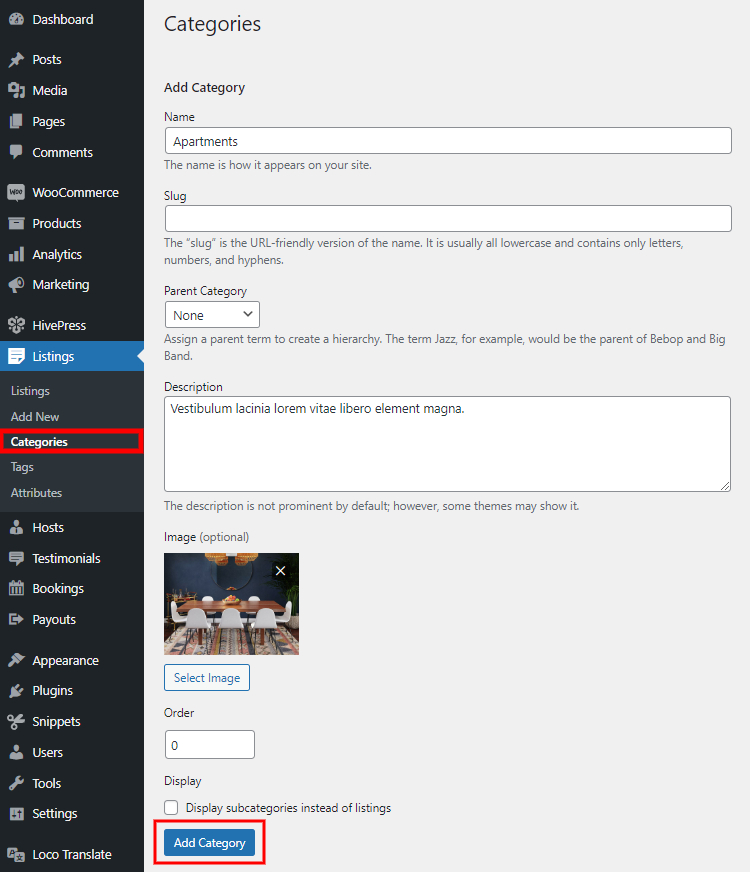
You have to organize your booking website by creating listing categories. This will make it easier for users to find what they’re looking for. Since RentalHive has no predefined categories, you can add custom ones in WP Dashboard > Listings > Categories.
Please note that you can add your own categories or edit the existing ones (those that were imported with demo content)
To add a new category, you need to:
Finally, click on the Publish button. In the same way, you can add as many listing categories as you need on your booking website.
Once you are done with listing categories on your booking website, it’s time to add custom listing fields and search filters. Simply saying, listing fields – are details that appear on each listing, for example, the “price field” or the field that shows the “number of bedrooms” in the apartments or any other key information users need.
To see how it works, let’s add one.
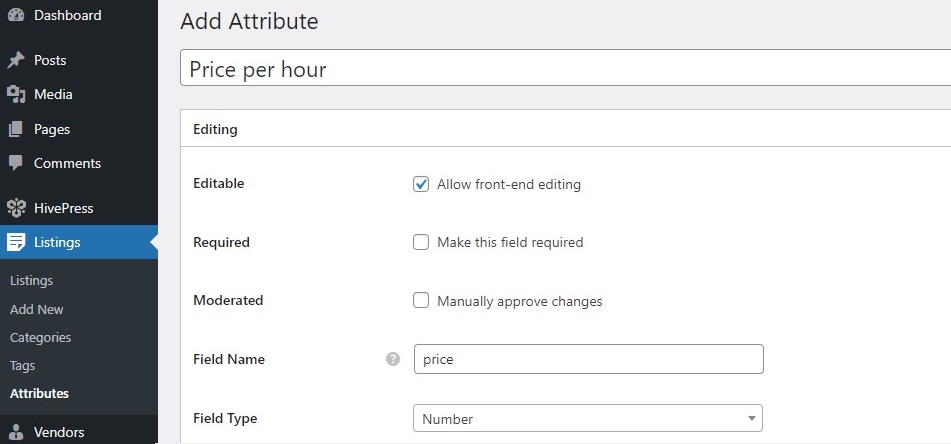
Let’s add the first listing field that will show website visitors the price. To do that, navigate to the WP Dashboard > Listings > Attributes section and click Add New.
Firstly, you should name it (e.g., “Price per hour”). Then, you can edit it in several different contexts.
Here, you can set whether users can fill in this field when adding a listing (on the front-end) or only admins can do that. Also, it’s necessary to choose a field type, let’s choose the “Number” type (for our “Price per hour” field).
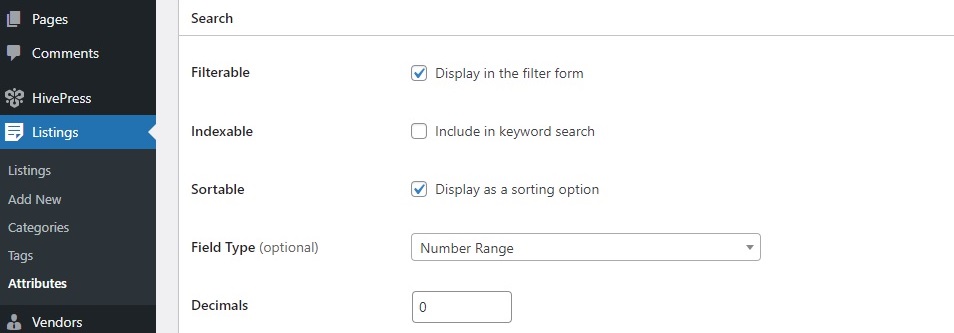
Within this section, you can turn your field into a search filter. If you do so, users will be able to filter listings using this field. For example, if we mark our “Price per our” field as filterable and sortable, then visitors will be able to sort listings by price.
Also, it’s important to set the search field type. In our case, we’ll choose “Number Range” to let users filter listings by a price range instead of a single value.
Here, you control where and how the field shows up on listing pages.
$%value% / hr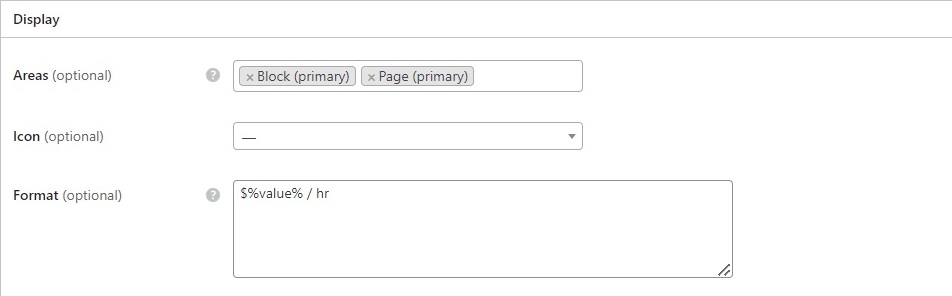
By following the same steps, you can add various listing fields and search filters and set them up in the way you need. To find out more on how to add new fields, you can check this doc.
Now it’s time to set up the look and feel of your booking website. Since your website is built with WordPress, you can use the native WP Customizer to change the logo, colors, fonts, and styles of your website.
Check out the screencast below for a step-by-step guide on how to customize your website’s appearance!
At this point, it’s important to show you the “Settings” section, where you can adjust many things on your booking website.
Go to the WordPress Dashboard > HivePress > Settings section. There are many different tabs here, and we recommend checking them all to set everything up just the way you need. You can start with the following tabs:
These are just the basic settings that you have to check right away, but it’s important to go through all the tabs to make sure that your booking website operates smoothly. To make it easier for you, we created an overview of all the settings, so feel free to check it.
There are a few ways to monetize your booking website. The two most common are:
You can use one or both models depending on your business. For example, if you’re building a rental marketplace, charging commissions might be the best option. If it’s a smaller, service-based platform, you might prefer paid listings.
Additionally, you can monetize through ads or by offering extra services on your platform. To get a better idea of available monetization options, check our article.
That’s it! We hope this article on how to create a booking website without any coding skills was useful to you, and now you have a better idea of how to get started. With the right tools and a little effort, you can build a fully functional booking platform that fits your business needs.
Please note that it is a basic tutorial, and if you want to create a more advanced booking website or dive deeper into certain settings – we recommend checking out the HivePress blog. There are tons of useful articles and tutorials that can help you.
Build your own business directory website with WordPress in a blink of an eye.

The complete guide to building a wedding marketplace with WordPress — no coding required.

A short explanation on how to set up the HivePress Messages extension.