
How to Add Location Search to a WordPress Directory Website
A complete tutorial on how to add location search in WordPress.
Get your marketplace of digital assets up and running with WordPress.

These days, companies rely heavily on digital assets to influence buying behavior and build brand awareness. So it became popular among creators and freelancers to create and sell digital assets on various online platforms.
Due to such popularity, the need for niche digital goods marketplaces has also increased.
In this step-by-step tutorial, we’ll show you how to create a digital products marketplace like Creative Market with WordPress. We’ll explain how to get your website off the ground without any coding skills and how to monetize your online platform in several different ways.
So, let’s dive in!
A digital products marketplace is a platform where creators can list their digital goods (e.g., images, fonts, templates, etc.), and other people can purchase & download them for their own projects. Since it’s a peer-to-peer marketplace, it excludes the need for retailers, so users can sell and buy products, services or any other goods without third-party sellers.
Creative Market is a prominent example of a digital products marketplace. It’s a platform for community-generated digital assets like Graphics, Fonts, Themes, and more. The platform simply matches customers with creators and makes money by charging a commission on every transaction.

You can sell various downloadable digital products on your marketplace, including:
We mentioned only a few examples to give you a better idea of the products you may sell on your digital goods marketplace. You can sell everything at once or create a platform that focuses on a specific niche.
If you are still doubting whether to launch your own digital products marketplace or not, here are some arguments why you should give it a shot:
As you can see, there are some amazing benefits of selling digital goods, and you can easily start a side hustle or even ditch the 9-5 and launch a niche digital products marketplace.
To build a digital assets marketplace using WordPress, you’ll need a domain name, an active hosting plan and a clean WordPress installation. Also, it’s crucial to select a clean WordPress theme and a reliable plugin.
For the sake of this guide, we’ll use the TaskHive theme and the HivePress plugin. They are both easy-to-use, highly customizable and include all the necessary features out of the box, so you’ll be able to create a digital products marketplace in no time.
Now let’s move to our tutorial!
By following these 6 steps, you’ll be able to launch a digital products marketplace without any coding skills. So let’s move to the first step without any further ado!
The starting point is to install the TaskHive theme. To do that, go to the WP Dashboard > Appearance > Themes page and click on the Add New button, then proceed by clicking on the Upload Theme button. Now you need to upload the TaskHive ZIP file, then install and activate it.
Upon activation, you’ll receive a notice to install the recommended plugins, including HivePress, a plugin that will power marketplace features on your website and WooCommerce, the most widely-used e-commerce plugin. Simply follow the suggested link and proceed by installing and activating plugins.
If there are some troubles, you may check the step-by-step screencast below in order to install TaskHive properly.
Once you activate WooCommerce, you’ll be redirected to its setup wizard. We recommend walking through all the steps in order to set up payments on your digital products marketplace. However, for brevity, we’re not going to show you the whole process of setting up payments since every website has its own unique details and payment methods. If you have some issues with WooCommerce settings, you can check an official tutorial to set it up properly.
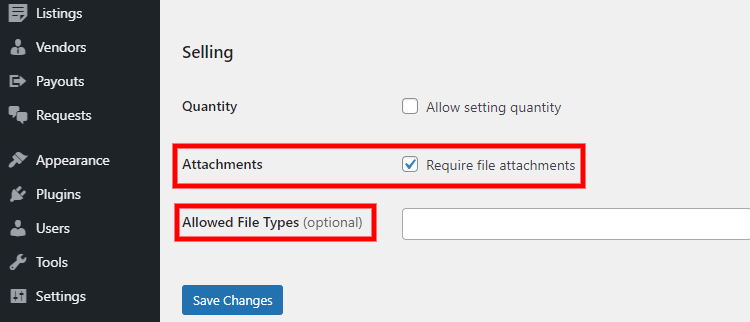
Okay, now you have all the necessary plugins installed so you can start setting up your digital goods marketplace. The first thing you have to do is to navigate to the WP Dashboard > HivePress > Settings section and enable the listing attachments by enabling the Attachments option. Keep in mind that you can restrict the file types depending on the files you want to sell. When finished, don’t forget to save changes.
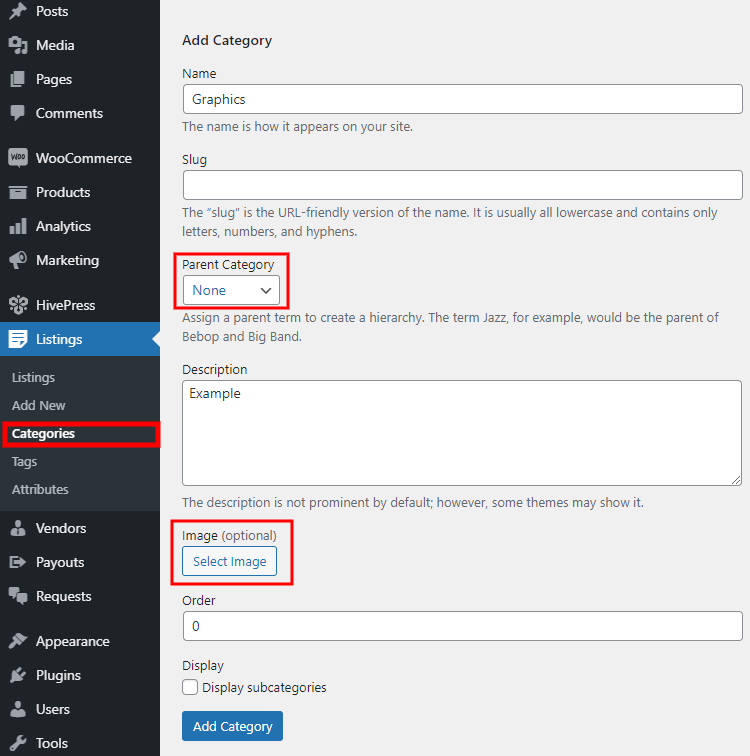
The next step is to add some listing categories specific to the digital products marketplace so it’s easier to navigate your website. For example, let’s create several categories that are available on Creative Market, like “Graphics,” “Fonts,” and “Templates”. In order to add a new category, go to the WP Dashboard > Listings > Categories section.
Firstly, you need to name your category, let it be “Graphics,” then you may describe it in order to provide users with more detailed info about this category. Also, you can turn your category into a subcategory by setting a parent category for it. Finally, there’s an option to upload the category image. When finished, click on the Add Category button.
Bear in mind that there is no limitation on the number of categories, so you can add as many as needed for your marketplace of digital goods.
Once you add the categories, it’s time to add some fields specific to the digital download listings. You can create custom listing fields and search filters in the WP Dashboard > Listings > Attributes > Add New section.
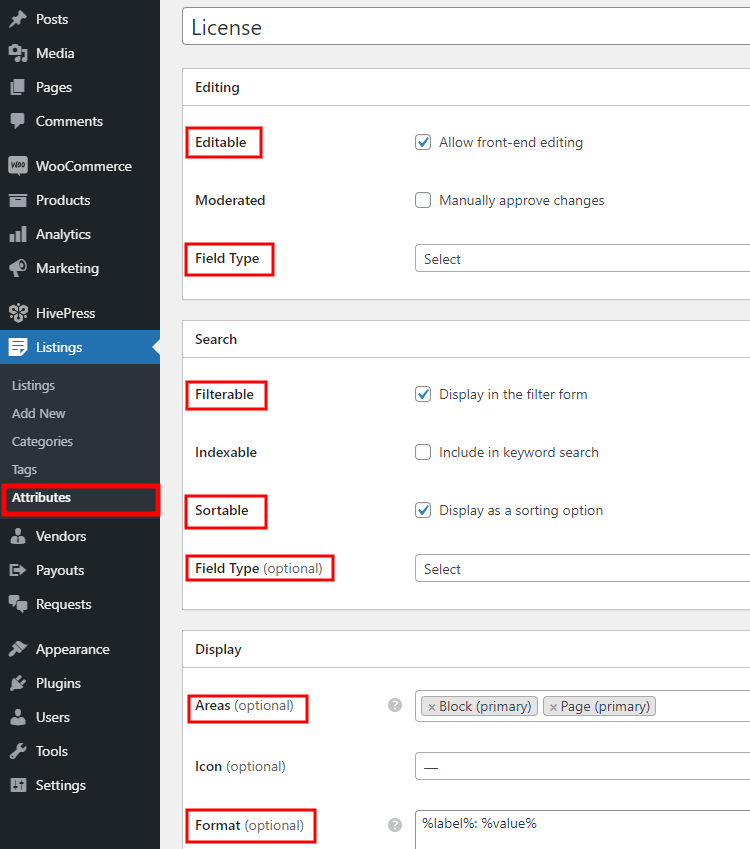
For example, let’s create a selectable “License” attribute in order to allow users to specify the license for digital assets they list for sale. First of all, enter the title and allow front-end editing, so users will be able to fill in this custom field. Then choose the field type (we recommend setting the “Select” field type for this attribute).
If you want to use this attribute as a search filter, you need to mark it as filterable and sortable. Also, it’s necessary to select the search field type. It’s better to use the “Select” field type as well. Finally, you can customize the custom display format if necessary and assign this custom field to a particular listing template area. Once you are done with settings, click on the Publish button.
Next, you need to mark this field required and add some options by clicking on the Edit Options button. For example, let’s add “Basic,” “Regular,” and “Extended” options to allow users to specify the license type when they add new digital goods. Keep in mind that you can add as many options as required for your website.
Now let’s move to the next step and set up a front page for your marketplace of digital assets.
Let’s create a new page by going to the WP Dashboard > Pages > Add New section. Since the HivePress plugin is compatible with Gutenberg and Elementor, you can easily customize any page using blocks, so you don’t have to mess with shortcodes.
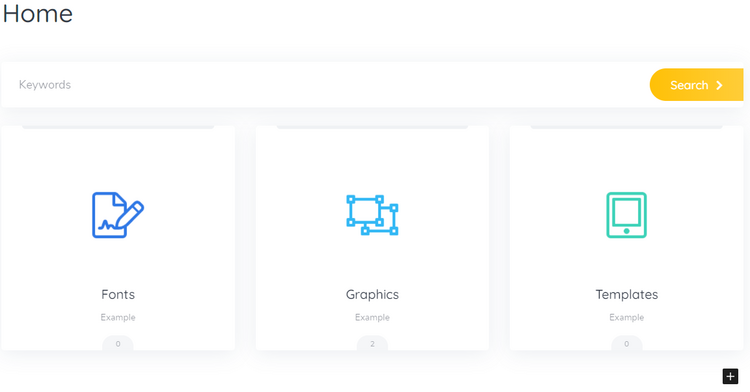
Firstly, name the page (let it be “Home”), then you may add some layout blocks by clicking on the ➕ icon and selecting the block you want to add. For example, let’s add a search form and a block that displays your listing categories. Once you are done, click on the Publish button. Next, you need to display this page as the front page of your website. To do that, go to the WP Dashboard > Settings > Reading section and select your newly-created page in the drop-down list.
Alright, since we have all the prerequisites, let’s try to upload a new digital asset to check how it works.
In order to check the workflow of uploading and selling digital goods as a seller, let’s add the first listing to the “Graphics” category. Simply go to your website and click on the List an Item button, then select the category (please note that we set a custom button text with the Loco Translate plugin. You can check this screencast if you want to change any static text on your website).
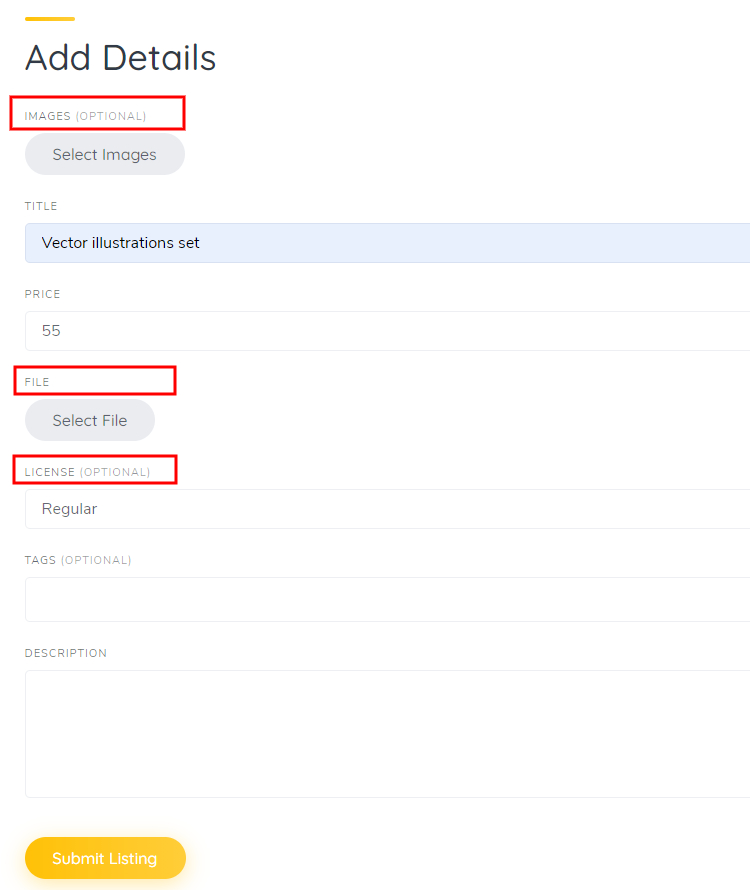
On the submission page, you’ll see several fields that you have to fill in. Firstly, name your digital asset, let it be “Vector illustration set,” then describe it and choose the license type. Also, you can upload some preview images if necessary. Finally, upload your digital asset and click on the Submit Listing button.
Once you upload a digital product as a seller, let’s try to purchase and download it as a regular buyer.
To get a better understanding of how your marketplace of digital products works for users, let’s register a new account and try to buy a previously uploaded digital asset. To do that, log out from the admin account and register a user account by clicking on the Sign-in button, then click on the Register button and fill in the required details.
When you finish the registration, go to the “Graphics” category and locate your previously added listing. You’ll notice that it’s displayed along with your custom field, and you are able to filter listings by license type. Now, let’s try to purchase this digital asset. Simply click on the Buy Now button, and you’ll be redirected to the Checkout page, where you can provide the billing details.
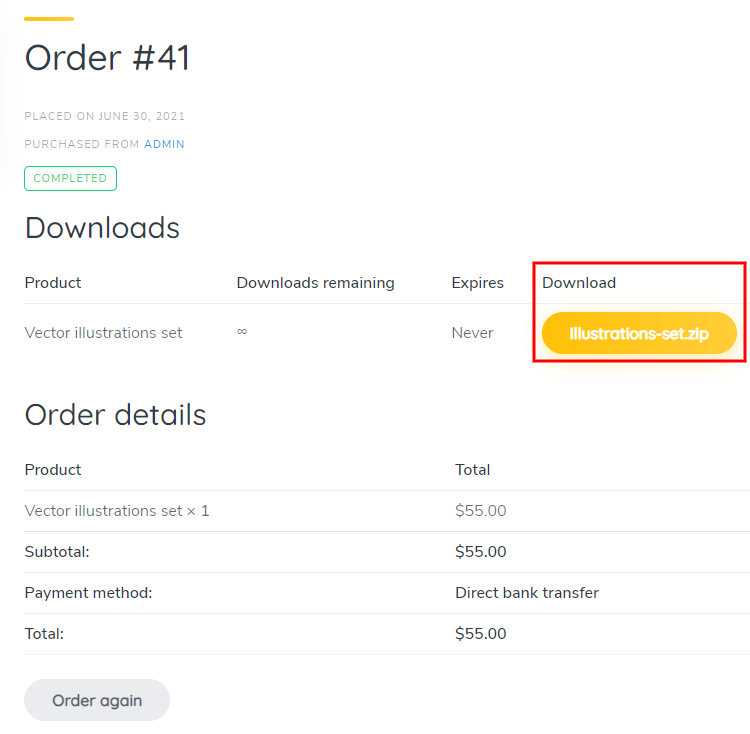
That’s how it works! Once the payment is received, a buyer will be able to download the purchased file in the My Account > Orders section. Also, if there are any issues with the order, buyers can contact the seller directly via private messages or raise a dispute by contacting the site administrator.
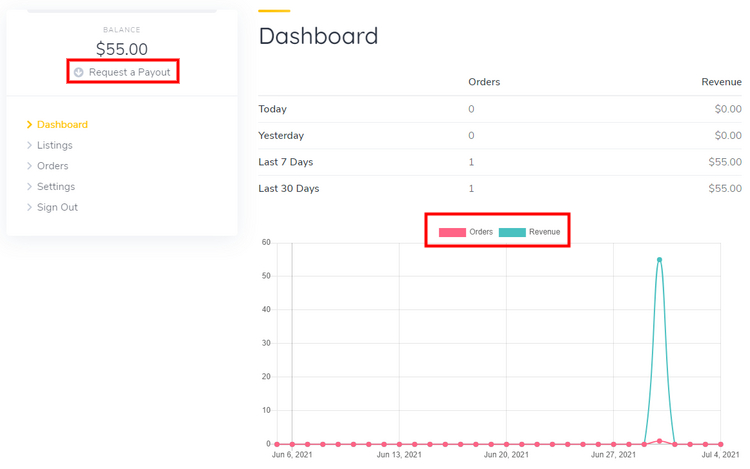
As for sellers, they have their own dashboards (as shown on the screenshot below) with all the necessary details, including a chart that provides them with the monthly, weekly and daily stats about their revenue. Also, if there’s a non-zero balance, sellers can request a payout of their earnings. Keep in mind that as a marketplace owner, you can allow payout requests of any amount or set a certain minimum that sellers have to reach before requesting a payout.
Finally, we’d like to share a few tips on how you can monetize your marketplace of digital goods. Generally, there are two main monetization models for such types of websites. Firstly, you can create and sell listing packages with different restrictions, so users have to buy one of the packages to list digital products on your website. The second model is more widespread among marketplaces since you simply charge a commission fee on every purchase made through your website.
You are not limited to a single monetization model and can use each of them or even both at once. Also, you can use some additional ways of making money, like displaying banners or different types of ads. However, we don’t recommend placing the cart before the horse and start monetizing your marketplace too early without getting decent traffic since it may negatively affect your website’s reputation among users.
So, after completing the steps above, you may notice that building your own digital products marketplace like Creative Market with WordPress is not such a tough deal. Once you create a website, you can develop your marketing strategy to attract creators and buyers to your marketplace. However, bear in mind that making your website a rising star is not a speedy process and requires some time and effort. But if you can dream it, you can do it!
If you want to get your marketplace off the ground using WordPress, you can try using the HivePress plugin along with its TaskHive theme. They have all the necessary features required to build a marketplace of digital goods right out of the box, so you don’t have to bother with coding in order to launch your website.
By the way, feel free to check our article on how to start a stock media marketplace with WordPress. Additionally, you may want to check out our overviews of:
A complete tutorial on how to add location search in WordPress.

Build your own business directory website with WordPress in a blink of an eye.

Create your own directory website with WordPress in a few simple steps.