
How to Add Location Search to a WordPress Directory Website
A complete tutorial on how to add location search in WordPress.
Learn how to create a fully-featured freelance platform with WordPress.

With the rapid development of information technologies and a switch toward prioritizing self-organization, freelancing has every chance to replace most of the 9 to 5 jobs in the nearest future.
Due to the ever-growing demand, it’s a great idea to consider developing a freelance marketplace to occupy a niche and become an advanced platform, thanks to the well-chosen strategy and sphere of interest.
In this tutorial, we’ll show you how to create a freelance services marketplace like Upwork with WordPress without coding skills and significant investments.
So, let’s get started without wasting time!
Freelance services marketplaces are the platforms that connect customers and freelancers; in other words, they are a meeting place between those who have an assignment to fulfill and those who know how to do it. The most famous examples of such platforms are Freelancer, Fiverr, and Upwork.

Let’s take Upwork as an example. Customers can register on the platform and request assistance in practically any field of work ranging from Marketing and Translation to Networking, Design, and Engineering.
Freelancers, in turn, can view available projects and make their bids. Then customers select freelancers to whom they decide to assign an order, or they can also send personal requests to certain service providers based on their ratings and qualifications.
Since Upwork is a mediator between clients and freelancers, it charges both for its services. So the main source of income is taking a cut from each transaction that occurs on the platform.
Upwork applies its commission fee every time a customer makes a payment, and a freelancer receives compensation. While the interest for customers is the same and equals 5% of the total amount, freelancers are encouraged to work hard for the accumulation of orders as the initial 20% fee decreases with the rise of freelancers’ earnings on the platform.
As the number of freelancers grows exponentially, so does the demand for freelance marketplaces. By 2027, freelancers are expected to make up more than 50% of the US workforce. More and more people choose freelance work for various reasons, such as independence, flexible working hours, improved health, and the opportunity to realize one’s creative potential.
This trend is here to stay, and if used wisely, it can be an excellent idea for starting an online business.

It may seem impossible to survive next to the giants of the market like Upwork and Fiverr, but remember that you don’t have to compete with them. A little goes a long way, and the history of online businesses is full of examples of how small companies became successful thanks to the right niche and well-chosen strategy.
The first thing to remember is that you shouldn’t aim to create a second Upwork because it just won’t work this way. Finding a specific area and becoming the best in it is the key to success. A great example of such a business is 99designs, a freelance services marketplace focusing on graphic design. By choosing a specific sphere, 99designs stood out in the market of similar services.
As you figure out the perfect niche and define characteristic features of your future platform, you’ll have every chance to succeed.
To start up a freelance services marketplace with WordPress, you first need to decide on several important moments:
The prices may vary depending on your requirements, but on average, get ready to pay for:
Now you can calculate the approximate costs of building a freelance marketplace website with WordPress. If you’re wondering where to begin, let’s explore it in our next section.
To illustrate the process, we’ll use TaskHive, a freelance marketplace WordPress theme, and HivePress, a free multipurpose WordPress plugin that comes with all the necessary features for building a website like Upwork.
The first step is to install the TaskHive theme. You can do it by going to the Dashboard > Appearance > Themes > Add New section. Then you have to upload the theme ZIP file by clicking on Upload Theme, and Activate it.
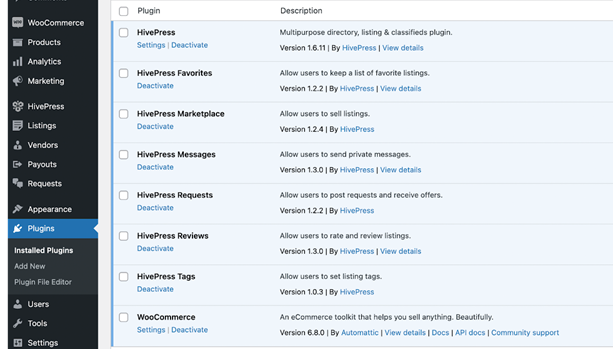
After that, you’ll see a suggestion to install the HivePress plugin and its add-ons, together with WooCommerce, the most popular eCommerce plugin (it will be responsible for payments on your future platform). Follow the link and install the recommended plugins to ensure the correct functioning of your freelance services marketplace.
Once you activate WooCommerce, the setup wizard will launch automatically. You should go through all the configuration steps to set up payments on your website (we’ll skip this step because every website has its own unique payment methods and requirements).
In this tutorial, we’ll show you how to create a website like Upwork from scratch. However, if you want to start with pre-made layouts, you can choose to import the TaskHive demo content by following the steps from the video below:
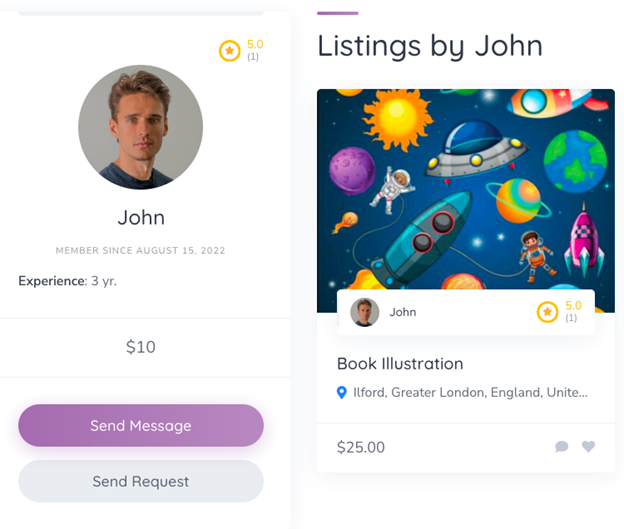
Contrary to other websites, Upwork pays particular attention to service providers, not the services themselves, which distinguishes it from other freelance platforms. That’s why TaskHive offers you a variety of options to set up freelancers’ profiles, among which are custom categories, custom fields, and search filters that can help you to build a website like Upwork.
Suppose you want to create a website for freelance graphic designers. Let’s call it “Artfreelance” and look at the required steps to take.
Firstly, determine the categories in which the freelancers on your website will offer their services. It’ll make your freelance marketplace easier to navigate and search for specialists in specific areas.
In the case at hand, we’ll add the following categories:
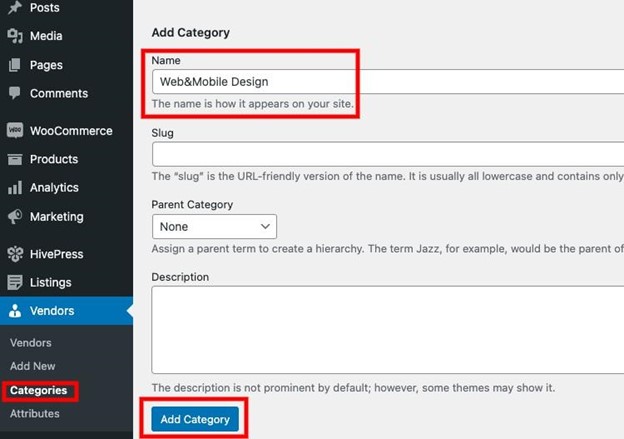
To create a category, go to Dashboard > Vendors > Categories, choose the desired name, and add a description. In the end, click on the Add Category button.
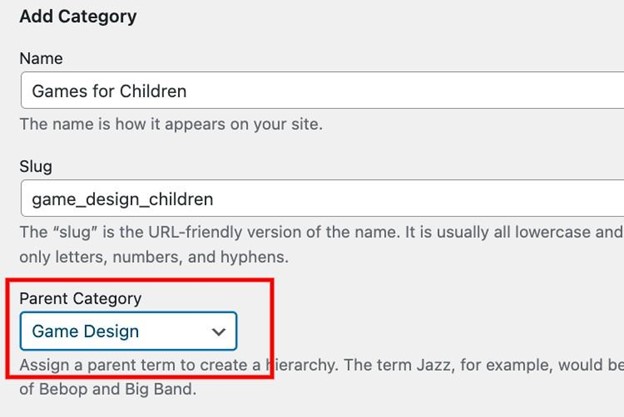
You can also create a category hierarchy by setting a parent category. It’ll ensure that freelancers get as specific as possible with the definition of the services they provide, and the customers will have less hustle finding the right person for their particular needs.
With TaskHive, you can create various custom fields to personalize vendors’ profiles. As a result, freelancers will have to enter all the required details when setting up their accounts, and customers, in turn, will be able to go through the list of potential freelancers and pick the most suitable one.
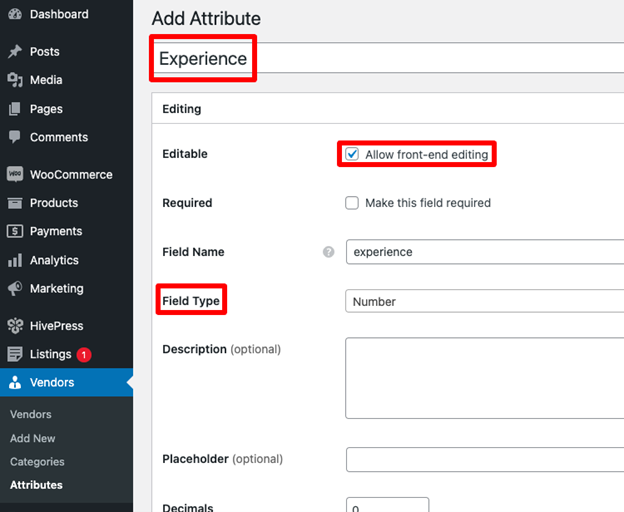
Think about the necessary information to cover. For example, let’s create an “Experience” field where freelancers will have to indicate the number of years they practice a certain skill.
Go to Vendors > Attributes > Add new. Add a title, allow front-end editing, and set the Field type (e.g., the “Number” type for the “Experience” field).
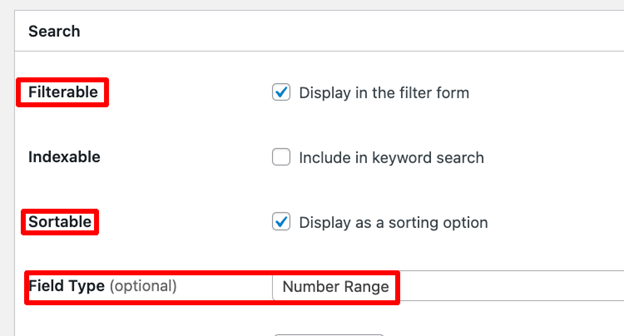
Enable the Filterable and Sortable options in the Search section. By making a custom field filterable, you can turn it into a search filter. The Sortable option means turning on the sorting of freelancers by their experience. Also, select the Field Type (it’s better to choose “Number Range” for the “Experience” field).
In Display, you can define template areas for every custom field (e.g., a secondary position in the Block and Page areas for the Experience field). Finally, define the custom field format using the available tokens (e.g., you can use this one %label%: %value% yr.).
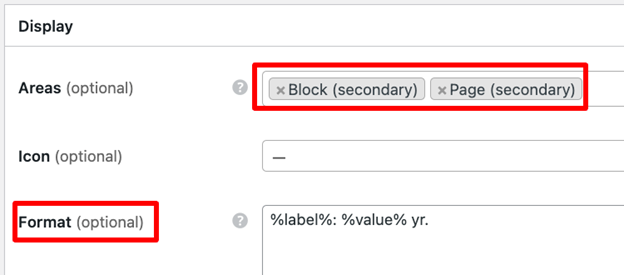
Don’t forget to click on the Publish button.
Following the same steps, you can add any other custom field of your choice, e.g., Hourly rate, Skills, Availability, etc.
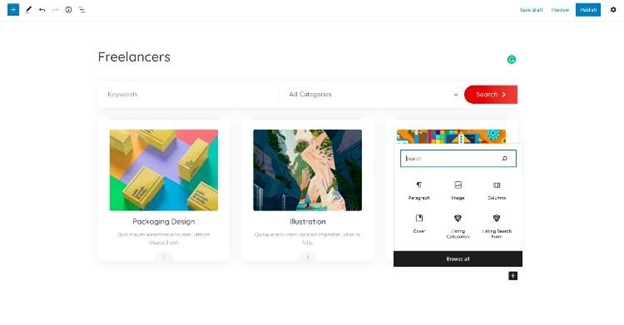
To combine all registered freelancers into one filterable list, you have to create a Vendor page. Click on the Page section in Dashboard and proceed to Add New. Since TaskHive is fully integrated with the Gutenberg page builder, you can create a stunning layout using blocks. Click on the ➕ icon and choose a block you want to add. For example, you can add a search form or a Vendors block to display all the freelancers. When finished, click on the Publish button.
Afterward, move to HivePress > Settings > Vendors and select your newly created page as a Vendors page option.
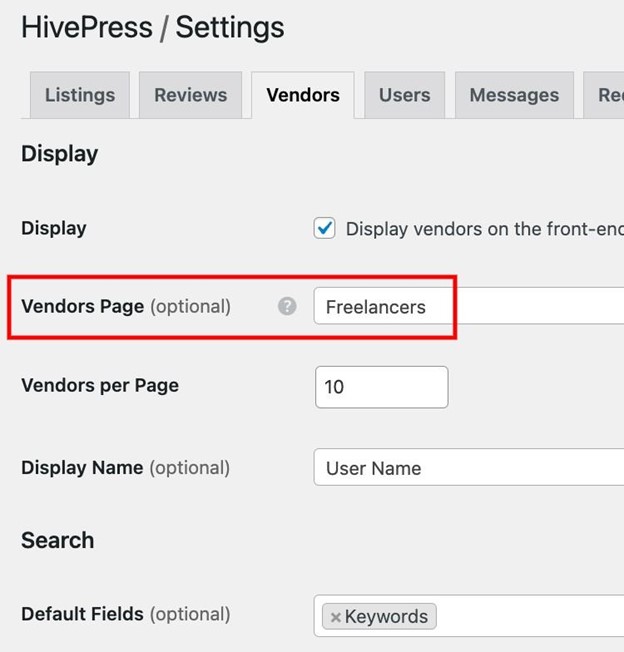
We highly recommend going through all the settings within this section to set up all other settings according to your preferences.
In TaskHive, users have to add at least one listing to become vendors (i.e., freelancers). A vendor status allows users to make offers, bid on jobs, and accept private job requests.
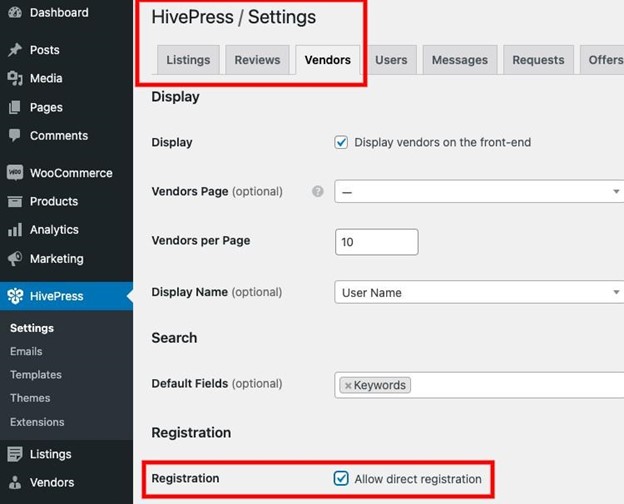
However, if you want to allow freelancers to register without adding listings, you can enable direct registration for vendors in the HivePress > Settings > Vendors section. It’ll allow users to register as freelancers right from the get-go.
Having enabled direct registration, you should add a vendor registration link to the website’s menu. For this purpose, visit your website and click Customize, then proceed to Menus > Header Menu, click on Add items > Custom Links. In this field, you can enter an URL following the structure: your-domain/register-vendor
Write a Link Text and end up by clicking on the Add to Menu button.

In addition, if you don’t want to allow freelancers to add any listings at all (e.g., they can use them as portfolios), you can turn off front-end listing submission in HivePress > Settings > Listings section.

Now you’ve enabled freelancers to sign up to your platform and ensured that customers find the right freelancer using custom search filters and category-based search.
Let’s move to the next section, where we’ll look at how to set up requests on your freelance services marketplace.
Freelancers on marketplace websites are active, too; they can follow relevant project requests and decide if they want to take them up. Setting up requests will allow customers to post project proposals with descriptions and requirements and enable freelancers to respond to the ones they find interesting.
Like freelancers, customers also have particular preferences; therefore, it’s essential to create request categories to group similar projects. As a result, an improved website organization will lead to a better user experience.
To create request categories, navigate to Dashboard > Requests > Categories. Here you can set up a category name. It’s a good idea to name Request categories in the same way as Vendor categories to make it easier for freelancers to find the right job. As you finish, click on Add Category button.

The hierarchy option is also available for Request Categories. You can add some sub-categories in the Dashboard > Requests > Categories > Add Category > Parent Category section.
Now let’s create some custom fields to allow customers to describe their projects more precisely. Also, turning them into search filters will make it easier for freelancers to find relevant requests.
Let’s add a few fields (e.g., “Deadline” and “Budget”) to the requests submission form. It will require customers to indicate their budget and the deadline for their project. To do that, go to the Dashboard > Requests > Attributes and click Add New.
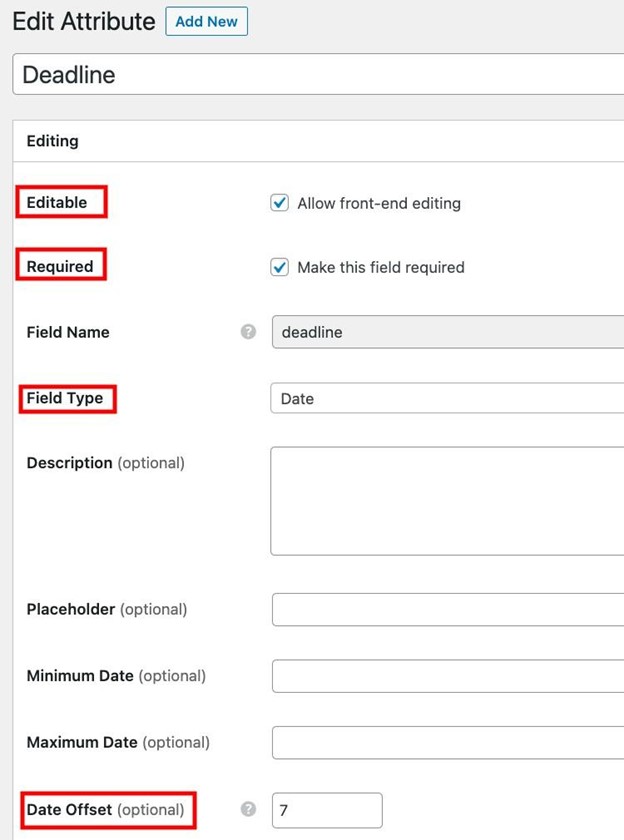
Let’s start with the “Deadline” field. Make it editable and, preferably, required. Enabling front-end editing will include the field in the request submission form, and making it required will guarantee that customers won’t miss publishing this information.
The next step will be choosing a Field Type. If you select “Date” as in the case of “Deadline,” it’s advisable to add also a Date Offset, which is the period between creating a request and the first possible deadline date. In other words, if you choose “7 days” in the Date Offset field, customers won’t be able to set a deadline shorter than a week from the publication date.
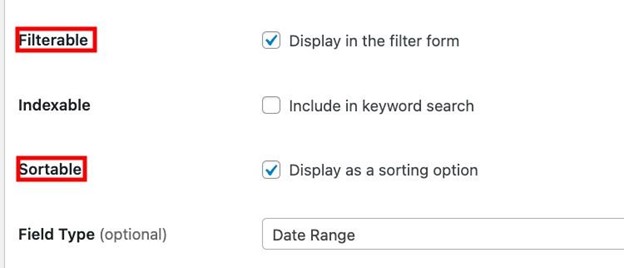
To enable freelancers to search for requests, set up the Search field. Make the Deadline option filterable (to show it among the filters) and sortable (to ensure freelancers can look for requests sorting by their deadline options). Use “Date Range” as the Field Type to enable the display of various projects with the deadline in a certain period instead of a specific date (e.g., “Sep 5 – Sep 25”, and not “Sep 5” only).
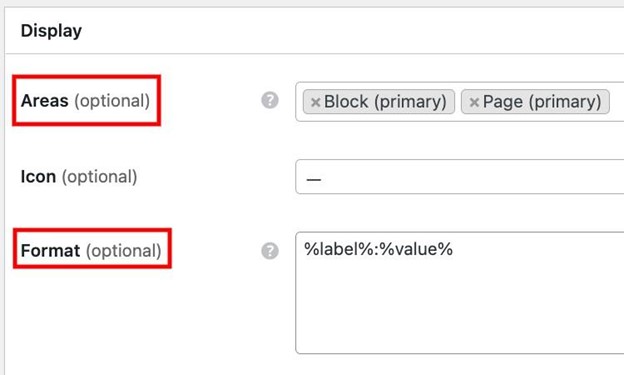
Then move to the Display section, and set the Display areas and format. As the project’s deadline information is crucial for its realization, it’s better to make it easily noticeable. For this reason, we’ll select it as Block (primary) and Page (primary). You can use the following Display Format: %label%:%value%
Remember to click on the Publish button.
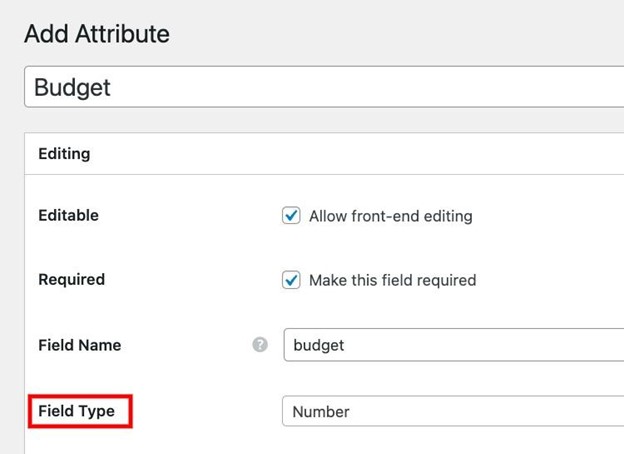
Once you finish customizing the “Deadline” field, let’s set up the “Budget” one. Click on the Add New button. Then, name the field, mark it as editable and required, and select “Number” as a Field Type.
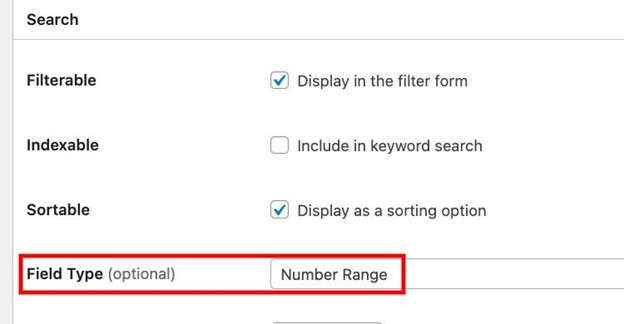
Now go to the Search section, make the field filterable and sortable, and select “Number Range” as a Field Type. It’ll allow freelancers to search for requests using the budget range they’re interested in.
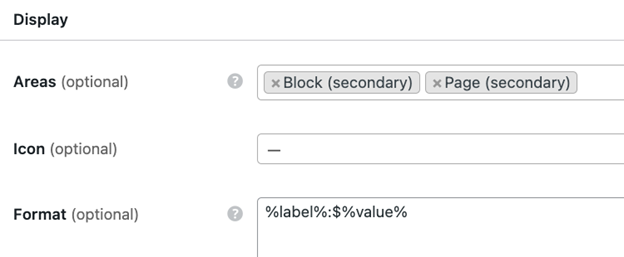
Finally, go to the Display section, choose the template areas and set the display format (you can use this one %label%: $%value%). When finished, click on the Publish button.
Adding Request custom fields makes customers specify their requests by indicating more project details. This way, freelancers can get a better idea of the potential cooperation.
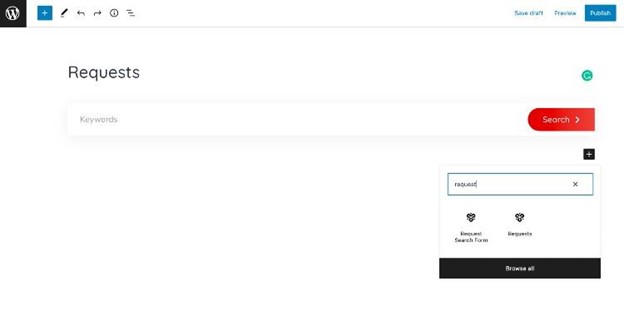
It’s necessary to add a single page where all the requests will be displayed. Go to Dashboard > Page > Add new, name the page, and add some layout blocks (e.g., Request Search Form and a Request block to display the requests). Once you finish customizing, click Publish.
Then navigate to Dashboard > HivePress > Settings > Requests, select a newly created page as the Request Page, and Save Changes.
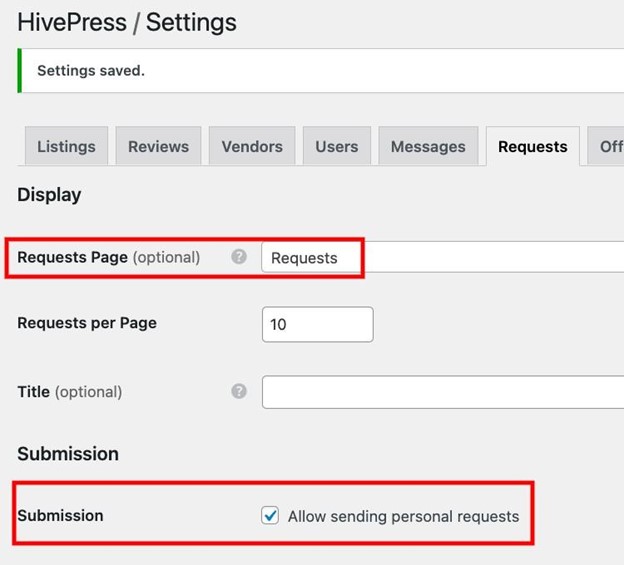
Also, remember that when customers publish requests, they receive multiple bids, among which they can choose the best one. But you can also enable the personal requests option (in HivePress > Settings > Requests section). This way, customers will be able to send direct requests to the freelancers of their choice.
Your freelance marketplace website is almost ready. The only thing missing at this stage is configuring the payment system. Thanks to the already installed Marketplace extension and WooCommerce plugin, freelancers and clients will get access to all the necessary features for managing orders and payouts. Let’s start setting everything up!
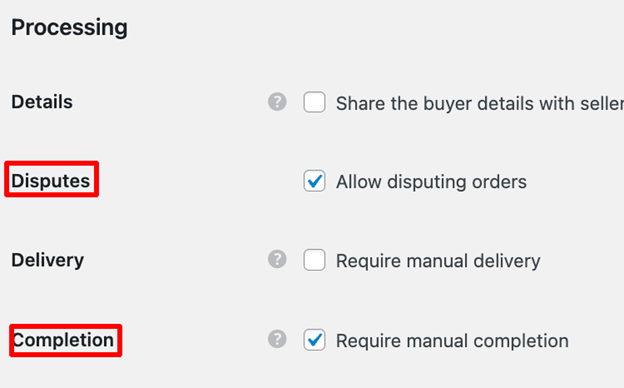
Firstly, let’s set up orders. You can do this in the HivePress > Settings > Orders section. You should go through all the settings to customize everything according to your website’s needs.
But we highly recommend enabling the following features regardless of a freelance services marketplace you are building:
Having finished customizing, click the Save Changes button.
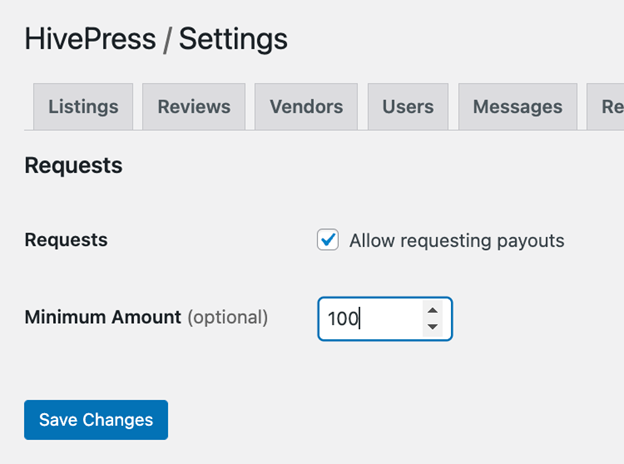
Next, proceed to set up the payouts. In HivePress > Settings > Payouts section, you can turn on the option of requesting payouts and indicate a minimum payout amount. This step will set a limit before which freelancers won’t be able to request payments. As before, finish by clicking Save Changes.
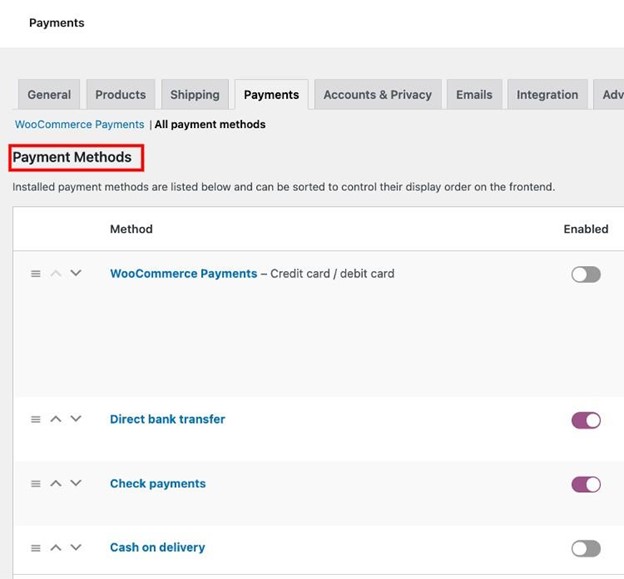
Finally, make sure you’ve chosen payment methods when setting up WooCommerce with its setup wizard. You can do this in the WooCommerce > Settings > Payments section.
In this section, we’ll show you how everything works.
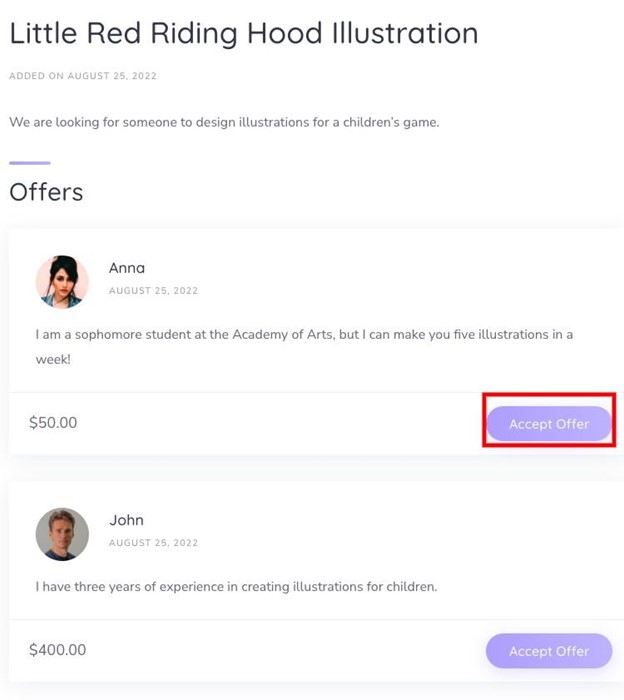
Suppose there’s a request for a game illustration. Unless it’s a private request, all interested freelancers can make bids by clicking on the Make an Offer button.

Once there’s an offer, customers receive an automatic notification. If there are many offers, customers can select the one they prefer by clicking Accept Offer (check out the screenshot below).
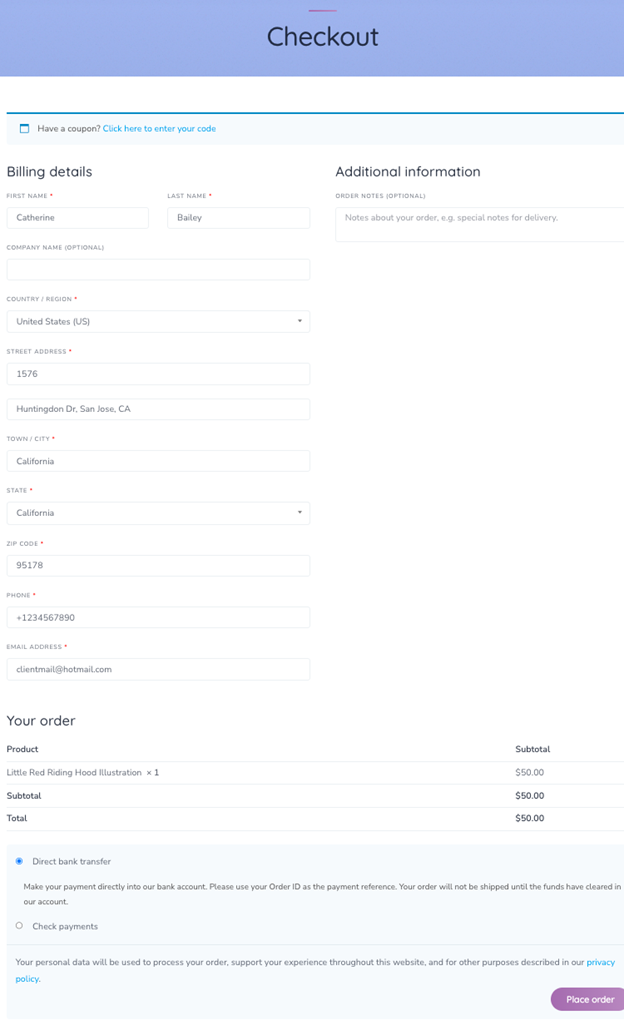
After accepting an offer, customers can proceed to the checkout page to complete the billing information and choose a payment method.
Once the order is placed, a freelancer can start working on the project.
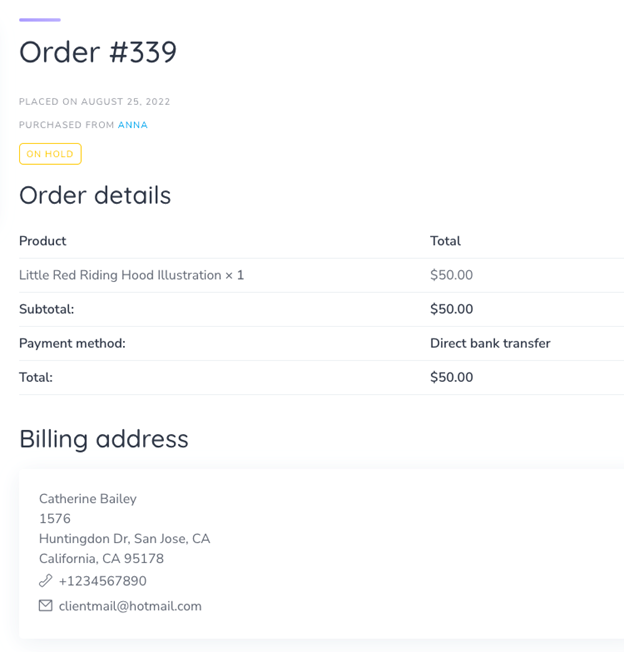
Bear in mind that if you’ve set a manual completion, the customer will have to mark the order as completed before the freelancer gets paid for the service.
That’s it now! As you can see, it’s not rocket science to create a freelance service marketplace.
We hope this tutorial was useful to you, and now you have a better idea of how to launch your freelance platform with WordPress. and the TaskHive theme.
Additionally, it may be interesting for you to check some of our other articles:
A complete tutorial on how to add location search in WordPress.
A step-by-step tutorial on how to build your own Tripadvisor using WordPress.

Build your own job portal website without any coding skills, using WordPress.